|
Last Modified: 01-27-2025 |
6.11:8.1.0 |
Doc ID: RM100000002PTYT |
|
Model Year Start: 2025 |
Model: GR Corolla |
Prod Date Range: [09/2024 -
] |
|
Title: PARK ASSIST / MONITORING: ULTRASONIC SENSOR (for Front Side): REMOVAL; 2025 MY Corolla Corolla Hatchback Corolla HV GR Corolla [09/2024 - ] |
REMOVAL
CAUTION / NOTICE / HINT
The necessary procedures (adjustment, calibration, initialization, or registration) that must be performed after parts are removed and installed, or replaced during ultrasonic sensor removal/installation are shown below.
Necessary Procedure After Parts Removed/Installed/Replaced
|
Replaced Part or Performed Procedure
|
Necessary Procedure
|
Effect/Inoperative Function When Necessary Procedures are not Performed
|
Link
|
|
Ultrasonic sensor
|
w/ Parking Support Brake System
-
Measurement of Ultrasonic sensor detection angle
-
Ultrasonic sensor detection angle registration
|
-
Intuitive Parking Assist System
-
Parking Support Brake System
|
![2025 MY Corolla Corolla Hatchback Corolla HV GR Corolla [09/2024 - ]; PARK ASSIST / MONITORING: INTUITIVE PARKING ASSIST SYSTEM: CALIBRATION](/t3Portal/stylegraphics/info.gif)
|
w/o Parking Support Brake System
-
Initialization of ultrasonic sensors
|
Intuitive Parking Assist System
|
PROCEDURE
1. REMOVE FRONT BUMPER ASSEMBLY
Click here
2. REMOVE NO. 3 RADIATOR TO SUPPORT SEAL
Click here
3. REMOVE NO. 2 RADIATOR TO SUPPORT SEAL
HINT:
Use the same procedure as for the No. 3 radiator to support seal.
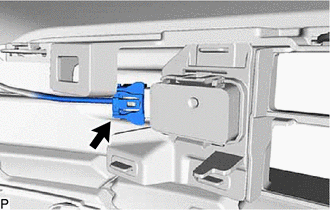
4. REMOVE FRONT CENTER ULTRASONIC SENSOR
HINT:
The illustration is for the LH side. The orientation for the RH side is the opposite of the LH side.
|
(a) Disconnect the connector.
|
|
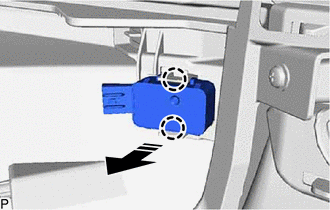
(b) Disengage the 2 claws and remove the front center ultrasonic sensor as shown in the illustration.


|
Remove in this Direction
|
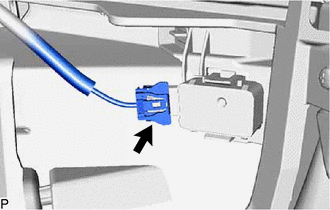
5. REMOVE FRONT CORNER ULTRASONIC SENSOR
HINT:
The illustration is for the LH side. The orientation for the RH side is the opposite of the LH side.
|
(a) Disconnect the connector.
|
|
(b) Disengage the 2 claws and remove the front corner ultrasonic sensor as shown in the illustration.
|
|
Remove in this Direction
|
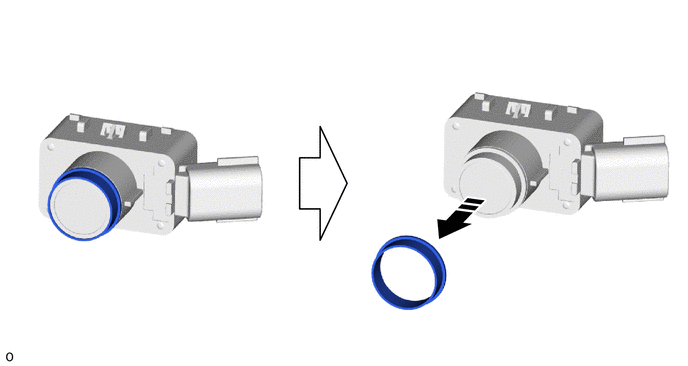
6. REMOVE ULTRASONIC SENSOR CUSHION SET
HINT:
Only perform this procedure when removing and installing the ultrasonic sensor cushion set.
(a) Remove the ultrasonic sensor cushion set as shown in the illustration.
|
|
Remove in this Direction
|
-
|
-
|
|