- Poor idle, etc.
- Engine start function, etc.
| Last Modified: 01-27-2025 | 6.11:8.1.0 | Doc ID: RM100000002OV0D |
| Model Year Start: 2025 | Model: GR Corolla | Prod Date Range: [09/2024 - ] |
| Title: UC80F (AUTOMATIC TRANSMISSION / TRANSAXLE): TRANSMISSION CONTROL CABLE: REMOVAL; 2025 MY Corolla Corolla Hatchback GR Corolla [09/2024 - ] | ||
REMOVAL
CAUTION / NOTICE / HINT
The necessary procedures (adjustment, calibration, initialization or registration) that must be performed after parts are removed and installed, or replaced during transmission control cable assembly removal/installation are shown below.
Necessary Procedure After Parts Removed/Installed/Replaced
|
Replacement Part or Procedure |
Necessary Procedure |
Effect/Inoperative when not Performed |
Link |
|---|---|---|---|
|
Gas leaks from exhaust system is repaired |
Inspection After Repair |
|
|
PROCEDURE
1. REMOVE RADIATOR SUPPORT OPENING COVER
Click here
![2025 MY Corolla Corolla Hatchback Corolla HV GR Corolla [09/2024 - ]; EXTERIOR PANELS / TRIM: FRONT BUMPER (for Hatchback, GR): REMOVAL+](/t3Portal/stylegraphics/info.gif)
2. REMOVE INLET NO. 1 AIR CLEANER
Click here
3. REMOVE AIR CLEANER WITH AIR CLEANER HOSE
Click here
4. REMOVE PROPELLER WITH CENTER BEARING SHAFT ASSEMBLY
Click here
5. REMOVE NO. 1 FRONT FLOOR HEAT INSULATOR SUB-ASSEMBLY
|
(a) Remove the 3 nuts. |
|
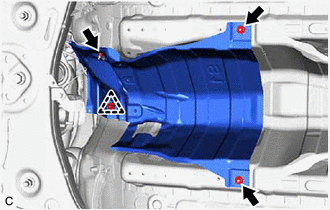
(b) Disengage the clip to remove the No. 1 front floor heat insulator sub-assembly.
6. REMOVE CONSOLE BOX ASSEMBLY
Click here
7. REMOVE TRANSMISSION CONTROL CABLE ASSEMBLY
(a) Move the shift lever to N.
|
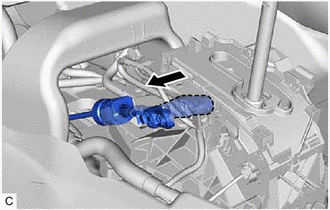
(b) Disconnect the transmission control cable assembly from the transmission floor shift assembly. |
|
|
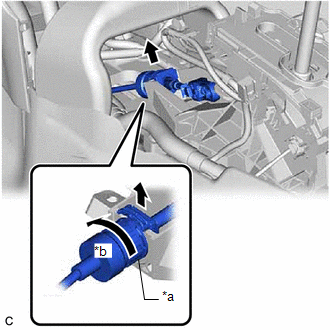
(c) Rotate the lock nut counterclockwise approximately 180° and, while holding the lock nut in that position, disconnect the transmission control cable assembly from the transmission floor shift assembly. NOTICE: Do not forcibly pull the transmission control cable assembly into the cabin. |
|
|
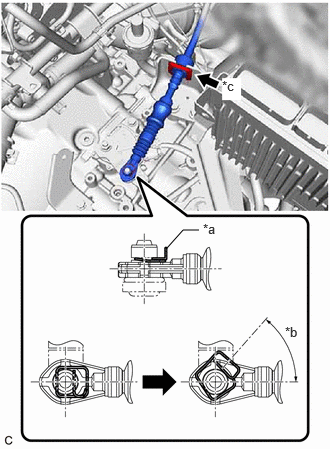
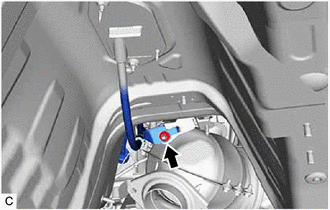
(d) While disengaging the clip (A) as shown in the illustration, disconnect the transmission control cable assembly from the transmission control shaft lever together with the clip (A). |
|
(e) Remove the clip (B) and disconnect the transmission control cable assembly from the No. 1 transmission control cable bracket.
|
(f) Remove the nut and disconnect the transmission control cable assembly from the vehicle body. |
|
|
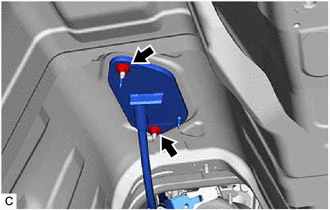
(g) Remove the 2 nuts and transmission control cable assembly from the vehicle body. |
|
|
|
|