| Last Modified: 05-13-2024 | 6.11:8.1.0 | Doc ID: RM100000002D8B4 |
| Model Year Start: 2024 | Model: GR Corolla | Prod Date Range: [08/2023 - ] |
| Title: PARK ASSIST / MONITORING: ULTRASONIC SENSOR (for Rear Side): REMOVAL; 2024 - 2025 MY Corolla Corolla Hatchback Corolla HV GR Corolla [08/2023 - ] | ||
REMOVAL
CAUTION / NOTICE / HINT
The necessary procedures (adjustment, calibration, initialization, or registration) that must be performed after parts are removed and installed, or replaced during ultrasonic sensor removal/installation are shown below.
Necessary Procedure After Parts Removed/Installed/Replaced
|
Replaced Part or Performed Procedure |
Necessary Procedure |
Effect/Inoperative Function When Necessary Procedures are not Performed |
Link |
|---|---|---|---|
|
Ultrasonic sensor |
Initialization of ultrasonic sensors |
Intuitive Parking Assist System |
PROCEDURE
1. REMOVE REAR BUMPER ASSEMBLY
2. REMOVE REAR CENTER ULTRASONIC SENSOR
HINT:
The illustration is for the LH side. Use the same procedure for the RH side and LH side.
|
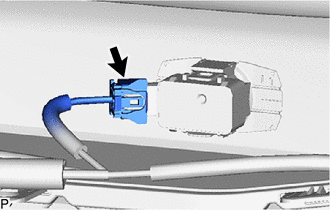
(a) Disconnect the connector. |
|
(b) Disengage the 2 claws and remove the rear center ultrasonic sensor as shown in the illustration.
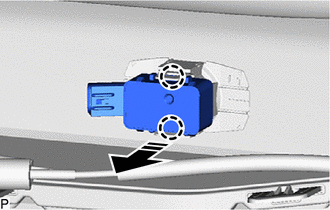

|
Remove in this Direction |
3. REMOVE REAR CORNER ULTRASONIC SENSOR
HINT:
The illustration is for the LH side. The orientation for the RH side is the opposite of the LH side.
(a) Disconnect the connector.
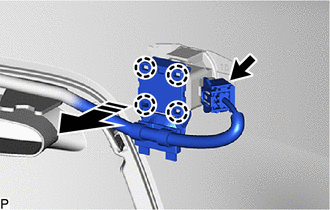

|
Remove in this Direction |
(b) Disengage the 4 claws as shown in the illustration.
(c) Disengage the 2 claws and remove the rear corner ultrasonic sensor as shown in the illustration.
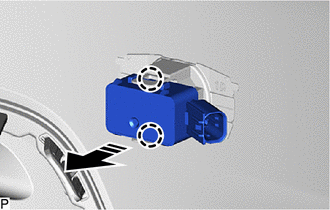

|
Remove in this Direction |
4. REMOVE ULTRASONIC SENSOR CLIP
HINT:
- Perform this procedure only when replacement of the ultrasonic sensor clip is necessary.
- Use the same procedure for all ultrasonic sensor clips.
|
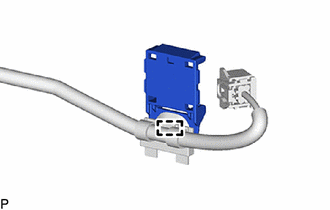
(a) Disengage the clamp to remove the ultrasonic sensor clip from the wire. |
|
5. REMOVE REAR CENTER ULTRASONIC SENSOR RETAINER
HINT:
- Perform this procedure only when replacement of the rear center ultrasonic sensor retainer is necessary.
- When removing the rear center ultrasonic sensor retainer, heat the rear bumper assembly and rear center ultrasonic sensor retainer using a heat light.
- The illustration is for the LH side. Use the same procedure for the RH side and LH side.
(a) Heat the rear bumper assembly and rear center ultrasonic sensor retainer using a heat light at the specified temperature for 3 to 5 minutes.
Heating Temperature:
|
Item |
Temperature |
|---|---|
|
Rear Bumper Assembly |
40 to 60°C (104 to 140°F) |
|
Rear Center Ultrasonic Sensor Retainer |
CAUTION:
- Do not touch the heat light and heated parts.
- Touching the heat light may result in burns.
- Touching heated parts for a long time may result in burns.
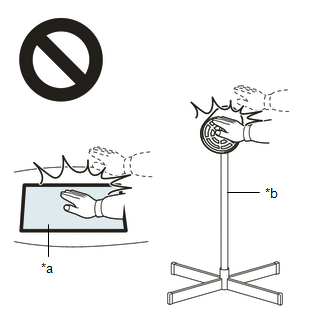
|
*a |
Heated Part |
|
*b |
Heat Light |
|
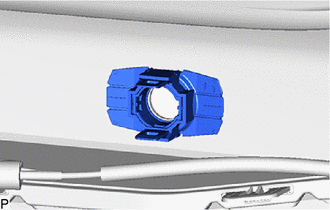
(b) Remove the rear center ultrasonic sensor retainer. |
|
6. REMOVE REAR CORNER ULTRASONIC SENSOR RETAINER
HINT:
- Perform this procedure only when replacement of the rear corner ultrasonic sensor retainer is necessary.
- When removing the rear corner ultrasonic sensor retainer, heat the rear bumper assembly and rear corner ultrasonic sensor retainer using a heat light.
- The illustration is for the LH side. Use the same procedure for the RH side and LH side.
(a) Heat the rear bumper assembly and rear corner ultrasonic sensor retainer using a heat light at the specified temperature for 3 to 5 minutes.
Heating Temperature:
|
Item |
Temperature |
|---|---|
|
Rear Bumper Assembly |
40 to 60°C (104 to 140°F) |
|
Rear Corner Ultrasonic Sensor Retainer |
CAUTION:
- Do not touch the heat light and heated parts.
- Touching the heat light may result in burns.
- Touching heated parts for a long time may result in burns.

|
*a |
Heated Part |
|
*b |
Heat Light |
|
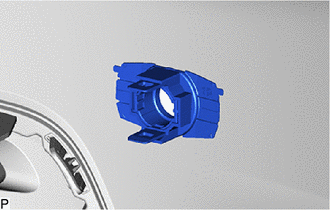
(b) Remove the rear corner ultrasonic sensor retainer. |
|
7. REMOVE ULTRASONIC SENSOR CUSHION SET
HINT:
Only perform this procedure when removing and installing the ultrasonic sensor cushion set.
(a) Remove the ultrasonic sensor cushion set as shown in the illustration.
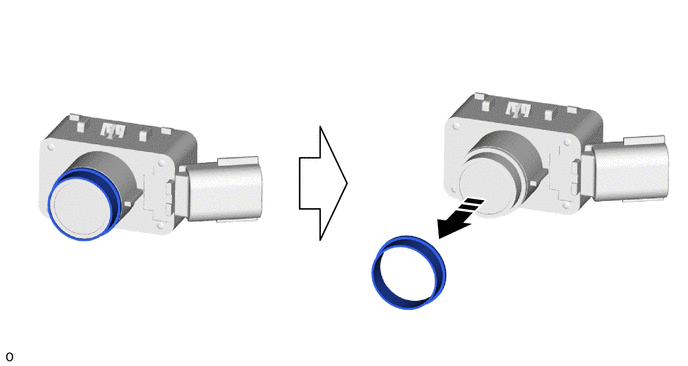

|
Remove in this Direction |
- |
- |
|
|
|
![2024 - 2025 MY Corolla Corolla Hatchback Corolla HV GR Corolla [08/2023 - ]; PARK ASSIST / MONITORING: INTUITIVE PARKING ASSIST SYSTEM: CALIBRATION](/t3Portal/stylegraphics/info.gif)
