- Perform "Reset Memory"
- Perform "Calibration"
| Last Modified: 05-13-2024 | 6.11:8.1.0 | Doc ID: RM1000000028J4Z |
| Model Year Start: 2023 | Model: GR Corolla | Prod Date Range: [11/2022 - ] |
| Title: REAR SUSPENSION: REAR TRAILING ARM (w/o Electric Parking Brake): REMOVAL; 2023 - 2025 MY Corolla Corolla Hatchback Corolla HV GR Corolla [11/2022 - ] | ||
REMOVAL
CAUTION / NOTICE / HINT
The necessary procedures (adjustment, calibration, initialization, or registration) that must be performed after parts are removed and installed, or replaced during rear trailing arm assembly removal/installation are shown below.
Necessary Procedures After Parts Removed/Installed/Replaced (for Gasoline Model)
|
Replaced Part or Performed Procedure |
Necessary Procedure |
Effect/Inoperative Function when Necessary Procedure not Performed |
Link |
|---|---|---|---|
|
Rear wheel alignment adjustment |
|
|
|
|
Tire |
ECU Data Initialization (When performing tire replacement after RoB code X2104 is output) |
Active Torque Split AWD System |
CAUTION / NOTICE / HINT
HINT:
- Use the same procedure for the RH side and LH side.
- The following procedure is for the LH side.
PROCEDURE
1. REMOVE REAR WHEEL
2. REMOVE FRONT FLOOR COVER LH (for LH Side)
3. REMOVE REAR FLOOR SIDE MEMBER COVER LH (for LH Side)
4. REMOVE FRONT FLOOR COVER RH (for RH Side)
5. REMOVE REAR FLOOR SIDE MEMBER COVER RH (for RH Side)
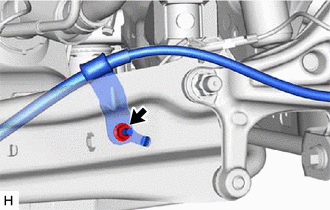
6. SEPARATE NO. 3 PARKING BRAKE CABLE ASSEMBLY
|
(a) Remove the nut and separate the No. 3 parking brake cable assembly from the rear trailing arm assembly. |
|
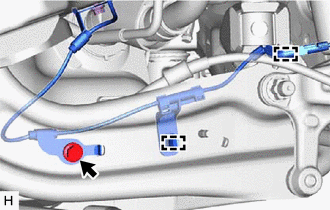
7. SEPARATE REAR SPEED SENSOR
|
(a) Disengage the 2 clamps. |
|
(b) Remove the bolt and separate the rear speed sensor from the rear trailing arm assembly.
8. REMOVE REAR STABILIZER LINK ASSEMBLY
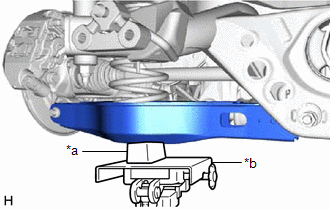
9. REMOVE REAR TRAILING ARM ASSEMBLY
|
(a) Using a transmission jack and a wooden block, support the rear No. 2 suspension arm assembly. NOTICE:
|
|
|
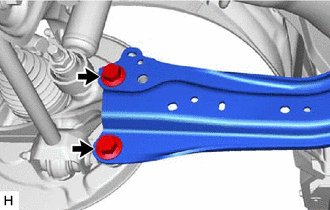
(b) Remove the 2 bolts and separate the rear trailing arm assembly from the rear axle carrier sub-assembly. |
|
|
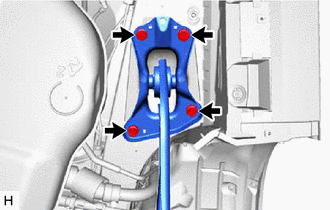
(c) Remove the 4 bolts and rear trailing arm assembly. |
|
10. REMOVE REAR NO. 1 SUSPENSION SUPPORT COVER
|
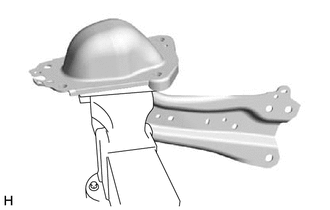
(a) Secure the rear trailing arm assembly in a vise using aluminum plates. NOTICE: Do not overtighten the vise. |
|
|
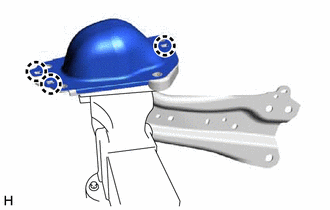
(b) Disengage the 3 claws and remove the rear No. 1 suspension support cover. |
|
11. REMOVE REAR SUSPENSION ARM BRACKET
|
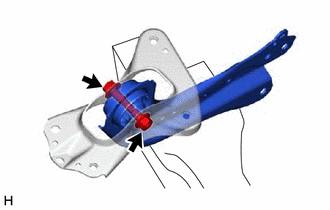
(a) Remove the bolt, nut and rear suspension arm bracket from the rear trailing arm assembly. |
|
|
|
|
![2023 - 2025 MY Corolla Corolla Hatchback GR Corolla [09/2022 - ]; BRAKE CONTROL / DYNAMIC CONTROL SYSTEMS: ELECTRONICALLY CONTROLLED BRAKE SYSTEM (for Gasoline Model without Electric Parking Brake System TMC Made): UTILITY](/t3Portal/stylegraphics/info.gif)
