- Perform "Reset Memory"
- Perform "Calibration"
| Last Modified: 01-27-2025 | 6.11:8.1.0 | Doc ID: RM1000000028IR7 |
| Model Year Start: 2023 | Model: GR Corolla | Prod Date Range: [11/2022 - ] |
| Title: REAR SUSPENSION: REAR UPPER ARM: REMOVAL; 2023 - 2025 MY Corolla Corolla Hatchback Corolla HV GR Corolla [11/2022 - ] | ||
REMOVAL
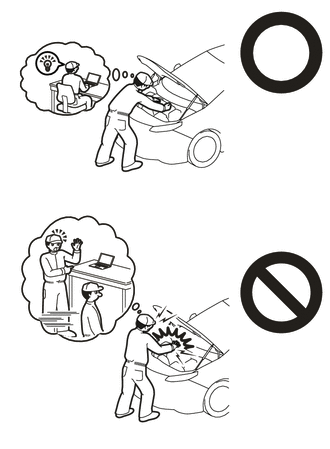
CAUTION / NOTICE / HINT
The necessary procedures (adjustment, calibration, initialization, or registration) that must be performed after parts are removed and installed, or replaced during rear upper control arm assembly removal/installation are shown below.
Necessary Procedures After Parts Removed/Installed/Replaced (for HV Model:)
|
Replaced Part or Performed Procedure |
Necessary Procedure |
Effect/Inoperative Function when Necessary Procedure not Performed |
Link |
|---|---|---|---|
|
Rear wheel alignment adjustment |
|
|
|
|
Gas leaks from exhaust system is repaired (2ZR-FXE) |
Inspection after repair |
|
|
Necessary Procedures After Parts Removed/Installed/Replaced (for Gasoline Model:)
|
Replaced Part or Performed Procedure |
Necessary Procedure |
Effect/Inoperative Function when Necessary Procedure not Performed |
Link |
|---|---|---|---|
|
Rear wheel alignment adjustment |
|
|
w/ Electric Parking Brake System:
w/o Electric Parking Brake System:
|
|
Gas leaks from exhaust system is repaired (M20A-FKS) |
Inspection after repair |
|
|
|
Gas leaks from exhaust system is repaired (G16E-GTS) |
Inspection after repair |
|
|
|
Tire |
ECU Data Initialization (When performing tire replacement after RoB code X2104 is output) |
Active Torque Split AWD System |
|
CAUTION:
-
Orange wire harnesses and connectors indicate high-voltage circuits. To prevent electric shock, always follow the procedure described in the repair manual.
Click here
![2023 - 2025 MY Corolla HV [09/2022 - ]; HYBRID / BATTERY CONTROL: HYBRID CONTROL SYSTEM (for LITHIUM-ION BATTERY with PA10): PRECAUTION](/t3Portal/stylegraphics/info.gif)
-
To prevent electric shock, wear insulated gloves when working on wire harnesses and components of the high voltage system.

-
To prevent burns, do not touch the engine, exhaust pipe or other high temperature components while the engine is hot.
HINT:
When the cable is disconnected / reconnected to the auxiliary battery terminal, systems temporarily stop operating. However, each system has a function that completes learning the first time the system is used.
Learning completes when vehicle is driven
|
Effect/Inoperative Function when Necessary Procedure not Performed |
Necessary Procedure |
Link |
|---|---|---|
|
Front Camera System |
Drive the vehicle straight ahead at 15 km/h (9 mph) or more for 1 second or more. |
|
PROCEDURE
1. REMOVE REAR SUSPENSION MEMBER SUB-ASSEMBLY
for 2WD: Click here
for HV Model AWD: Click here
for Gasoline Model AWD: Click here
2. REMOVE REAR UPPER CONTROL ARM ASSEMBLY LH (for 2WD)
|
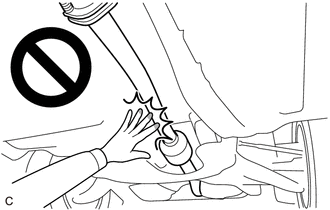
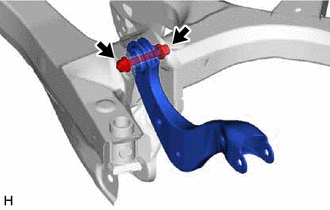
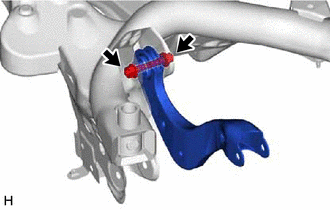
(a) Remove the bolt, nut and rear upper control arm assembly LH from the rear suspension member sub-assembly. NOTICE: Because the nut has its own stopper, do not turn the nut. Loosen the bolt with the nut secured. |
|
3. REMOVE REAR UPPER CONTROL ARM ASSEMBLY RH (for 2WD)
HINT:
Perform the same procedure as for the LH side.
4. REMOVE REAR UPPER CONTROL ARM ASSEMBLY LH (for Gasoline Model AWD)
|
(a) Remove the bolt, nut and rear upper control arm assembly LH from the rear suspension member sub-assembly. NOTICE: Because the nut has its own stopper, do not turn the nut. Loosen the bolt with the nut secured. |
|
5. REMOVE REAR UPPER CONTROL ARM ASSEMBLY RH (for Gasoline Model AWD)
HINT:
Perform the same procedure as for the LH side.
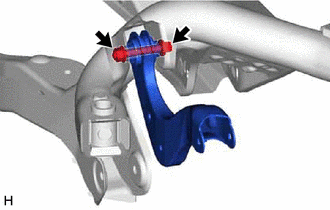
6. REMOVE REAR UPPER CONTROL ARM ASSEMBLY LH (for HV Model AWD)
|
(a) Remove the bolt, nut and rear upper control arm assembly LH from the rear suspension member sub-assembly. NOTICE: Because the nut has its own stopper, do not turn the nut. Loosen the bolt with the nut secured. |
|
7. REMOVE REAR UPPER CONTROL ARM ASSEMBLY RH (for HV Model AWD)
HINT:
Perform the same procedure as for the LH side.
|
|
|