| Last Modified: 05-13-2024 | 6.11:8.1.0 | Doc ID: RM1000000028GRN |
| Model Year Start: 2023 | Model: Corolla | Prod Date Range: [11/2022 - ] |
| Title: MAINTENANCE: 2ZR-FXE AUXILIARY BATTERY: REMOVAL; 2023 - 2025 MY Corolla Corolla HV [11/2022 - ] | ||
REMOVAL
CAUTION / NOTICE / HINT
The necessary procedures (adjustment, calibration, initialization or registration) that must be performed after parts are removed and installed, or replaced during auxiliary battery removal/installation are shown below.
NOTICE:
When replacing the auxiliary battery, use a new auxiliary battery of the same dimensions and same capacity or more from the same class at a 20-hour rate.
HINT:
When the cable is disconnected / reconnected to the auxiliary battery terminal, systems temporarily stop operating. However, each system has a function that completes learning the first time the system is used.
Learning completes when vehicle is driven
|
Effect/Inoperative Function when Necessary Procedure not Performed |
Necessary Procedure |
Link |
|---|---|---|
|
Front Camera System |
Drive the vehicle straight ahead at 15 km/h (9 mph) or more for 1 second or more. |
|
PROCEDURE
1. PRECAUTION
NOTICE:
After turning the power switch off, waiting time may be required before disconnecting the cable from the negative (-) auxiliary battery terminal.
Click here
![2023 - 2025 MY Corolla Corolla Hatchback Corolla HV GR Corolla [09/2022 - ]; SETUP: WHEN DISCONNECTING OR RECONNECTING BATTERY TERMINAL: BEFORE DISCONNECTING BATTERY](/t3Portal/stylegraphics/info.gif)
2. DISCONNECT CABLE FROM NEGATIVE AUXILIARY BATTERY TERMINAL
|
(a) Loosen the nut, and disconnect the cable from the negative (-) auxiliary battery terminal. |
|
3. REMOVE AUXILIARY BATTERY
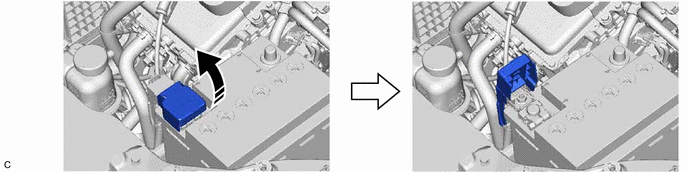
(a) Open the fusible link cover.
|
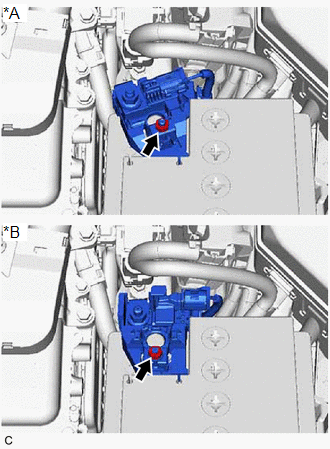
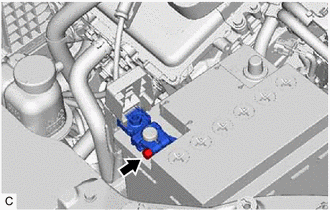
(b) Loosen the nut and disconnect the cable from the positive (+) auxiliary battery terminal. |
|
(c) Remove the bolt.

|
Remove in this Direction |
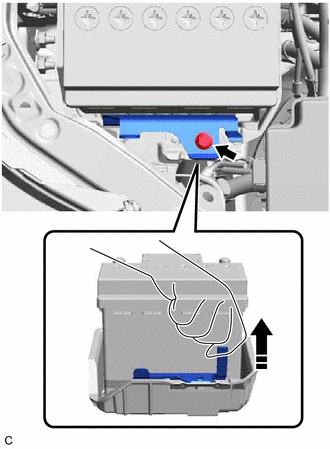
(d) Remove the No. 2 battery clamp as shown in the illustration.
(e) Remove the auxiliary battery.
|
|
|