- Poor idle, etc.
- Engine start function, etc.
| Last Modified: 07-31-2024 | 6.11:8.1.0 | Doc ID: RM1000000028FZG |
| Model Year Start: 2023 | Model: Corolla Hatchback | Prod Date Range: [11/2022 - ] |
| Title: M20A-FKS (FUEL): FUEL TANK (w/ Canister Pump Module (for Torsion Beam Type Suspension)): REMOVAL; 2023 - 2025 MY Corolla Corolla Hatchback [11/2022 - ] | ||
REMOVAL
CAUTION / NOTICE / HINT
The necessary procedures (adjustment, calibration, initialization or registration) that must be performed after parts are removed and installed, or replaced during fuel tank assembly removal/installation are shown below.
Necessary Procedures After Parts Removed/Installed/Replaced
|
Replaced Part or Performed Procedure |
Necessary Procedure |
Effect/Inoperative Function when Necessary Procedure not Performed |
Link |
|---|---|---|---|
|
Gas leak from exhaust system is repaired |
Inspection after repair |
|
|
|
Rear wheel alignment adjustment |
|
|
CAUTION:
-
Never perform work on fuel system components near any possible ignition sources.
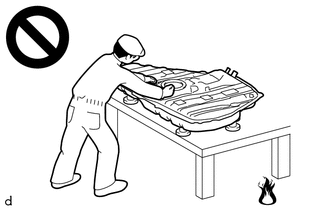
- Vaporized fuel could ignite, resulting in a serious accident.
-
Do not perform work on fuel system components without first disconnecting the cable from the negative (-) battery terminal.
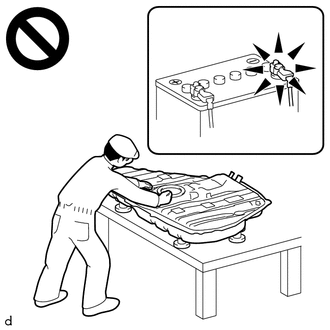
- Sparks could cause vaporized fuel to ignite, resulting in a serious accident.
-
The fuel tank assembly is very heavy. Be sure to follow the procedure described in the repair manual, or the fuel tank assembly may fall off the engine lifter.
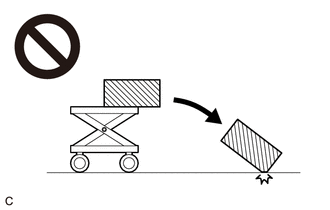
HINT:
When the cable is disconnected / reconnected to the battery terminal, systems temporarily stop operating. However, each system has a function that completes learning the first time the system is used.
Learning completes when vehicle is driven
|
Effect/Inoperative Function when Necessary Procedure not Performed |
Necessary Procedure |
Link |
|---|---|---|
|
Front Camera System |
Drive the vehicle straight ahead at 15 km/h (9 mph) or more for 1 second or more. |
PROCEDURE
1. PRECAUTION (for TMC Made)
|
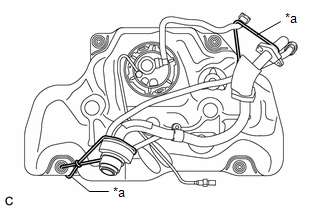
(a) When removing and storing the fuel tank assembly, arrange the fuel tank filler pipe assembly as shown in the illustration, and secure the fuel tank assembly using a cord or similar. NOTICE: Depending on the arrangement of the fuel tank filler pipe assembly during storage, the fuel tank filler pipe assembly and rear suspension may interfere and cause fuel leakage. |
|
2. REMOVE FUEL SUCTION TUBE WITH PUMP AND GAUGE ASSEMBLY
3. DRAIN FUEL
4. REMOVE REAR WHEEL (for TMC Made)
5. REMOVE REAR WHEEL HOUSE LINER LH (for TMC Made)
(a) w/ Rear Wheel House Front Plate:
Remove the rear wheel house front plate.
|
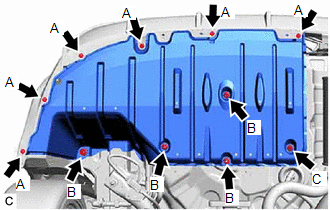
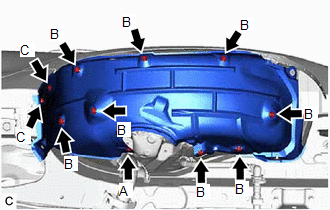
(b) w/ No. 2 Floor Under Cover: (1) Remove the 6 clips (A). (2) Turn the 4 clips (B) and clip (C) and remove the No. 2 floor under cover. NOTICE: If the 5 clips are not turned when the No. 2 floor under cover is removed, the No. 2 floor under cover or stud bolt may be damaged. HINT: Do not remove the clips from the No. 2 floor under cover. |
|
|
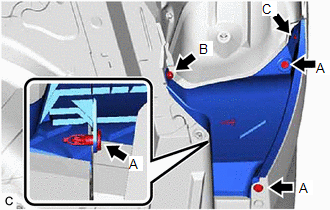
(c) Remove the 3 clips (A), clip (B), clip (C) and rear bumper side seal LH. |
|
|
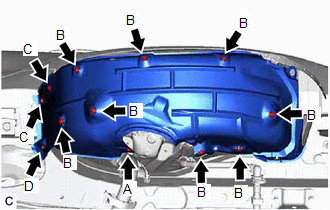
(d) w/o Rear Wheel House Front Plate: Remove the clip (A), 8 clips (B), 2 screws (C) and screw (D). |
|
|
(e) w/ Rear Wheel House Front Plate: Remove the clip (A), 8 clips (B) and 2 screws (C). |
|
|
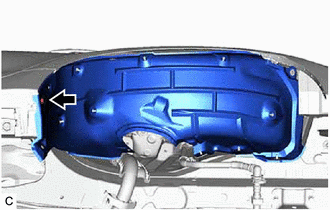
(f) Remove the clip and rear wheel house liner LH. |
|
6. REMOVE FRONT EXHAUST PIPE ASSEMBLY
7. REMOVE FUEL TANK CAP ASSEMBLY (for TMC Made)
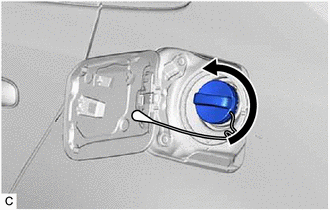
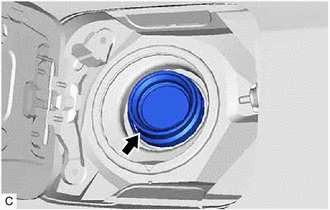
(a) Remove the fuel tank cap assembly from the fuel tank filler pipe assembly.
8. DISCONNECT FUEL TANK FILLER PIPE ASSEMBLY (for TMC Made)
|
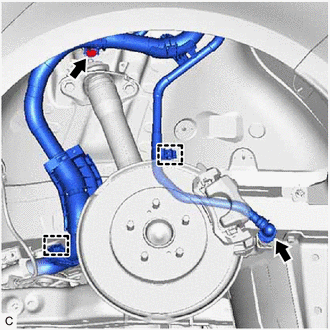
(a) Remove the bolt. |
|
(b) Disengage the 2 clamps.
(c) Disconnect the fuel tank filler pipe air tube from the fuel tank vent hose sub-assembly.
|
(d) Disengage the location shown in the illustration, and disconnect the fuel tank filler pipe assembly from the vehicle body. |
|
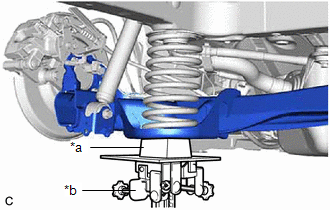
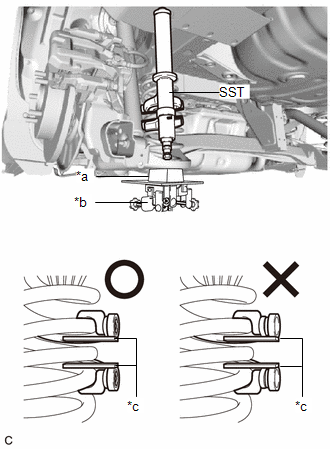
9. REMOVE REAR COIL SPRING LH (for TMC Made)
|
(a) Support the rear axle beam assembly using a jack and wooden block. CAUTION: Do not jack up the rear axle beam assembly too high as the vehicle may fall. NOTICE:
|
|
|
(b) Attach the hooks of each SST arm across the diameter of the rear coil spring LH. SST: 09727-30022 09727-00010 09727-00031 SST: 09727-00120 |
|
(c) Install the SST (stopper plate) to the hooks of SST.
SST: 09727-30022
09727-00130
CAUTION:
Make sure that the stopper plates are installed securely.
(d) Using SST, compress and remove the rear coil spring LH.
CAUTION:
- If the rear coil spring LH bends while using SST, stop immediately and reattach SST correctly.
- Do not compress the rear coil spring LH to the point where the coils touch each other.
- Do not use an impact wrench.
- Compress the rear coil spring LH until there is no tension between the vehicle body and rear coil spring LH.
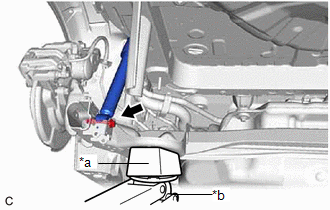
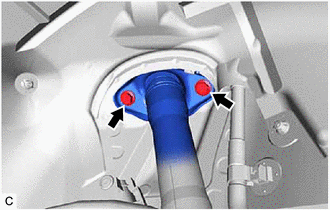
10. REMOVE REAR SHOCK ABSORBER ASSEMBLY LH (for TMC Made)
|
(a) Support the rear axle beam assembly using a jack and wooden block. CAUTION: Do not jack up the rear axle beam assembly too high as the vehicle may fall. NOTICE:
|
|
(b) Remove the bolt and nut to separate the rear shock absorber assembly LH while compressing the rear shock absorber assembly LH.
NOTICE:
Because the nut has its own stopper, do not turn the nut. Loosen the bolt with the nut secured.
|
(c) Remove the 2 bolts and rear shock absorber assembly LH from the vehicle body. |
|
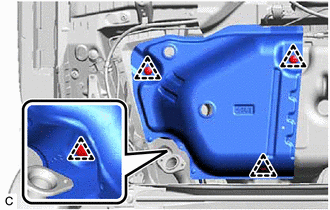
11. REMOVE NO. 1 FUEL TANK PROTECTOR SUB-ASSEMBLY
|
(a) Remove the 4 clips and No. 1 fuel tank protector sub-assembly from the fuel tank assembly. |
|
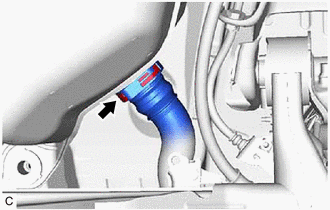
12. DISCONNECT FUEL TANK FILLER PIPE ASSEMBLY (except TMC Made)
|
(a) Disconnect the fuel tank filler pipe assembly from the fuel tank assembly. |
|
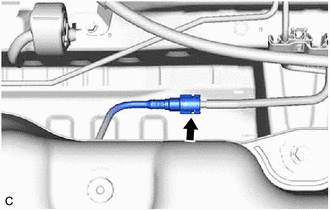
13. DISCONNECT FUEL TANK MAIN TUBE SUB-ASSEMBLY
|
(a) Disconnect the fuel tank main tube sub-assembly from the fuel pipe. |
|
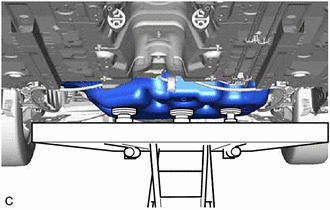
14. REMOVE FUEL TANK ASSEMBLY
CAUTION:
The fuel tank assembly is very heavy. Be sure to follow the procedure described in the repair manual, or the fuel tank assembly may fall off the engine lifter.
|
(a) Support the fuel tank assembly using an engine lifter. HINT: Using height adjustment attachments and plate lift attachments, keep the fuel tank assembly horizontal. |
|
|
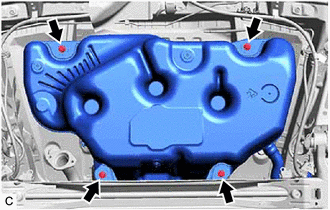
(b) Remove the 4 bolts. |
|
(c) Lower the engine lifter to remove the fuel tank assembly.
NOTICE:
- Be careful not to drop the fuel tank assembly.
- When removing the fuel tank assembly, tilt it slightly to prevent it from interfering with the surrounding parts.
15. REMOVE FUEL TANK MAIN TUBE SUB-ASSEMBLY
|
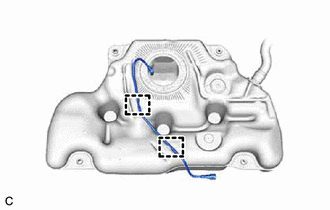
(a) Disengage the 2 clamps to remove the fuel tank main tube sub-assembly from the fuel tank assembly. |
|
|
|
|
![2023 - 2025 MY Corolla Corolla Hatchback [11/2022 - ]; M20A-FKS (ENGINE CONTROL): SFI SYSTEM: INITIALIZATION](/t3Portal/stylegraphics/info.gif)
