- Clear zero point calibration data.
- Perform yaw rate and acceleration sensor zero point calibration.
| Last Modified: 07-31-2024 | 6.11:8.1.0 | Doc ID: RM100000002694Z |
| Model Year Start: 2023 | Model: Corolla | Prod Date Range: [09/2022 - ] |
| Title: REAR SUSPENSION: REAR SUSPENSION MEMBER (for HV Model AWD): REMOVAL; 2023 - 2025 MY Corolla Corolla HV [09/2022 - ] | ||
REMOVAL
CAUTION / NOTICE / HINT
The necessary procedures (adjustment, calibration, initialization, or registration) that must be performed after parts are removed and installed, or replaced during rear suspension member sub-assembly removal/installation are shown below.
Necessary Procedures After Parts Removed/Installed/Replaced
|
Replaced Part or Performed Procedure |
Necessary Procedure |
Effect/Inoperative Function when Necessary Procedure not Performed |
Link |
|---|---|---|---|
|
Rear wheel alignment adjustment |
|
|
|
|
Gas leak from exhaust system is repaired |
Inspection after repair |
|
CAUTION:
-
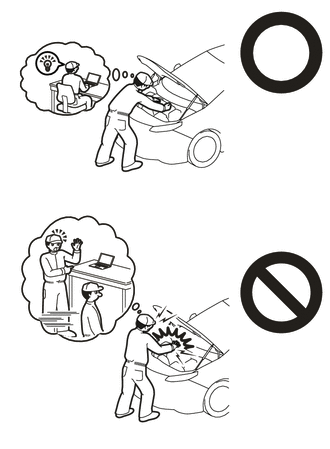
Orange wire harnesses and connectors indicate high-voltage circuits. To prevent electric shock, always follow the procedure described in the repair manual.
-
To prevent electric shock, wear insulated gloves when working on wire harnesses and components of the high voltage system.
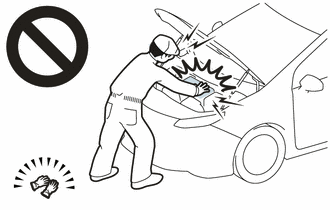
-
To prevent burns, do not touch the engine, exhaust pipe or other high temperature components while the engine is hot.
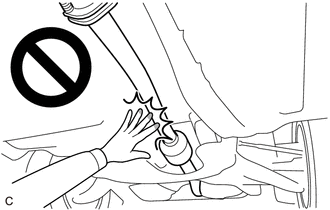
HINT:
When the cable is disconnected / reconnected to the auxiliary battery terminal, systems temporarily stop operating. However, each system has a function that completes learning the first time the system is used.
Learning completes when vehicle is driven
|
Effect/Inoperative Function when Necessary Procedure not Performed |
Necessary Procedure |
Link |
|---|---|---|
|
Front Camera System |
Drive the vehicle straight ahead at 15 km/h (9 mph) or more for 1 second or more. |
PROCEDURE
1. REMOVE TAIL EXHAUST PIPE ASSEMBLY
2. REMOVE SERVICE PLUG GRIP
3. REMOVE CONNECTOR COVER ASSEMBLY
4. CHECK TERMINAL VOLTAGE
5. INSTALL CONNECTOR COVER ASSEMBLY
6. REMOVE SPARE WHEEL COVER
7. REMOVE SPARE WHEEL CUSHION
8. REMOVE MOTOR CONNECTOR PROTECTOR
9. DISCONNECT REAR TRACTION MOTOR CABLE
10. REMOVE REAR WHEEL
11. REMOVE REAR AXLE SHAFT NUT LH
12. REMOVE REAR AXLE SHAFT NUT RH
HINT:
Perform the same procedure as for the LH side.
13. SEPARATE REAR FLEXIBLE HOSE LH
14. SEPARATE REAR FLEXIBLE HOSE RH
HINT:
Perform the same procedure as for the LH side.
15. DISCONNECT NO. 2 PARKING BRAKE WIRE ASSEMBLY
16. DISCONNECT NO. 1 PARKING BRAKE WIRE ASSEMBLY
HINT:
Perform the same procedure as for the No. 2 parking brake wire assembly.
17. REMOVE REAR SKID CONTROL SENSOR LH
18. REMOVE REAR SKID CONTROL SENSOR RH
HINT:
Perform the same procedure as for the LH side.
19. REMOVE REAR STABILIZER LINK ASSEMBLY LH
20. REMOVE REAR STABILIZER LINK ASSEMBLY RH
HINT:
Perform the same procedure as for the LH side.
21. REMOVE REAR STABILIZER BAR SUB-ASSEMBLY
22. REMOVE REAR COIL SPRING LH
23. REMOVE REAR COIL SPRING RH
HINT:
Perform the same procedure as for the LH side.
24. REMOVE REAR LOWER COIL SPRING INSULATOR LH
25. REMOVE REAR LOWER COIL SPRING INSULATOR RH
HINT:
Perform the same procedure as for the LH side.
26. REMOVE REAR NO. 1 SUSPENSION ARM ASSEMBLY LH
27. REMOVE REAR NO. 1 SUSPENSION ARM ASSEMBLY RH
HINT:
Perform the same procedure as for the LH side.
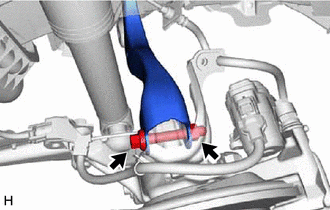
28. SEPARATE REAR UPPER CONTROL ARM ASSEMBLY LH
|
(a) Remove the bolt and nut and separate the rear upper control arm assembly LH from the rear axle carrier sub-assembly LH. NOTICE: Because the nut has its own stopper, do not turn the nut. Loosen the bolt with the nut secured. |
|
29. SEPARATE REAR UPPER CONTROL ARM ASSEMBLY RH
HINT:
Use the same procedure as for the LH side.
30. REMOVE REAR DRIVE SHAFT ASSEMBLY LH
31. REMOVE REAR DRIVE SHAFT ASSEMBLY RH
HINT:
Use the same procedure as for the LH side.
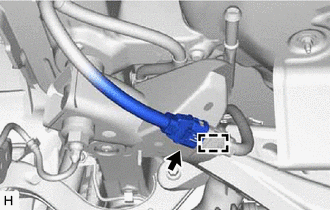
32. REMOVE REAR SUSPENSION MEMBER SUB-ASSEMBLY
|
(a) Disconnect the connector. |
|
(b) Disengage the clamp.
(c) Using an engine lifter and 4 attachments or equivalent tools, support the rear suspension member sub-assembly as shown in the illustration.
CAUTION:
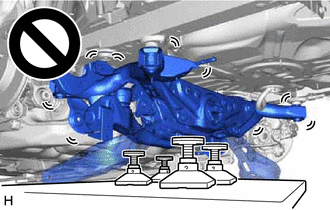
- The rear suspension member sub-assembly is a very heavy component. Make sure that it is supported securely.
- If the rear suspension member sub-assembly is not securely supported, it may drop, resulting in serious injury.
NOTICE:
Use attachments and wooden blocks to keep the rear suspension member sub-assembly level.
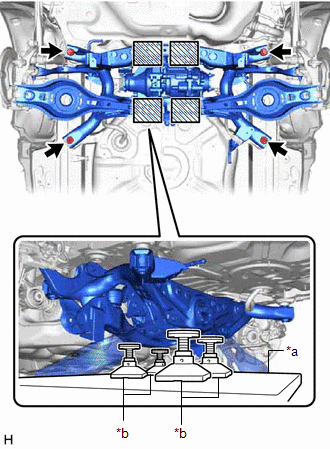
|
*a |
Engine Lifter |
|
*b |
Attachment |

|
Attachment Placement Location |
(d) Remove the 2 bolts and 2 nuts.
(e) Slowly lower the rear suspension member sub-assembly.
NOTICE:
When lowering the rear suspension member sub-assembly, be careful not to damage the vehicle body or other components installed to the vehicle.
33. REMOVE REAR UPPER CONTROL ARM ASSEMBLY LH
34. REMOVE REAR UPPER CONTROL ARM ASSEMBLY RH
HINT:
Perform the same procedure as for the LH side.
35. SEPARATE NO. 6 FLOOR WIRE
36. SEPARATE REAR TRACTION MOTOR CABLE
37. REMOVE REAR TRACTION MOTOR WITH TRANSAXLE ASSEMBLY
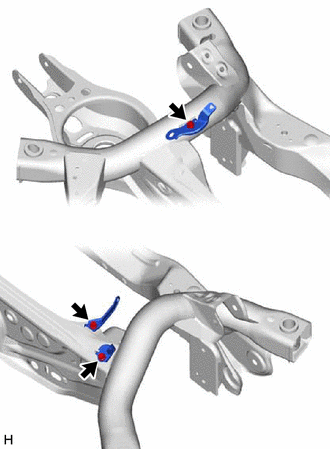
38. REMOVE MOTOR CABLE BRACKET
|
(a) Remove the 3 bolts and 3 motor cable brackets from the rear suspension member sub-assembly. |
|
39. REMOVE REAR NO. 2 SUSPENSION ARM ASSEMBLY LH
40. REMOVE REAR NO. 2 SUSPENSION ARM ASSEMBLY RH
HINT:
Perform the same procedure as for the LH side.
41. REMOVE DIFFERENTIAL MOUNT CUSHION
(a) Using SST, remove the differential mount cushion from the rear suspension member sub-assembly.
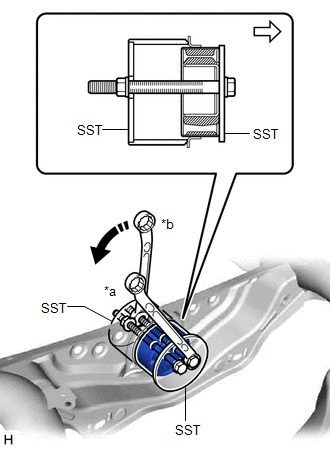
|
*a |
Hold |
|
*b |
Turn |

|
Front of the Vehicle |
SST: 09570-48010
NOTICE:
- Apply grease to the threads of the SST center bolt before use.
- Install the SST bolts straight and tighten them equally.
|
|
|
![2023 - 2025 MY Corolla Corolla HV [09/2022 - ]; BRAKE CONTROL / DYNAMIC CONTROL SYSTEMS: ELECTRONICALLY CONTROLLED BRAKE SYSTEM (for HV Model): UTILITY](/t3Portal/stylegraphics/info.gif)
