| Last Modified: 05-13-2024 | 6.11:8.1.0 | Doc ID: RM10000000267C9 |
| Model Year Start: 2023 | Model: GR Corolla | Prod Date Range: [09/2022 - ] |
| Title: EXTERIOR PANELS / TRIM: FRONT BUMPER (for Hatchback except GR): DISASSEMBLY; 2023 - 2025 MY Corolla Corolla Hatchback Corolla HV GR Corolla [09/2022 - ] | ||
DISASSEMBLY
PROCEDURE
1. REMOVE FOG LIGHT ASSEMBLY LH (w/ Fog Light)
Click here
![2023 - 2025 MY Corolla Corolla Hatchback Corolla HV GR Corolla [09/2022 - ]; LIGHTING (EXT): FOG LIGHT ASSEMBLY: REMOVAL+](/t3Portal/stylegraphics/info.gif)
2. REMOVE FOG LIGHT ASSEMBLY RH (w/ Fog Light)
HINT:
Use the same procedure as for the LH side.
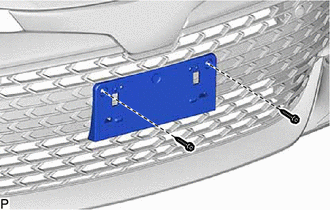
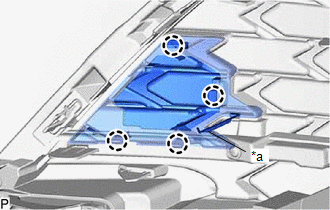
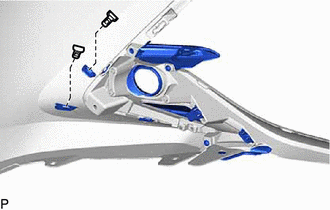
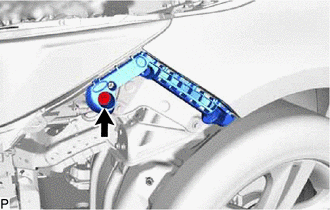
3. REMOVE FRONT BUMPER EXTENSION MOUNTING BRACKET
|
(a) Remove the 2 screws. |
|
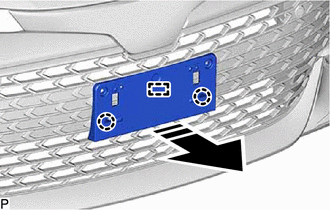
(b) Disengage the 2 claws and guide as shown in the illustration to remove the front bumper extension mounting bracket.

|
Remove in this Direction |
4. REMOVE NO. 3 RADIATOR TO SUPPORT SEAL
|
(a) Disengage the claw and guide to remove the No. 3 radiator to support seal. |
|
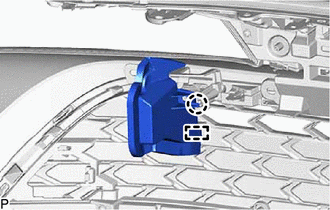
5. REMOVE NO. 2 RADIATOR TO SUPPORT SEAL
HINT:
Use the same procedure as for the No. 3 radiator to support seal.
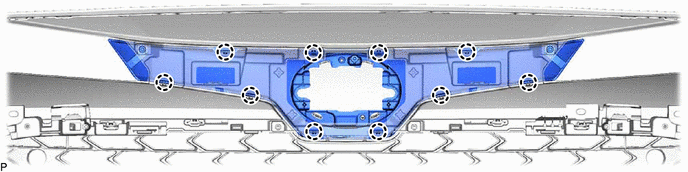
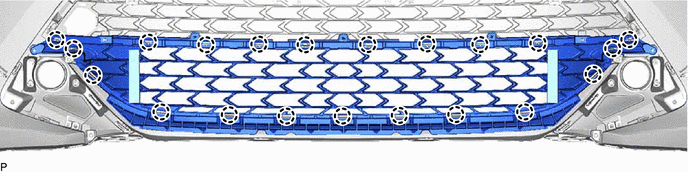
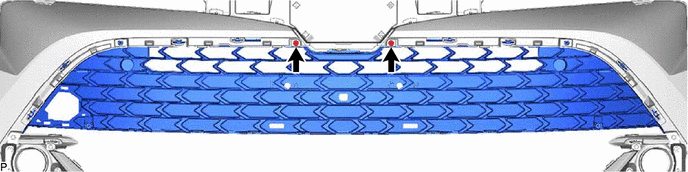
6. REMOVE INNER RADIATOR GRILLE
|
(a) Disengage the 2 guides. |
|
(b) Remove the 2 screws and 4 clips.


|
Screw |

|
Clip |
|
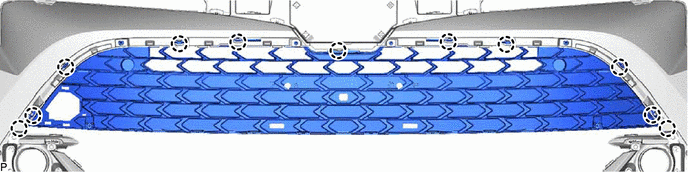
(c) Remove the 6 screws. |
|
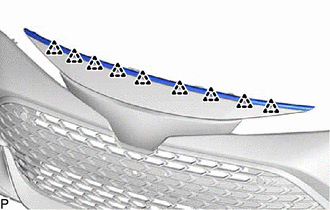
(d) Disengage the 11 claws to remove the inner radiator grille.
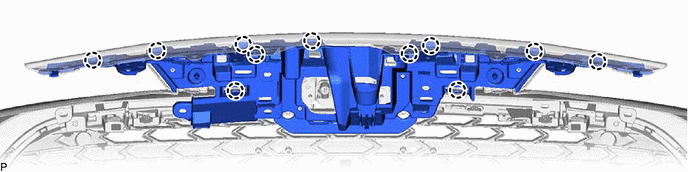
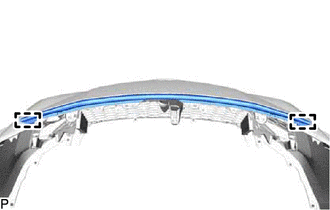
7. REMOVE HOOD TO FRONT END PANEL SEAL
|
(a) Disengage the 9 clips to remove the hood to front end panel seal. |
|
8. REMOVE MILLIMETER WAVE RADAR SENSOR ASSEMBLY
Click here
9. REMOVE RADIATOR GRILLE (OR FRONT PANEL) EMBLEM
|
(a) Remove the screw. |
|
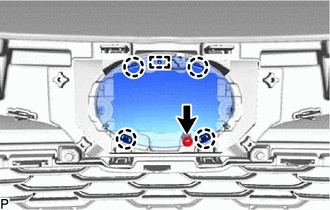
(b) Disengage the 4 claws and guide to remove the radiator grille (or front panel) emblem.
10. REMOVE RADIATOR GRILLE
(a) Disengage the 10 claws to remove the radiator grille.
11. REMOVE LOWER SIDE RADIATOR GRILLE LH
|
(a) Disengage the 4 claws. |
|
(b) Disengage the hook to remove the lower side radiator grille LH.
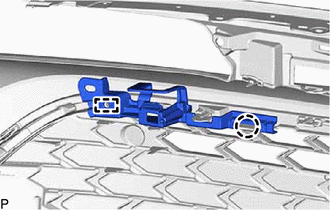
12. REMOVE NO. 1 FRONT BUMPER SIDE SUPPORT LH
|
(a) Remove the screw. |
|

|
(b) Disengage the claw and guide to remove the No. 1 front bumper side support LH. |
|
13. REMOVE NO. 1 FRONT BUMPER SIDE SUPPORT RH
HINT:
Use the same procedure as for the LH side.
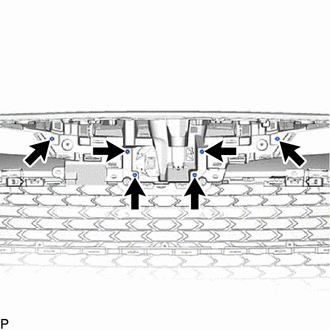
14. REMOVE CENTER RADIATOR SUPPORT
(a) Remove the 4 screws.
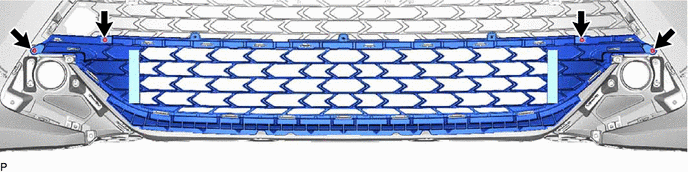
(b) Disengage the 21 claws to remove the center radiator support.
15. REMOVE LOWER RADIATOR GRILLE
(a) Remove the 2 screws.
(b) Disengage the 11 claws to remove the lower radiator grille.
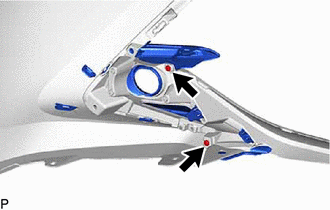
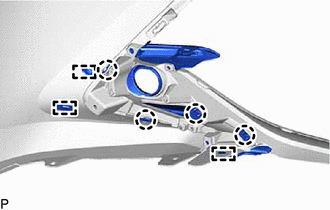
16. REMOVE FRONT BUMPER HOLE COVER ASSEMBLY LH
|
(a) Remove the 2 clips. |
|
|
(b) Remove the 2 screws. |
|
|
(c) Disengage the 4 claws and 3 guides to remove the front bumper hole cover assembly LH. |
|
17. REMOVE FRONT BUMPER HOLE COVER ASSEMBLY RH
HINT:
Use the same procedure as for the LH side.
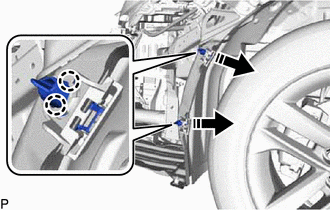
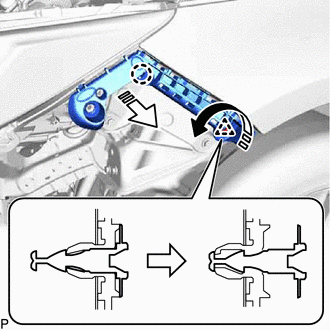
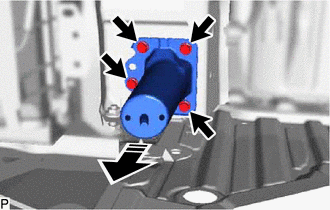
18. REMOVE PIN HOLD CLIP
(a) Disengage the 4 claws as shown in the illustration to remove the 2 pin hold clips.
|
|
Remove in this Direction |
HINT:
Use the same procedure for the RH side and LH side.
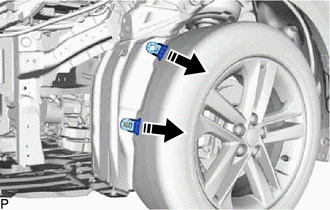
19. REMOVE FRONT FENDER LINER RETAINER
(a) Remove the 2 front fender liner retainers as shown in the illustration.
|
|
Remove in this Direction |
HINT:
Use the same procedure for the RH side and LH side.
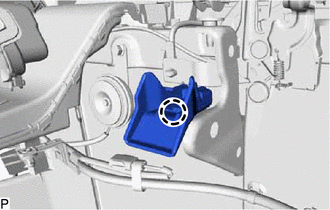
20. REMOVE FRONT BUMPER SIDE SUPPORT LH
|
(a) Remove the bolt. |
|
(b) Disengage the clip as shown in the illustration.
|
|
Remove in this Direction (1) |

|
Remove in this Direction (2) |
(c) Disengage the claw as shown in the illustration to remove the front bumper side support LH.
21. REMOVE FRONT BUMPER SIDE SUPPORT RH
HINT:
Use the same procedure as for the LH side.
22. REMOVE NO. 2 LOWER FRONT BUMPER RETAINER
|
(a) Disengage the claw to remove the No. 2 lower front bumper retainer. |
|
23. REMOVE FRONT BUMPER ENERGY ABSORBER
(a) Disengage the 4 guides as shown in the illustration to remove the front bumper energy absorber.
|
|
Remove in this Direction |
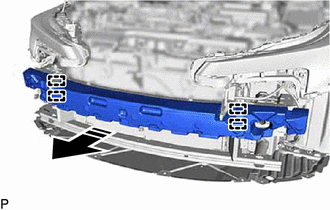
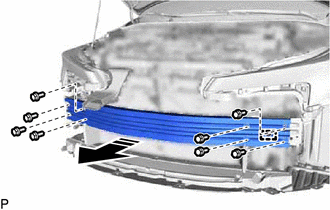
24. REMOVE FRONT BUMPER REINFORCEMENT
|
(a) Disengage each clamp. |
|
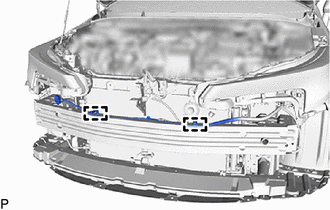
(b) Remove the 8 bolts.
|
|
Remove in this Direction |
(c) Disengage the guide as shown in the illustration to remove the front bumper reinforcement.
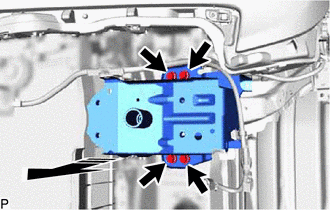
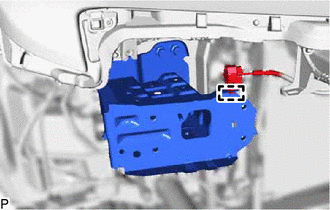
25. REMOVE FRONT SIDE MEMBER BRACKET SUB-ASSEMBLY LH
|
(a) Disengage the 2 clamps. |
|
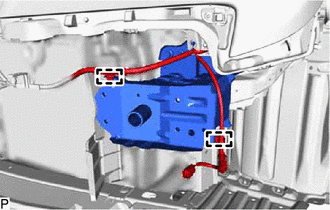
(b) Remove the 4 bolts and front side member bracket sub-assembly LH as shown in the illustration.
|
|
Remove in this Direction |
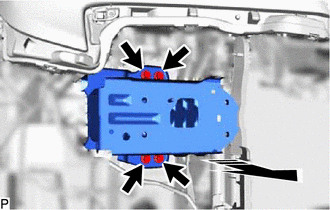
26. REMOVE FRONT SIDE MEMBER BRACKET SUB-ASSEMBLY RH
|
(a) Disengage the clamp. |
|
(b) Remove the 4 bolts and front side member bracket sub-assembly RH as shown in the illustration.
|
|
Remove in this Direction |
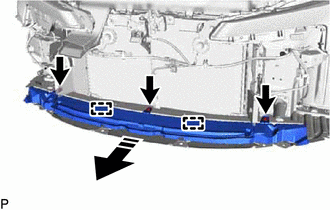
27. REMOVE LOWER FRONT BUMPER ABSORBER
(a) Remove the 3 clips.
|
|
Remove in this Direction |
(b) Disengage the 2 guides as shown in the illustration to remove the lower front bumper absorber.
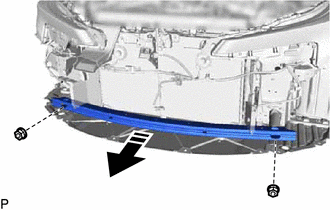
28. REMOVE NO. 2 FRONT BUMPER REINFORCEMENT
(a) Remove the 2 nuts and No. 2 front bumper reinforcement as shown in the illustration.
|
|
Remove in this Direction |
29. REMOVE FRONT BUMPER BRACKET LH
(a) Remove the 4 bolts and front bumper bracket LH as shown in the illustration.
|
|
Remove in this Direction |
30. REMOVE FRONT BUMPER BRACKET RH
HINT:
Use the same procedure as for the LH side.
|
|
|