- DTCs are stored
- Slight vibration at a vehicle speed of 5 km/h (3 mph) or less
- Shock or vibration during acceleration
| Last Modified: 05-13-2024 | 6.11:8.1.0 | Doc ID: RM1000000025P1C |
| Model Year Start: 2023 | Model: Corolla | Prod Date Range: [09/2022 - 11/2022] |
| Title: 2ZR-FXE (EMISSION CONTROL): EGR COOLER: REMOVAL; 2023 MY Corolla Corolla HV [09/2022 - 11/2022] | ||
REMOVAL
CAUTION / NOTICE / HINT
The necessary procedures (adjustment, calibration, initialization or registration) that must be performed after parts are removed and installed, or replaced during EGR pipe with cooler sub-assembly removal/installation are shown below.
Necessary Procedures After Parts Removed/Installed/Replaced
|
Replaced Part or Performed Procedure |
Necessary Procedure |
Effect/Inoperative Function when Necessary Procedure not Performed |
Link |
|---|---|---|---|
|
Replacement of inverter with converter assembly |
ECU configuration |
- |
|
|
Resolver learning |
|
||
|
Replacement of ECM |
Vehicle Identification Number (VIN) registration |
MIL comes on |
|
|
ECU configuration |
- |
||
|
Update ECU security key |
Vehicle Control History (RoB) are stored |
||
|
Inspection after repair |
|
NOTICE:
- After the ignition switch is turned off, the radio and display receiver assembly recordsvarious types of memory and settings. As a result, after turning the ignition switch off,make sure to wait at least 3 minutes before disconnecting the cable from the negative(-) auxiliary battery terminal.
- When the cable is disconnected from the negative (-) auxiliary battery terminal and thesecurity lock setting has been enabled, multi-display operations will be disabled uponnext startup unless the password is entered. Be sure to check the security lock settingbefore disconnecting the cable from the negative (-) auxiliary battery terminal. (forAudio and Visual System (for Single Knob Type))
HINT:
When the cable is disconnected / reconnected to the auxiliary battery terminal, systems temporarily stop operating. However, each system has a function that completes learning the first time the system is used.
Learning completes when vehicle is driven
|
Effect/Inoperative Function when Necessary Procedure not Performed |
Necessary Procedure |
Link |
|---|---|---|
|
Front Camera System (for TMC Made) |
Drive the vehicle straight ahead at 15 km/h (9 mph) or more for 1 second or more. |
PROCEDURE
1. DRAIN ENGINE COOLANT (for Engine)
2. REMOVE INVERTER WITH CONVERTER ASSEMBLY
3. REMOVE EGR PIPE ASSEMBLY
4. DISCONNECT WATER BY-PASS HOSE
|
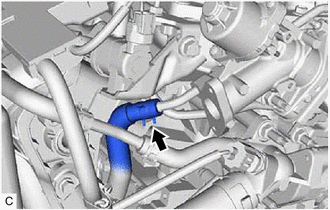
(a) Slide the clip and disconnect the water by-pass hose from the EGR valve assembly. |
|
5. DISCONNECT INLET HEATER WATER HOSE
|
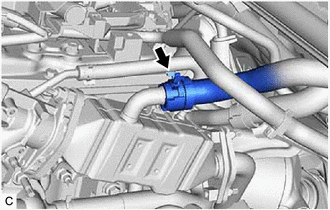
(a) Slide the clip and disconnect the inlet heater water hose from the EGR pipe with cooler sub-assembly. |
|
6. DISCONNECT NO. 4 WATER BY-PASS HOSE
|
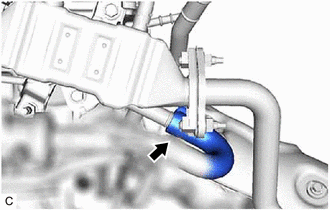
(a) Slide the clip and disconnect the No. 4 water by-pass hose from the EGR pipe with cooler sub-assembly. |
|
7. REMOVE EGR PIPE WITH COOLER SUB-ASSEMBLY
|
(a) Disconnect the EGR valve assembly connector. |
|
|
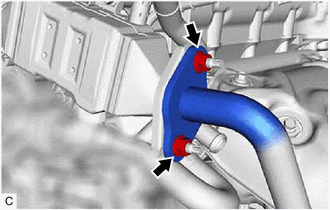
(b) Remove the 2 nuts and disconnect the EGR pipe with cooler sub-assembly from the exhaust manifold (TWC: Front Catalyst). |
|
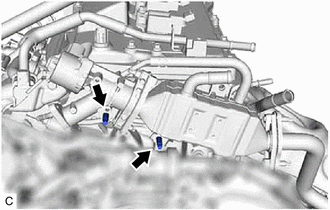
(c) Remove the bolt and 2 nuts and disconnect the EGR pipe with cooler sub-assembly with the EGR valve assembly from the cylinder head sub-assembly and camshaft housing sub-assembly.
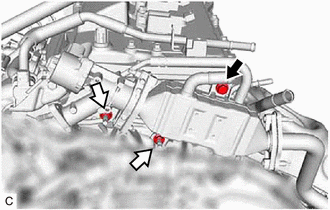

|
Bolt |

|
Nut |
|
(d) Using an E8 "TORX" socket wrench, remove the 2 stud bolts from the cylinder head sub-assembly and camshaft housing sub-assembly. HINT: If a stud bolt is deformed or the threads are damaged, replace it. |
|
|
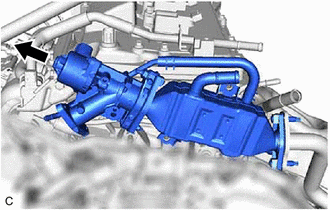
(e) Remove the EGR pipe with cooler sub-assembly with the EGR valve assembly. |
|
|
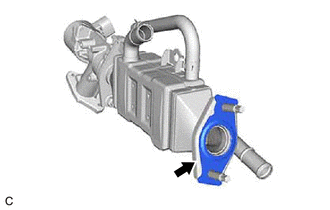
(f) Remove the EGR cooler gasket from the EGR pipe with cooler sub-assembly. |
|
|
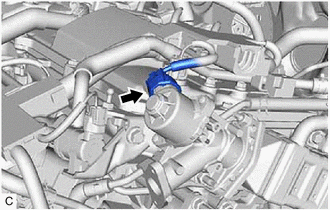
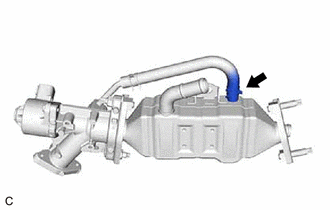
(g) Slide the clip and disconnect the No. 6 water by-pass hose from the EGR pipe with cooler sub-assembly. |
|
|
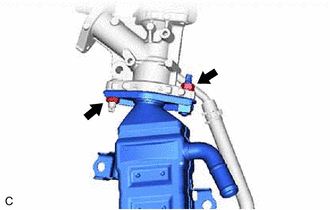
(h) Remove the 2 nuts and EGR pipe with cooler sub-assembly from the EGR valve assembly. |
|
|
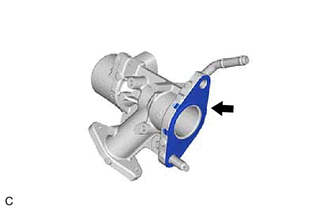
(i) Remove the EGR valve gasket from the EGR valve assembly. |
|
|
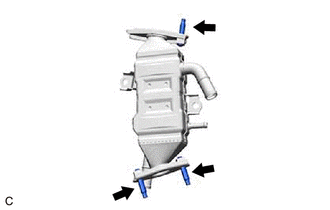
(j) Using an E8 "TORX" socket wrench, remove the 3 stud bolts from the EGR pipe with cooler sub-assembly. HINT: If a stud bolt is deformed or the threads are damaged, replace it. |
|
|
|
|
![2023 - 2025 MY Corolla Corolla Hatchback Corolla HV GR Corolla [09/2022 - ]; SETUP: WHEN REPLACING OR REMOVING/INSTALLING PARTS: ECU CONFIGURATION](/t3Portal/stylegraphics/info.gif)
