| Last Modified: 05-13-2024 | 6.11:8.1.0 | Doc ID: RM100000001I62S |
| Model Year Start: 2020 | Model: GR Corolla | Prod Date Range: [03/2019 - 04/2020] |
| Title: SEAT: FRONT SEAT ASSEMBLY (for Manual Seat): DISASSEMBLY; 2020 MY Corolla Corolla Hatchback Corolla HV GR Corolla [03/2019 - 04/2020] | ||
DISASSEMBLY
CAUTION / NOTICE / HINT
CAUTION:
Wear protective gloves. Sharp areas on the parts may injure your hands.
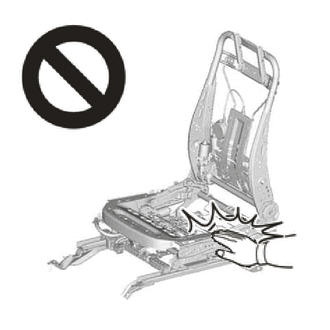
HINT:
- Use the same procedure for the RH side and LH side.
- The following procedure is for the LH side.
PROCEDURE
1. REMOVE SEAT POSITION AIRBAG SENSOR (for TMC Made Driver Side)
2. REMOVE OCCUPANT DETECTION ECU (for Front Passenger Side)
3. REMOVE FRONT SEAT INNER BELT ASSEMBLY (for Driver Side)
4. REMOVE FRONT SEAT INNER BELT ASSEMBLY (for Front Passenger Side)
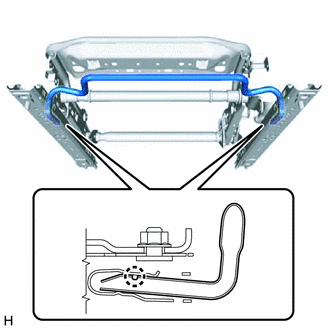
5. DISCONNECT SEPARATE TYPE FRONT SEATBACK COVER
|
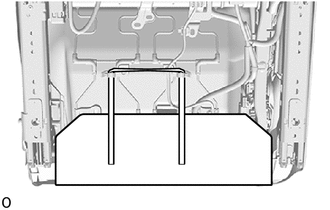
(a) Disconnect the rubber band of the separate type front seatback cover. |
|
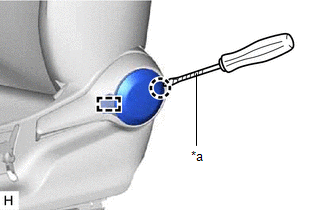
6. REMOVE VERTICAL ADJUSTING HANDLE LH (for Driver Side)
(a) Operate the vertical adjusting handle and using a screwdriver with its tip wrapped with protective tape, disengage the claw and remove the vertical adjusting handle LH as shown in the illustration.
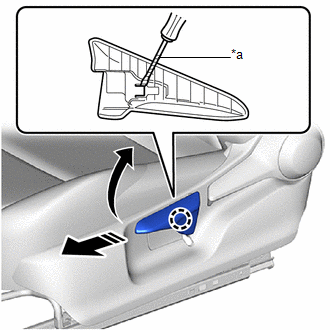
|
*a |
Protective Tape |

|
Remove in this Direction |
7. REMOVE RECLINING HINGE COVER
|
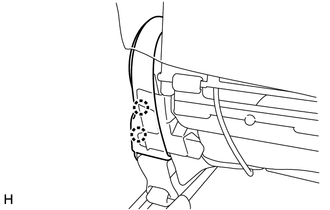
(a) Using a screwdriver with its tip wrapped with protective tape, disengage the claw. |
|
(b) Disengage the guide to remove the reclining hinge cover.
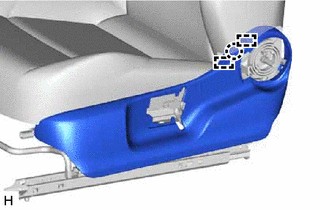
8. REMOVE RECLINING ADJUSTER RELEASE HANDLE
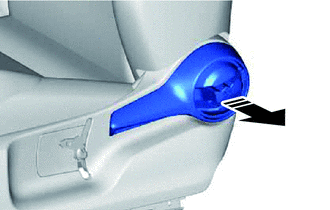

|
Remove in this Direction |
(a) Remove the reclining adjuster release handle as shown in the illustration.
9. REMOVE LH SEAT SEAT ADJUSTER COVER CAP (for Driver Side)
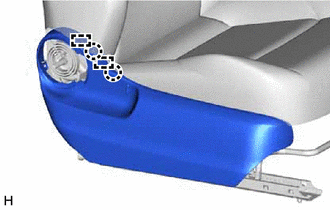
(a) Using a screwdriver with its tip wrapped with protective tape, disengage the 2 claws as shown in the illustration.
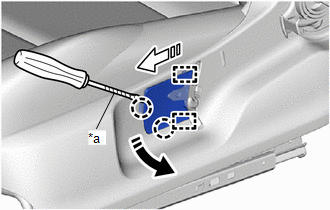
|
*a |
Protective Tape |

|
Remove in this Direction (1) |

|
Remove in this Direction (2) |
(b) Disengage the 2 guides to remove the LH seat seat adjuster cover cap as shown in the illustration.
10. REMOVE FRONT SEAT CUSHION SHIELD (for Driver Side)
|
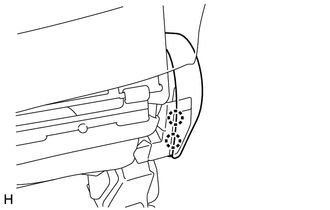
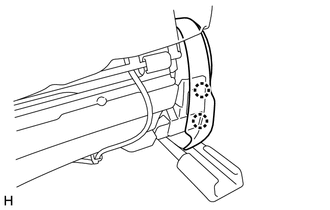
(a) Disengage the 2 claws. |
|
|
(b) Disengage the claw and 2 guides. |
|
(c) Using a screwdriver with its tip wrapped with protective tape, disengage the 2 claws as shown in the illustration.
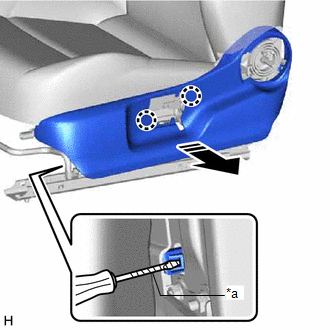
|
*a |
Protective Tape |

|
Remove in this Direction |
(d) Disengage the guide as shown in the illustration.
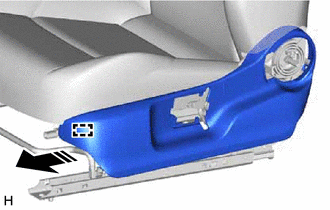

|
Remove in this Direction |
(e) w/ Lumbar Support:
|
(1) Disengage the 2 clamps. |
|
(2) Disconnect the front lumbar power seat switch connector to remove the front seat cushion shield.
11. REMOVE FRONT LUMBAR POWER SEAT SWITCH (w/ Lumbar Support)
12. REMOVE FRONT SEAT INNER CUSHION SHIELD (for Driver Side)
|
(a) Disengage the 2 claws. |
|
(b) Disengage the 2 claws and 2 guides to remove the front seat inner cushion shield as shown in the illustration.
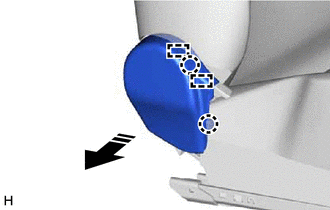

|
Remove in this Direction |
13. REMOVE FRONT SEAT CUSHION SHIELD (for Front Passenger Side)
|
(a) Disengage the 2 claws. |
|
|
(b) Disengage the 2 claws and 2 guides. |
|
(c) Using a screwdriver with its tip wrapped with protective tape, disengage the claw as shown in the illustration.
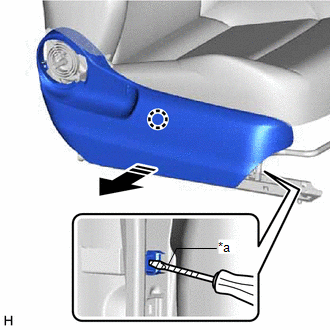
|
*a |
Protective Tape |

|
Remove in this Direction |
(d) Disengage the guide to remove the front seat cushion shield as shown in the illustration.
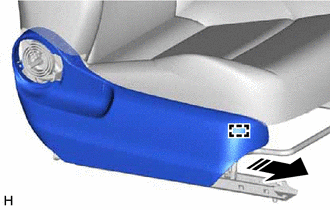

|
Remove in this Direction |
14. REMOVE FRONT SEAT INNER CUSHION SHIELD (for Front Passenger Side)
|
(a) Remove the clip. |
|
(b) Disengage the claw and 2 guides as shown the illustration.
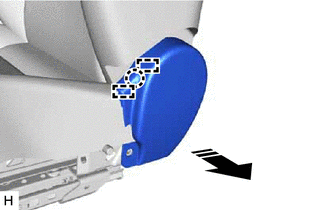

|
Remove in this Direction |
|
(c) Disengage the 2 claws to remove the front seat inner cushion shield. |
|
15. REMOVE LOWER NO. 1 SEAT TRACK SPACER (for Front Passenger Side)
|
(a) Remove the 2 screws and lower No. 1 seat track spacer from the front seat cushion shield. |
|
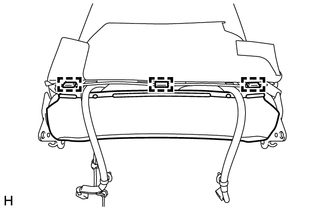
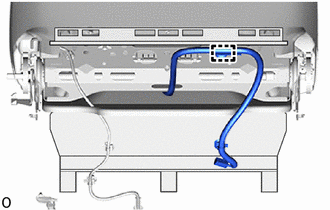
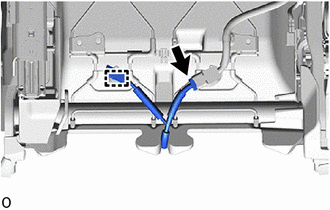
16. REMOVE SEPARATE TYPE FRONT SEATBACK ASSEMBLY
|
(a) Disengage the 2 hooks. |
|
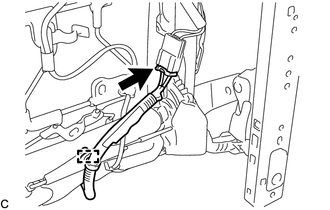
(b) w/ Lumbar Support:
|
(1) Disconnect the connector. |
|
(2) Disengage the clamp.
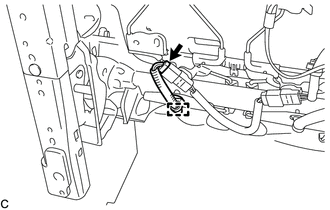
(c) w/ Seat Heater System:
|
(1) Disconnect the connector. |
|
(2) Disengage the clamp.
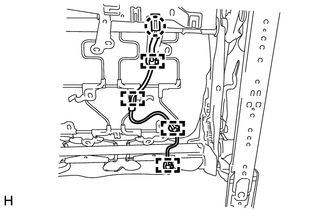
|
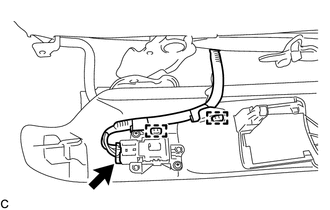
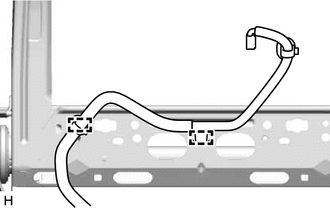
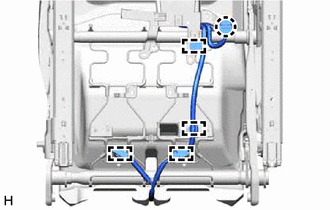
(d) Disengage the claw and 4 clamps to separate the front seat airbag assembly wire harness. HINT: Disengage the 4 clamps first. |
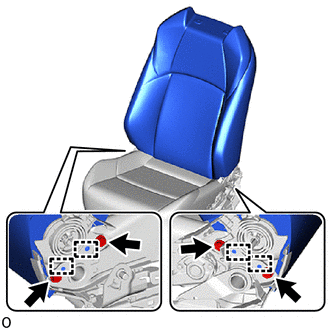
|
|
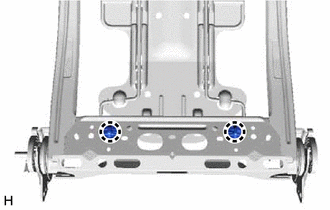
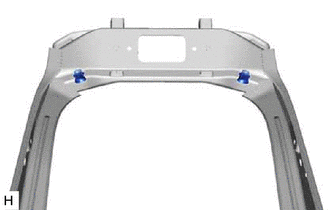
(e) Remove the 4 bolts. |
|
(f) Disengage the 4 guides to remove the separate type front seatback assembly from the separate type front seat cushion assembly.
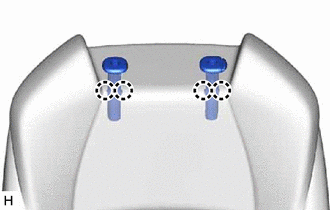
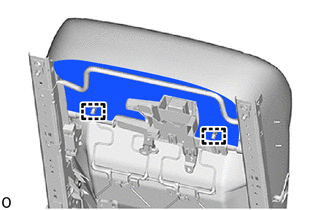
17. REMOVE FRONT SEAT HEADREST SUPPORT
|
(a) Disengage the 3 hooks. |
|
(b) w/ Seat Heater System:
|
(1) Disengage the clamp. |
|
|
(c) Open the 2 fasteners. |
|
(d) for Sports Seat Type:
(1) Disengage the 5 clips and remove the bezel as shown in the illustration.
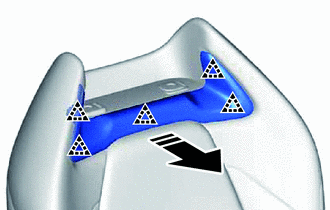

|
Remove in this Direction |
|
(e) Disengage the 4 claws and remove the 2 front seat headrest supports. |
|
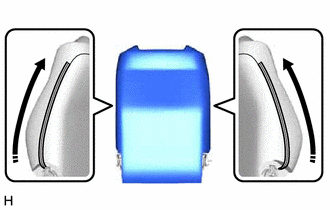
18. REMOVE SEPARATE TYPE FRONT SEATBACK COVER WITH PAD
(a) Remove the separate type front seatback cover with pad.
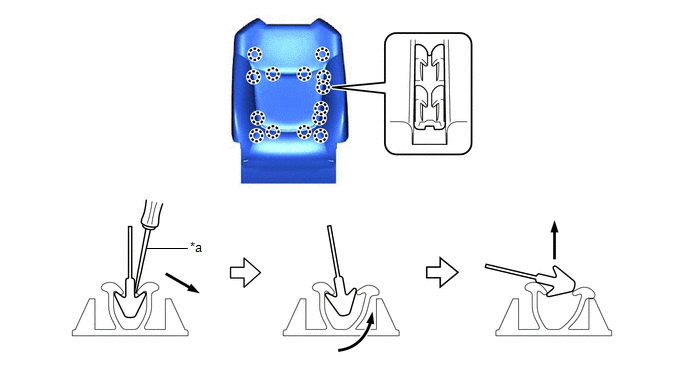
19. REMOVE SEPARATE TYPE FRONT SEATBACK COVER
(a) for Standard Seat Type:
(1) Using a screwdriver, disengage the 14 claws and remove the separate type front seatback cover from the separate type front seatback pad as shown in the illustration.
|
*a |
Screwdriver |
- |
- |
(b) for Sporty Seat Type:
(1) Using a screwdriver, disengage the 15 claws and remove the separate type front seatback cover from the separate type front seatback pad as shown in the illustration.
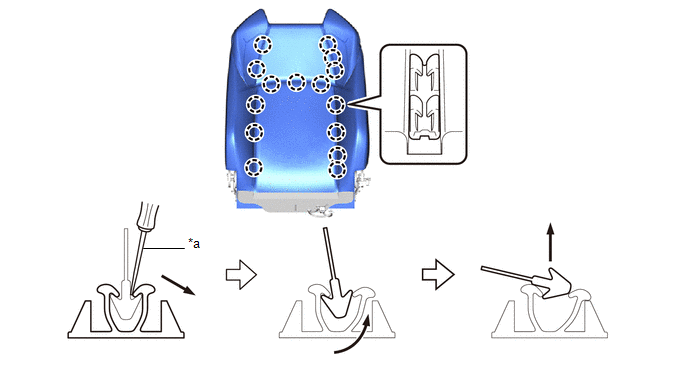
|
*a |
Screwdriver |
- |
- |
(c) for Sports Seat Type:
(1) Using a screwdriver, disengage the 17 claws and remove the separate type front seatback cover from the separate type front seatback pad as shown in the illustration.
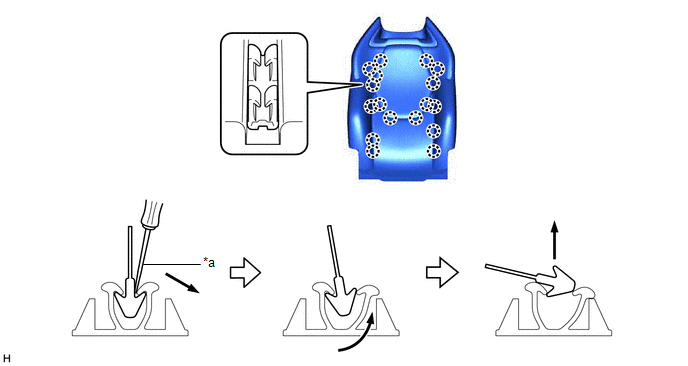
|
*a |
Screwdriver |
- |
- |
20. REMOVE FRONT SEATBACK HEATER ASSEMBLY (w/ Seat Heater System)
21. REMOVE FRONT SEAT AIRBAG ASSEMBLY
22. REMOVE LUMBAR SUPPORT ADJUSTER ASSEMBLY LH (w/ Lumbar Support)
23. REMOVE FRONT SEATBACK FELT LH (w/ Lumbar Support)
(a) Remove the front seatback felt LH from the lumbar support adjuster assembly LH.
24. REMOVE FRONT SEATBACK SPRING SUB-ASSEMBLY (w/o Lumbar Support)
|
(a) Disengage the 2 claws to remove the 2 front seatback edge protectors from the front seatback frame sub-assembly. |
|
(b) Remove the front seatback spring sub-assembly from the front seatback frame sub-assembly as shown in the illustration.
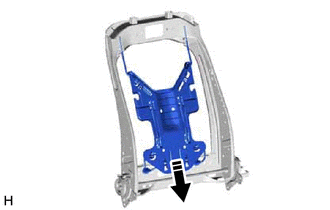

|
Remove in this Direction |
25. REMOVE FRONT SEATBACK EDGE PROTECTOR
(a) w/o Lumbar Support:
(1) Remove the 2 front seatback edge protectors from the front seatback spring sub-assembly.
(b) w/ Lumbar Support:
(1) Remove the 2 front seatback edge protectors from the lumbar support adjuster assembly LH.
26. REMOVE FRONT NO. 2 SEATBACK HOOK
|
(a) Remove the 2 front No. 2 seatback hooks from the front seatback frame sub-assembly. |
|
27. REMOVE FRONT SEAT NO. 2 WIRE LH (w/ Lumbar Support)
|
(a) Disengage the 2 clamps to remove the front seat No. 2 wire LH. |
|
28. REMOVE SEPARATE TYPE FRONT SEAT CUSHION COVER WITH PAD
(a) w/o Lumbar Support:
|
(1) Disengage the claw and 4 clamps. (w/ Seat Heater System) HINT: Disengage the 4 clamps first. |
|
(b) w/ Lumbar Support:
|
(1) Disconnect the connector. |
|
(2) Disengage the clamp.
|
(c) Disengage the 2 hooks. |
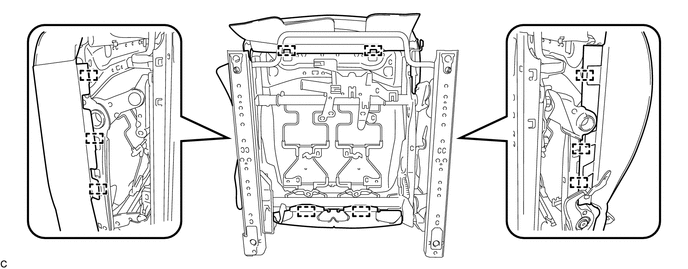
|
(d) Disengage the 10 hooks and remove the separate type front seat cushion cover with pad from the separate type front seat cushion spring assembly.
29. REMOVE FRONT SEAT CUSHION AIRBAG ASSEMBLY RH (for Front Passenger Side)
30. REMOVE SEPARATE TYPE FRONT SEAT CUSHION COVER
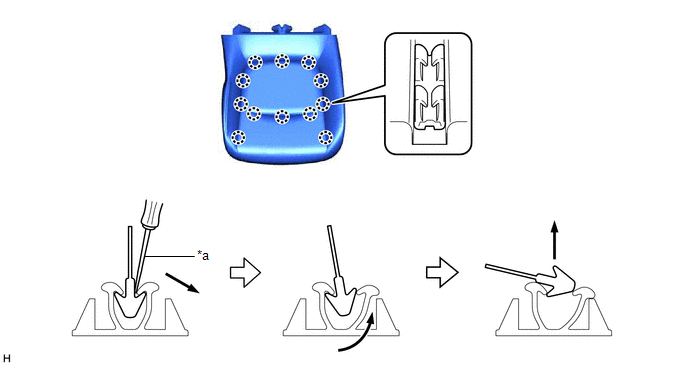
(a) for Standard Seat Type:
(1) Using a screwdriver, disengage the 12 claws and remove the separate type front seat cushion cover from the separate type front seat cushion pad as shown in the illustration.
|
*a |
Screwdriver |
- |
- |
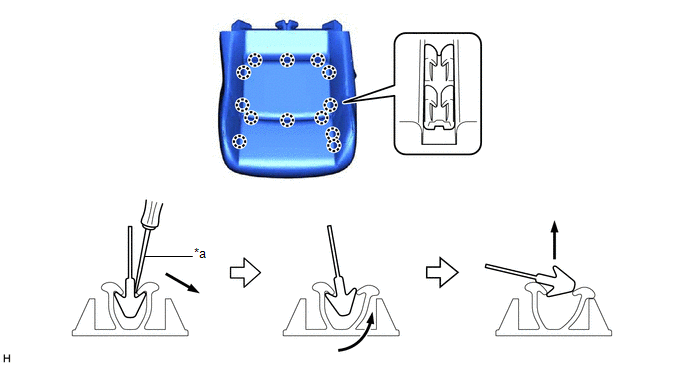
(b) for Sporty Seat Type:
(1) Using a screwdriver, disengage the 13 claws and remove the separate type front seat cushion cover from the separate type front seat cushion pad as shown in the illustration.
|
*a |
Screwdriver |
- |
- |
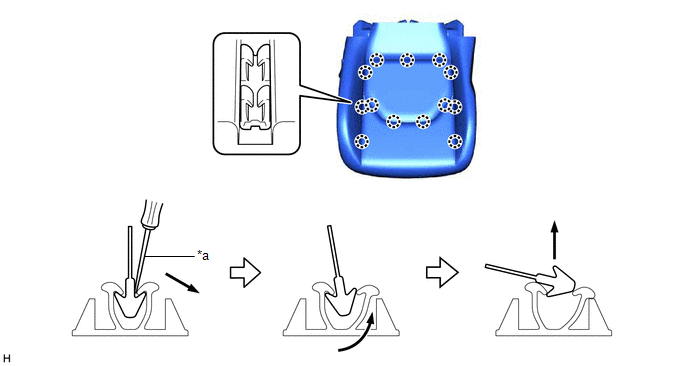
(c) for Sports Seat Type:
(1) Using a screwdriver, disengage the 13 claws and remove the separate type front seat cushion cover from the separate type front seat cushion pad as shown in the illustration.
|
*a |
Screwdriver |
- |
- |
31. REMOVE FRONT SEAT CUSHION HEATER ASSEMBLY (w/ Seat Heater System)
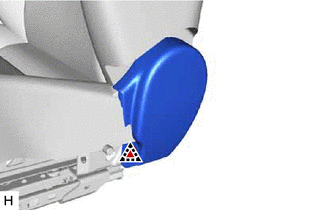
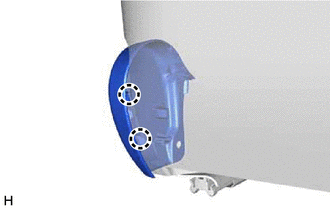
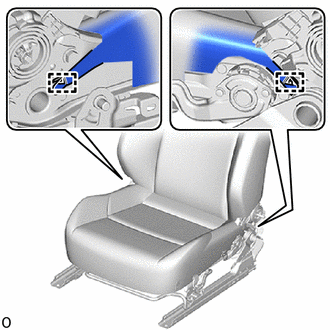
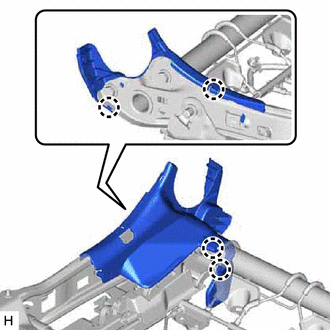
32. REMOVE LH SEAT RECLINING ADJUSTER INSIDE COVER LH (for Driver Side)
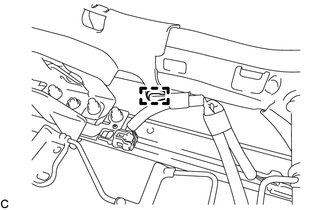
(a) w/ Lumbar Support:
|
(1) Disengage the claw. |
|
|
(b) Disengage the 4 claws to remove the LH seat reclining adjuster inside cover LH. |
|
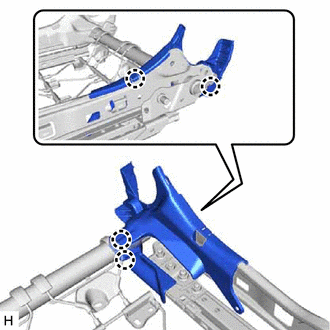
33. REMOVE LH SEAT RECLINING ADJUSTER INSIDE COVER RH (for Driver Side)
|
(a) Disengage the 4 claws to remove the LH seat reclining adjuster inside cover RH. |
|
34. REMOVE RH SEAT RECLINING ADJUSTER INSIDE COVER LH (for Front Passenger Side)
|
(a) Disengage the clamp. |
|
|
(b) Disengage the 4 claws to remove the RH seat reclining adjuster inside cover LH. |
|
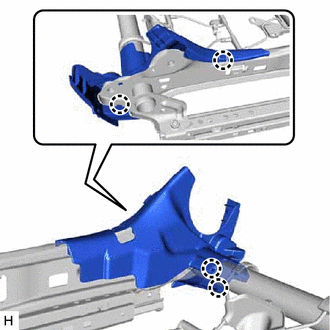
35. REMOVE RH SEAT RECLINING ADJUSTER INSIDE COVER RH (for Front Passenger Side)
|
(a) Disengage the 4 claws to remove the RH seat reclining adjuster inside cover RH. |
|
36. REMOVE FRONT SEAT LOWER CUSHION SHIELD LH (for Driver Side)
|
(a) Disengage the hook. |
|
(b) Disengage the claw and guide to remove the front seat lower cushion shield LH.
37. REMOVE FRONT SEAT LOWER CUSHION SHIELD RH (for Driver Side)
|
(a) Disengage the hook. |
|
(b) Disengage the claw and guide to remove the front seat lower cushion shield RH.
38. REMOVE FRONT SEAT WIRE LH (w/ Lumbar Support)
(a) Disengage each clamp and each claw to remove the front seat wire LH.
39. REMOVE FRONT SEAT WIRE RH (for Front Passenger Side)
(a) Disengage each clamp and each claw.
(b) Disconnect each connector to remove the front seat wire RH.
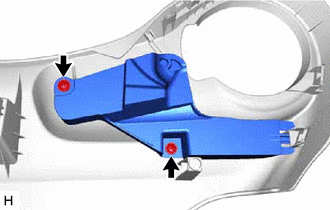
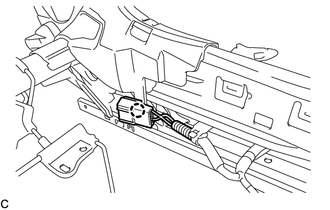
40. REMOVE FRONT SEAT CUSHION WIRE HARNESS HOLDER
|
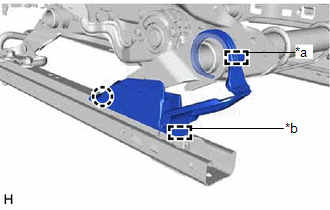
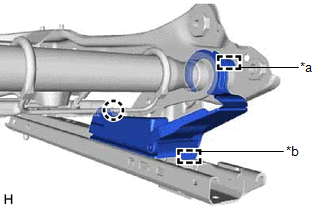
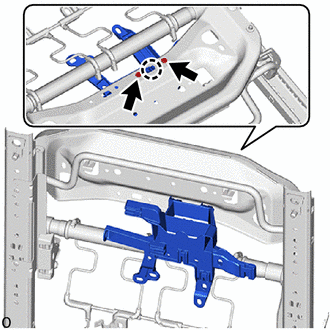
(a) Remove the 2 screws. |
|
(b) Disengage the claw to remove the front seat cushion wire harness holder.
(c) w/ Wiring Harness Connector:
(1) Disengage the claw to remove the wiring harness connector from the front seat cushion wire harness holder.
41. REMOVE FRONT SEAT CUSHION SPRING SUB-ASSEMBLY
|
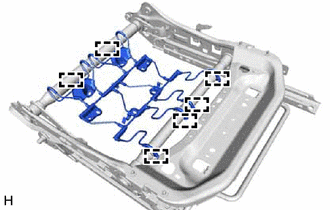
(a) Disengage the 6 hooks to remove the front seat cushion spring sub-assembly from the front seat adjuster assembly. |
|
42. REMOVE SEAT TRACK UPPER NO. 3 COVER
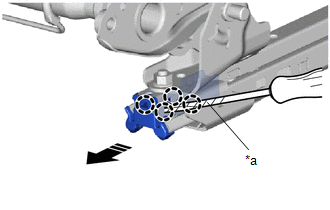
(a) Operate the seat track adjusting handle and move the front seat adjuster assembly to the rearmost position.
(b) Using a screwdriver with its tip wrapped with protective tape, disengage the 4 claws to remove the seat track upper No. 3 cover as shown in the illustration.
|
*a |
Protective Tape |

|
Remove in this Direction |
HINT:
Use the same procedure for both sides.
43. REMOVE SEAT TRACK ADJUSTING HANDLE
(a) Operate the seat track adjusting handle and move the front seat adjuster assembly to the foremost position.
|
(b) Disengage the 2 claws to remove the seat track adjusting handle from the front seat adjuster assembly. |
|
44. REMOVE SEAT TRACK UPPER RAIL COVER LH
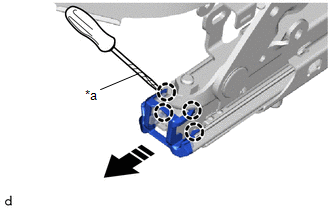
(a) Using a screwdriver with its tip wrapped with protective tape, disengage the 4 claws to remove the seat track upper rail cover LH as shown in the illustration.
|
*a |
Protective Tape |

|
Remove in this Direction |
HINT:
Use the same procedure for both sides.
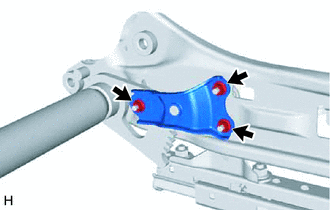
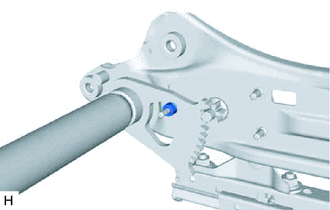
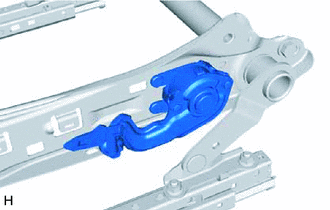
45. REMOVE VERTICAL ADJUSTER GEAR LH (for Driver Side)
(a) Remove the vertical adjuster gear LH.
|
(1) Remove the 3 nuts and vertical adjuster plate. |
|
|
(2) Remove the vertical adjuster spacer. |
|
|
(3) Remove the front vertical adjuster brake sub-assembly. |
|
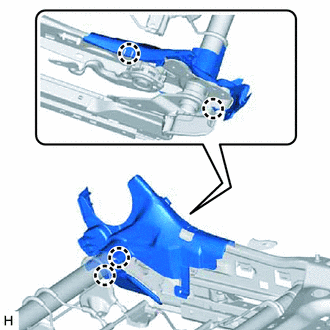
46. REMOVE VERTICAL ADJUSTER OUTER BRACKET COVER (for Driver Side)
|
(a) Disengage the claw to remove the vertical adjuster outer bracket cover from the front vertical adjuster brake sub-assembly. |
|
|
|
|
![2020 - 2022 MY Corolla Corolla Hatchback Corolla HV GR Corolla [01/2019 - 09/2022]; SUPPLEMENTAL RESTRAINT SYSTEMS: SEAT POSITION SENSOR (for TMC Made): REMOVAL+](/t3Portal/stylegraphics/info.gif)
