| Last Modified: 05-13-2024 | 6.11:8.1.0 | Doc ID: RM100000001H9M6 |
| Model Year Start: 2020 | Model: GR Corolla | Prod Date Range: [01/2019 - ] |
| Title: SLIDING ROOF / CONVERTIBLE: SLIDING ROOF HOUSING: DISASSEMBLY; 2020 - 2025 MY Corolla Corolla Hatchback Corolla HV GR Corolla [01/2019 - ] | ||
DISASSEMBLY
PROCEDURE
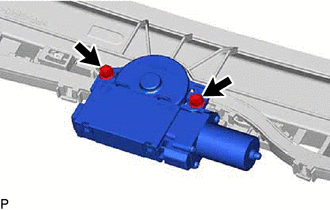
1. REMOVE SLIDING ROOF DRIVE GEAR SUB-ASSEMBLY
|
(a) Remove the 2 bolts and sliding roof drive gear sub-assembly. |
|
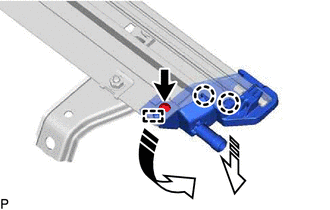
2. REMOVE SUNSHADE TRIM SUB-ASSEMBLY
(a) Remove the screw.

|
Remove in this Direction (1) |

|
Remove in this Direction (2) |
HINT:
Use the same procedure for the RH side.
(b) Move the sliding roof piece sub-assembly LH in the direction indicated by the arrow (1) shown in the illustration to disengage the guide.
HINT:
Use the same procedure for the RH side.
(c) Move the sliding roof piece sub-assembly LH in the direction indicated by the arrow (2) shown in the illustration to disengage the 2 claws and remove the sliding roof piece sub-assembly LH.
HINT:
Use the same procedure for the RH side.
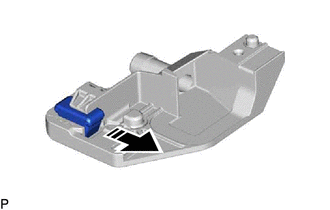
(d) Remove the rear sliding roof sunshade stopper as shown in the illustration.
|
|
Remove in this Direction |
HINT:
Use the same procedure for the RH side.
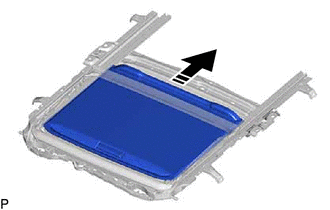
(e) Slide and remove the sunshade trim sub-assembly as shown in the illustration.
|
|
Remove in this Direction |
3. REMOVE SLIDING ROOF DRIVE CABLE SUB-ASSEMBLY
NOTICE:
Perform this procedure only when replacement of the sliding roof drive cable sub-assembly is necessary.
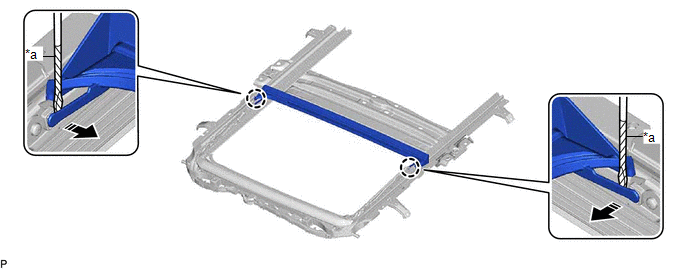
(a) Using a screwdriver, disengage the 2 claws as shown in the illustration.
|
*a |
Protective Tape |
- |
- |
|
|
Remove in this Direction |
- |
- |
HINT:
Tape the screwdriver tip before use.
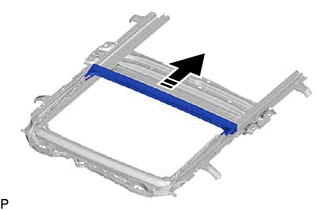
(b) Slide and remove the rear roof drip channel as shown in the illustration.
|
|
Remove in this Direction |
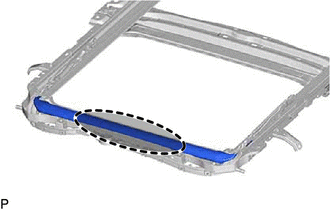
(c) Hold down the roof wind deflector panel sub-assembly.

|
Hold Position |
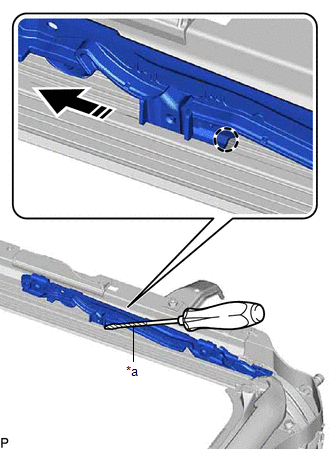
(d) Using a screwdriver, slide the sliding roof drive cable LH as shown in the illustration to remove it.
|
*a |
Protective Tape |
|
|
Push Position |
|
|
Remove in this Direction |
HINT:
- Tape the screwdriver tip before use.
- Use the same procedure for the RH side.
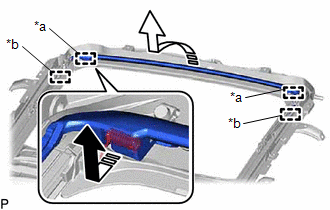
4. REMOVE ROOF WIND DEFLECTOR PANEL SUB-ASSEMBLY
(a) Pull each spring in the direction indicated by the arrow (1) shown in the illustration to disengage the 2 springs.
|
*a |
Spring |
|
*b |
Guide |
|
|
Remove in this Direction (1) |
|
|
Remove in this Direction (2) |
(b) Pull the roof wind deflector panel sub-assembly in the direction indicated by the arrow (2) shown in the illustration to disengage the 2 guides and remove it.
|
|
|