| Last Modified: 07-31-2024 | 6.11:8.1.0 | Doc ID: RM100000001CZC5 |
| Model Year Start: 2019 | Model: Corolla Hatchback | Prod Date Range: [06/2018 - ] |
| Title: BRAKE SYSTEM (OTHER): VACUUM PUMP (for M20A-FKS): INSTALLATION; 2019 - 2025 MY Corolla Corolla Hatchback [06/2018 - ] | ||
INSTALLATION
CAUTION / NOTICE / HINT
NOTICE:
This procedure includes the installation of small-head bolts. Refer to Small-Head Bolts of Basic Repair Hint to identify the small-head bolts.
PROCEDURE
1. INSTALL VACUUM PUMP ASSEMBLY
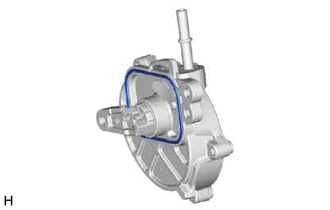
(a) When reusing the vacuum pump assembly:
|
(1) Install a new No. 1 vacuum pump O-ring to the vacuum pump assembly. |
|
|
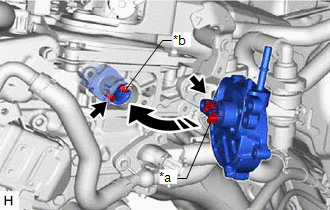
(b) Install the vacuum pump assembly so that the coupling teeth of the vacuum pump assembly and groove of the camshaft are engaged. NOTICE:
|
|
|
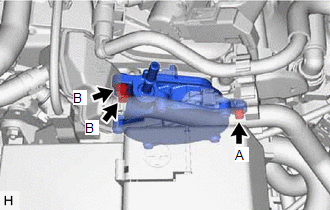
(c) Using an 8 mm socket wrench, install the vacuum pump assembly with the 3 bolts. Torque: 10 N·m {102 kgf·cm, 7 ft·lbf} NOTICE:
|
|
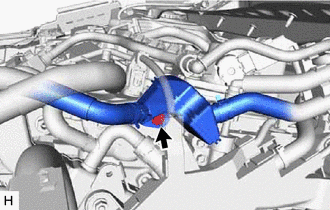
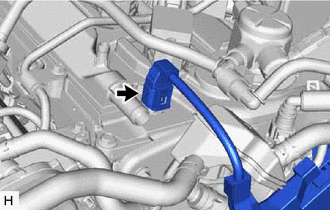
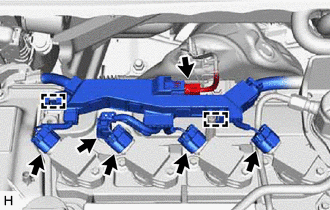
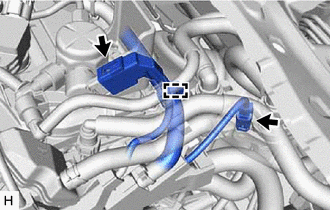
2. INSTALL ENGINE WIRE
|
(a) Install the No. 3 water hose clamp bracket with the bolt. Torque: 10 N·m {102 kgf·cm, 7 ft·lbf} |
|
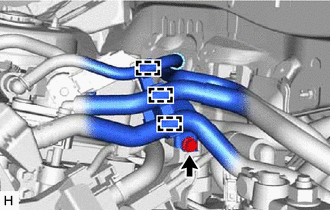
(b) engage the 3 clamps and install the 3 hoses.
|
(c) Install the vacuum surge tank with the bolt. Torque: 10 N·m {102 kgf·cm, 7 ft·lbf} |
|
|
(d) Connect the connector. |
|
(e) Connect the connector and lock the lock lever.
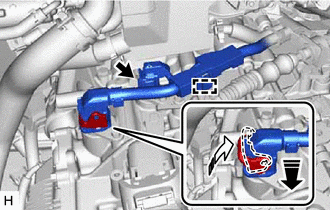

|
Connect the connector |

|
Lock the lock lever |
(f) Connect the connector and engage the clamp.
|
(g) Connect the 6 connectors and engage the 2 clamps. |
|
|
(h) Connect the 2 connectors and engage the clamp. |
|
|
(i) Connect the connector and engage the clamp. |
|
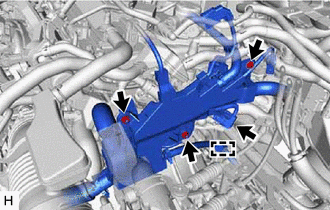
(j) Install the engine wire with the bolt and 2 nuts.
Torque:
10 N·m {102 kgf·cm, 7 ft·lbf}
3. CONNECT NO. 1 VACUUM HOSE CONNECTOR
(a) Align the No. 1 vacuum hose connector with the vacuum pump assembly, and push them together until the No. 1 vacuum hose connector makes a "click" sound.
NOTICE:
- Check that there is no foreign matter on the connecting parts.
- After connecting the No. 1 vacuum hose connector, check that the vacuum pump assembly and No. 1 vacuum hose connector are securely connected by pulling on them.
4. INSTALL BATTERY CLAMP SUB-ASSEMBLY
5. INSTALL BATTERY
6. INSTALL ECM
7. INSPECT VACUUM PUMP OPERATION
|
|
|
![2019 - 2025 MY Corolla Corolla Hatchback Corolla HV GR Corolla [06/2018 - ]; INTRODUCTION: REPAIR INSTRUCTION: PRECAUTION](/t3Portal/stylegraphics/info.gif)
