- Poor idle, etc.
- Engine start function, etc.
| Last Modified: 05-13-2024 | 6.11:8.1.0 | Doc ID: RM100000001C4LJ |
| Model Year Start: 2019 | Model: Corolla Hatchback | Prod Date Range: [06/2018 - 01/2019] |
| Title: CLUTCH: CLUTCH UNIT (for EG60): REMOVAL; 2019 MY Corolla Corolla Hatchback [06/2018 - 01/2019] | ||
REMOVAL
CAUTION / NOTICE / HINT
The necessary procedures (adjustment, calibration, initialization or registration) that must be performed after parts are removed and installed, or replaced during clutch unit removal/installation are shown below.
Necessary Procedures After Parts Removed/Installed/Replaced
|
Replaced Part or Performed Procedure |
Necessary Procedure |
Effect/Inoperative Function when Necessary Procedure not Performed |
Link |
|---|---|---|---|
| *: If the vehicle height has changed due to suspension or tire replacement. | |||
|
Disconnect cable from negative battery terminal |
Perform steering sensor zero point calibration |
Lane Control System |
|
|
Pre-collision System |
|||
|
Lighting System (w/ AFS)(EXT) |
|||
|
Initialize back door lock |
Power Door Lock Control System |
|
|
|
Replacement of ECM |
Vehicle Identification Number (VIN) registration |
MIL comes on |
|
|
ECU communication ID registration (Immobiliser system) |
Engine start function |
|
|
|
Gas leak from exhaust system is repaired |
Inspection after repair |
|
|
|
Replacement of ECM |
Code registration (Smart Key System (for Start Function)) |
|
|
|
Suspension, tires, etc.* |
Perform headlight ECU sub-assembly LH initialization |
Lighting system (w/ AFS)(EXT) |
|
|
Front wheel alignment adjustment |
|
|
|
CAUTION:
-
To prevent burns, do not touch the engine, exhaust pipe or other high temperature components while the engine is hot.
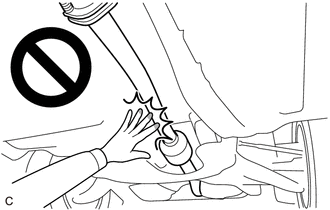
-
Because the manual transaxle assembly is extremely heavy, make sure to follow the work procedures described in the repair manual.
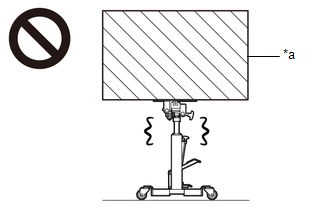
*a
Heavy object exceeding the capacity of the transmission jack
- If work is not performed according to the procedures described in the repair manual, there is a danger that the transmission jack could drop and components could fall down.
NOTICE:
- After the engine switch is turned off, the radio and display receiver assembly records various types of memory and settings. As a result, after turning the engine switch off, make sure to wait at least 85 seconds before disconnecting the cable from the negative (-) battery terminal. (for Audio and Visual System)
- After the engine switch is turned off, the radio and display receiver assembly records various types of memory and settings. As a result, after turning the engine switch off, make sure to wait at least 85 seconds before disconnecting the cable from the negative (-) battery terminal. (for Navigation System)
- When the manual transaxle assembly is removed, be sure to use a new clutch release cylinder with bearing assembly and new installation bolts. Removal of the manual transaxle assembly allows the compressed clutch release cylinder with bearing assembly to return to its original position. Dust from the moving section may damage the seal of the clutch release cylinder with bearing assembly, possibly causing clutch fluid leaks.
PROCEDURE
1. REMOVE MANUAL TRANSAXLE ASSEMBLY
Click here
![2019 MY Corolla Corolla Hatchback [06/2018 - 01/2019]; EG60 (MANUAL TRANSMISSION / TRANSAXLE): MANUAL TRANSAXLE ASSEMBLY: REMOVAL](/t3Portal/stylegraphics/info.gif)
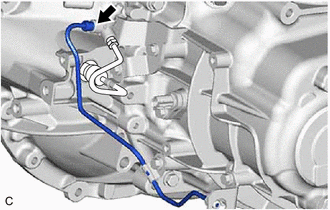
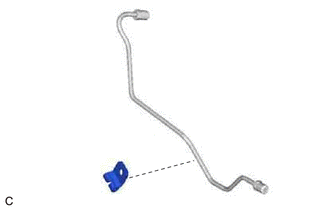
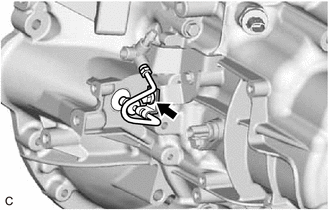
2. REMOVE BLEEDER TO FLEXIBLE HOSE TUBE
|
(a) Using a 10 mm union nut wrench, disconnect the bleeder to flexible hose tube from the clutch release bleeder sub-assembly. |
|
|
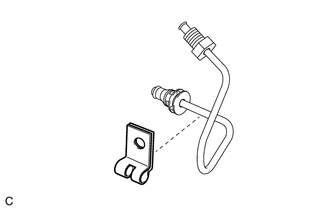
(b) Remove the bolt and bleeder to flexible hose tube from the manual transaxle assembly. |
|
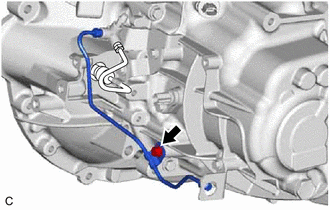
|
(c) Remove the clamp from the bleeder to flexible hose tube. |
|
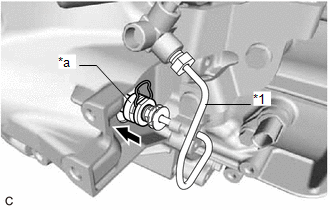
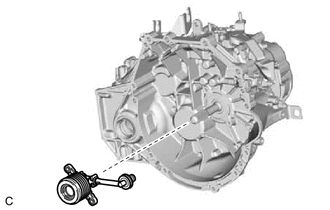
3. REMOVE CLUTCH RELEASE CYLINDER WITH BEARING ASSEMBLY
|
(a) Using a screwdriver, pull out the clip of the adapter. |
|

|
(b) Remove the 2 bolts. |
|
|
(c) Disconnect the adapter from the clutch release cylinder with bearing assembly to bleeder tube. |
|
|
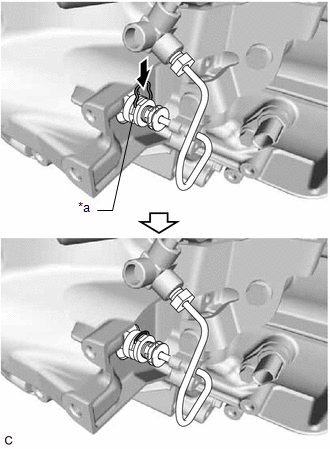
(d) Push the clip into the adapter. |
|
|
(e) Remove the clutch release cylinder with bearing assembly from the manual transaxle assembly. |
|
4. REMOVE CLUTCH RELEASE CYLINDER WITH BEARING ASSEMBLY TO BLEEDER TUBE
|
(a) Using a 10 mm union nut wrench, disconnect the clutch release cylinder with bearing assembly to bleeder tube from the clutch release bleeder sub-assembly. |
|

|
(b) Remove the bolt and clutch release cylinder with bearing assembly to bleeder tube from the manual transaxle assembly. |
|
|
(c) Remove the clamp from the clutch release cylinder with bearing assembly to bleeder tube. |
|
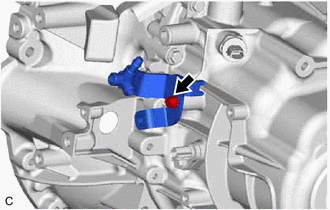
5. REMOVE CLUTCH RELEASE BLEEDER SUB-ASSEMBLY
|
(a) Remove the bolt and clutch release bleeder sub-assembly from the manual transaxle assembly. |
|
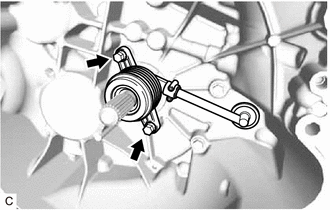
6. REMOVE CLUTCH COVER ASSEMBLY
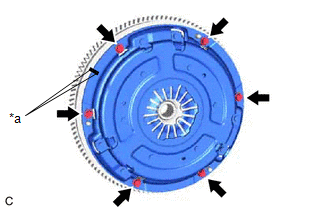
|
*a |
Matchmark |
(a) Put matchmarks on the clutch cover assembly and the flywheel sub-assembly.
(b) Loosen each bolt 180° at a time until the spring tension is released.
(c) Remove the 6 bolts and pull off the clutch cover assembly.
NOTICE:
Do not drop the clutch disc assembly.
7. REMOVE CLUTCH DISC ASSEMBLY
NOTICE:
Keep the lined part of the clutch disc assembly, the pressure plate, and the surface of the flywheel sub-assembly away from oil and foreign matter.
|
|
|