| Last Modified: 01-30-2024 | 6.11:8.1.0 | Doc ID: RM10000000201SJ |
| Model Year Start: 2022 | Model: RAV4 | Prod Date Range: [12/2021 - ] |
| Title: INTERIOR PANELS / TRIM: FRONT CONSOLE BOX: REMOVAL; 2022 - 2024 MY RAV4 RAV4 HV [12/2021 - ] | ||
REMOVAL
PROCEDURE
1. REMOVE SHIFT LEVER KNOB SUB-ASSEMBLY
(a) for Automatic Transaxle:
-
UB80E: Click here
![2019 - 2024 MY RAV4 [11/2018 - ]; UB80E (AUTOMATIC TRANSMISSION / TRANSAXLE): SHIFT LEVER KNOB: REMOVAL](/t3Portal/stylegraphics/info.gif)
-
UB80F: Click here
(b) for HV Model:
-
P710: Click here
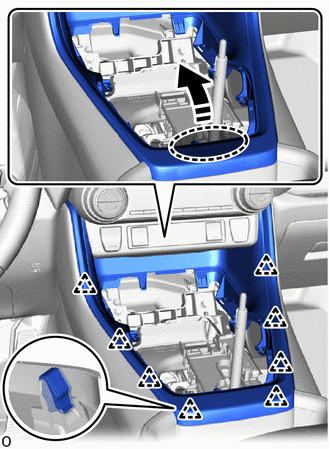
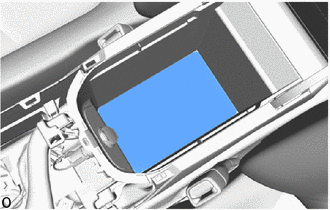
2. REMOVE UPPER CONSOLE PANEL SUB-ASSEMBLY
(a) Lift up in the direction indicated by the arrow shown in the illustration to detach the claw and clip and remove the upper console panel sub-assembly.

|
Remove in this Direction |
|
(b) Disconnect the 2 connectors. |
|
3. REMOVE MOBILE WIRELESS CHARGER CRADLE ASSEMBLY (w/ Wireless Charger)
Click here
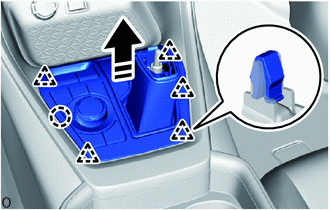
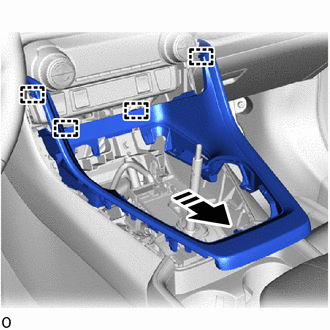
4. REMOVE UPPER CONSOLE BOX (w/o Wireless Charger)
(a) Rotate in the direction indicated by the arrow (1) shown in the illustration to detach the clip.
|
|
Remove in this Direction (1) |

|
Remove in this Direction (2) |
(b) Pull in the direction indicated by the arrow (2) shown in the illustration to detach the guide and remove the upper console box.
|
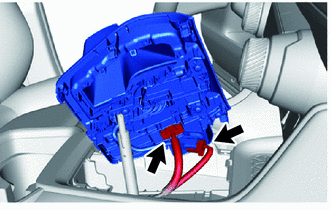
(c) Detach the clamp and disconnect the 2 connectors. |
|
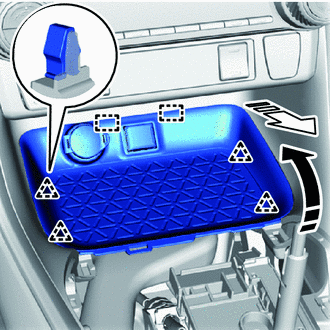
5. REMOVE REAR UPPER CONSOLE PANEL SUB-ASSEMBLY
|
(a) Remove the bolt. |
|

(b) Place your hand at the position shown in the illustration and lift up in the direction indicated by the arrow to detach the clip.

|
Place Hand Here |
|
|
Remove in this Direction |
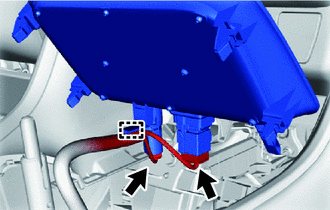
(c) Pull in the direction indicated by the arrow shown in the illustration to detach the guide and remove the rear upper console panel sub-assembly.
|
|
Remove in this Direction |
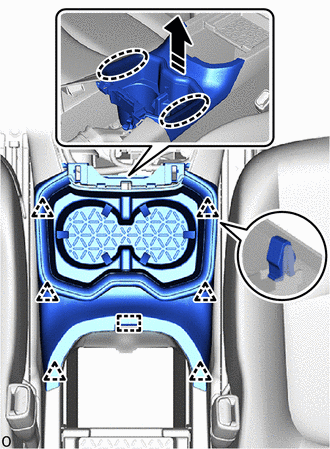
6. REMOVE CONSOLE CUP HOLDER BOX SUB-ASSEMBLY
(a) Place both hands at the position shown in the illustration and lift up in the direction indicated by the arrow to detach the clip and guide and remove the console cup holder box sub-assembly.
|
|
Place Hands Here |
|
|
Remove in this Direction |
(b) w/ Illumination:
|
(1) Disconnect the connector. |
|
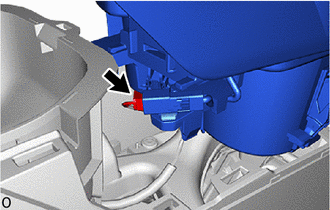
7. REMOVE REAR CONSOLE END PANEL SUB-ASSEMBLY
(a) Pull in the direction indicated by the arrow to detach the clip and claw.
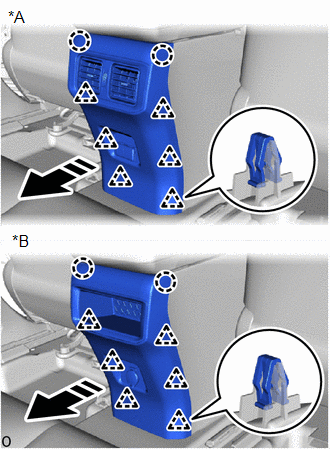
|
*A |
w/ Rear Register Duct |
|
*B |
w/o Rear Register Duct |
|
|
Remove in this Direction |
(b) Disconnect each connector and remove the rear console end panel sub-assembly.
8. REMOVE FRONT NO. 2 CONSOLE BOX INSERT
(a) Rotate in the direction indicated by the arrow (1) shown in the illustration to detach the clip.
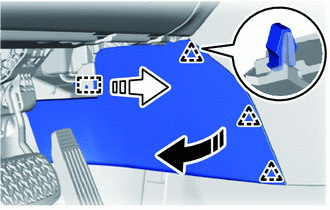
|
|
Remove in this Direction (1) |
|
|
Remove in this Direction (2) |
(b) Pull in the direction indicated by the arrow (2) shown in the illustration to detach the guide and remove the front No. 2 console box insert.
9. REMOVE FRONT NO. 1 CONSOLE BOX INSERT
(a) Rotate in the direction indicated by the arrow (1) shown in the illustration to detach the clip.
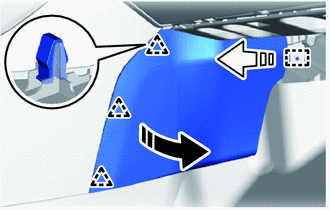
|
|
Remove in this Direction (1) |
|
|
Remove in this Direction (2) |
(b) Pull in the direction indicated by the arrow (2) shown in the illustration to detach the guide and remove the front No. 1 console box insert.
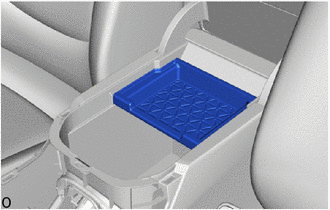
10. REMOVE CONSOLE BOX POCKET (w/ Console Box Tray)
|
(a) Remove the console box pocket. |
|
11. REMOVE CONSOLE BOX CARPET
|
(a) Remove the console box carpet. |
|
12. REMOVE CONSOLE BOX ASSEMBLY
|
(a) Detach the clamp and remove the 2 bolts. |
|
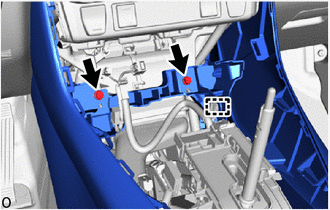
(b) Disconnect each connector.
|
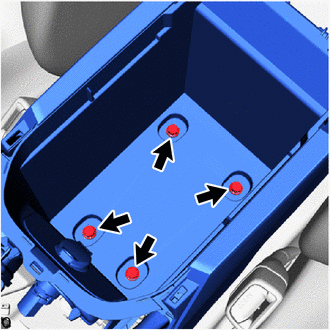
(c) Remove the 4 bolts. |
|
(d) While avoiding the shift lever, pull in the direction indicated by the arrow shown in the illustration to detach the guide and remove the console box assembly.
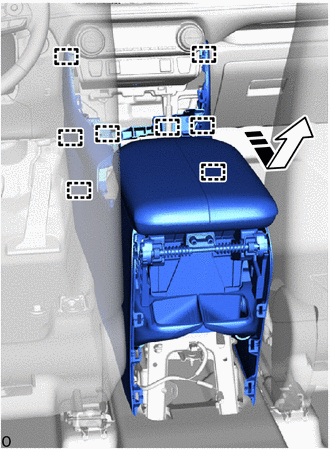
|
|
Remove in this Direction |
|
|
|