- Clear zero point calibration data.
- Perform yaw rate and acceleration sensor zero point calibration.
| Last Modified: 01-30-2024 | 6.11:8.1.0 | Doc ID: RM100000001P29K |
| Model Year Start: 2020 | Model: RAV4 HV | Prod Date Range: [06/2020 - 08/2020] |
| Title: Q610 (HYBRID TRANSMISSION / TRANSAXLE): REAR TRACTION MOTOR: REMOVAL; 2020 MY RAV4 HV [06/2020 - 08/2020] | ||
REMOVAL
CAUTION / NOTICE / HINT
The necessary procedures (adjustment, calibration, initialization, or registration) that must be performed after parts are removed and installed, or replaced during rear traction motor with transaxle assembly removal/installation are shown below.
Necessary Procedures After Parts Removed/Installed/Replaced
|
Replaced Part or Performed Procedure |
Necessary Procedure |
Effect/Inoperative Function when Necessary Procedure not Performed |
Link |
|---|---|---|---|
|
*: When performing learning using the Techstream.
Click here
|
|||
|
Auxiliary battery terminal is disconnected/reconnected |
Perform steering sensor zero point calibration |
Lane control system |
|
|
Parking support brake system (for HV model)* |
|||
|
Pre-collision system |
|||
|
Lighting system (EXT)(w/ AFS) |
|||
|
Memorize steering angle neutral point |
Parking assist monitor system |
|
|
|
Panoramic view monitor system (for HV model) |
|
||
|
Reset back door close position |
Power back door system (for HV model) |
|
|
|
Back door lock initialization |
Power door lock control system |
|
|
|
Rear wheel alignment adjustment |
|
|
|
|
Suspension, tires, etc. |
Television camera assembly optical axis (Back camera position setting) |
Parking Assist Monitor System |
|
|
Panoramic View Monitor System (for HV model) |
|
|
|
Gas leak from exhaust system is repaired |
Inspection After Repair |
|
|
|
Rear traction motor with transaxle assembly |
|
|
for AWD with NICKEL METAL HYDRIDE BATTERY:
for LITHIUM-ION BATTERY:
|
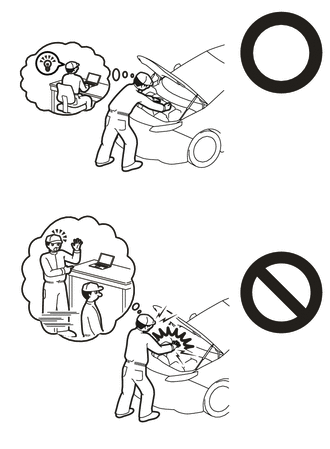
CAUTION:
-
This vehicle has contains high voltage circuits standardized with orange colored wiring and connectors, so follow the instructions in this manual to perform the procedures correctly.
for AWD with Nickel Metal Hydride Battery:
Click here
![2019 - 2024 MY RAV4 HV [02/2019 - ]; HYBRID / BATTERY CONTROL: HYBRID CONTROL SYSTEM (for AWD with NICKEL METAL HYDRIDE BATTERY): PRECAUTION](/t3Portal/stylegraphics/info.gif)
for Lithium-ion Battery:
Click here
- If the correct procedures are not followed according to the instructions in this manual, there is a danger of electric shock from the high voltage circuits.
-
Be sure to wear insulating gloves when working on high voltage wiring or components.
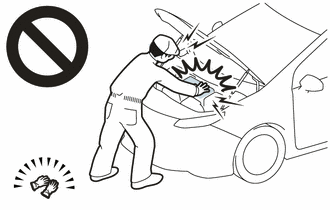
- If work is performed without wearing insulating gloves, there is a danger of electric shock.
-
To prevent burns, do not touch the engine, exhaust pipe or other high temperature components while the engine is hot.
NOTICE:
After the ignition switch is turned off, the radio and display receiver assembly records various types of memory and settings. As a result, after turning the ignition switch off, be sure to wait for the time specified in the following table before disconnecting the cable from the negative (-) auxiliary battery terminal.
Waiting Time before Disconnecting Cable from Negative (-) Auxiliary Battery Terminal
|
System Name |
See Procedure |
|---|---|
|
Vehicle enrolled in Toyota Audio Multimedia system or safety connect system |
6 minutes |
|
Vehicle not enrolled in Toyota Audio Multimedia system and safety connect system |
1 minute |
PROCEDURE
1. REMOVE DECK BOARD ASSEMBLY
Click here
2. REMOVE REAR NO. 2 FLOOR BOARD
Click here
3. REMOVE BATTERY HOLE COVER
Click here
4. DISCONNECT CABLE FROM NEGATIVE AUXILIARY BATTERY TERMINAL
Click here
5. REMOVE BATTERY SERVICE HOLE COVER
Click here
6. REMOVE SERVICE PLUG GRIP
Click here
7. DISCONNECT ENGINE ROOM MAIN WIRE
Click here
8. REMOVE CONNECTOR COVER ASSEMBLY
Click here
9. CHECK TERMINAL VOLTAGE
Click here
10. INSTALL CONNECTOR COVER ASSEMBLY
Click here
11. CONNECT ENGINE ROOM MAIN WIRE
Click here
12. DRAIN HYBRID TRANSAXLE FLUID
Click here
13. REMOVE REAR DRIVE SHAFT ASSEMBLY
Click here
14. REMOVE REAR SUSPENSION MEMBER SUB-ASSEMBLY
Click here
15. DISCONNECT WIRE HARNESS
|
(a) Disconnect the temperature sensor connector. |
|
(b) Disconnect the resolver sensor connector.
(c) Detach the 4 clamps to disconnect the wire harness from the rear traction motor with transaxle assembly and rear suspension member sub-assembly.
16. REMOVE REAR TRACTION MOTOR CABLE
CAUTION:
Be sure to wear insulated gloves.
HINT:
Unnecessary to remove the rear traction motor cable unless inspection or replacement.
(a) Clean the area around the rear traction motor cable.
NOTICE:
Dust or other foreign matter entering the terminal when installing the rear traction motor cable may cause a short or electrical leakage.
|
(b) Remove the 4 bolts of the rear traction motor cable. |
|

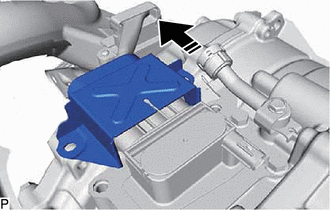
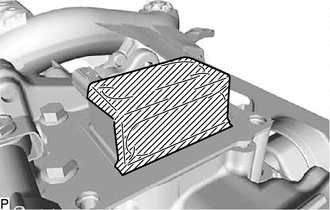
(c) Slide the cover on the top side of the rear traction motor cable.

|
Slide cover on top side |
|
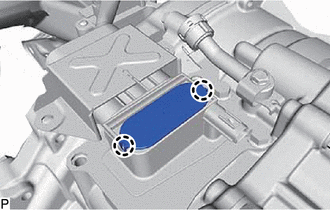
(d) Disengage the 2 claws to remove the motor cable terminal cap from the rear traction motor with transaxle assembly. |
|
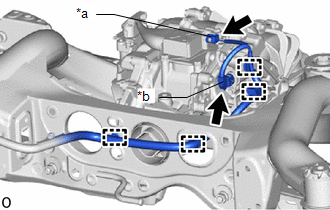
(e) Using an insulated tool, remove the 3 bolts and rear traction motor cable from the rear traction motor with transaxle assembly.
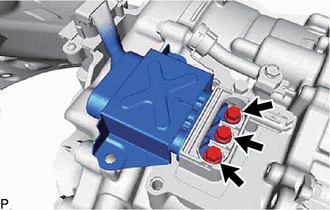
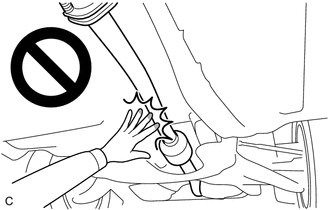
NOTICE:
- Protect the rear traction motor cable with a plastic bag or other protective material until immediately before reconnection.
- Do not allow foreign matter or water to enter the rear traction motor cable terminal or installation area.
-
Do not touch the rubber seal and terminals of the rear traction motor cable.
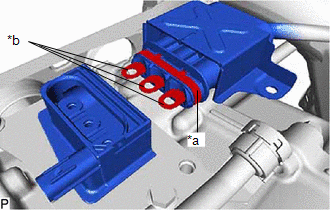
*a
Rubber Seal
*b
Terminal
|
(f) Protect the opening where the rear traction motor cable was removed with protective tape (non-residue type) to prevent the entry of foreign matter or water. |
|
17. REMOVE REAR TRACTION MOTOR WITH TRANSAXLE ASSEMBLY
(a) Using an engine sling device and chain block, hold the rear traction motor with transaxle assembly.
CAUTION:
- Do not lift the rear traction motor with transaxle assembly more than necessary.
- Check the center of gravity while lifting the rear traction motor with transaxle assembly.
NOTICE:
- Lightly shake the rear traction motor with transaxle assembly by hand to make sure it is securely held while performing work.
- Do not shake the rear traction motor with transaxle assembly excessively while holding it.
|
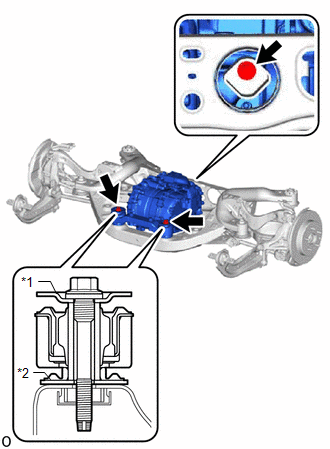
(b) Remove the 3 bolts, 2 upper differential mount stoppers, 2 lower differential mount stoppers and rear traction motor with transaxle assembly from the rear suspension member sub-assembly. NOTICE:
|
|
18. REMOVE WIRE HARNESS CLAMP BRACKET
|
(a) Remove the 4 bolts and 3 wire harness clamp brackets from the rear traction motor with transaxle assembly. |
|
19. REMOVE FRONT DIFFERENTIAL SUPPORT ASSEMBLY
|
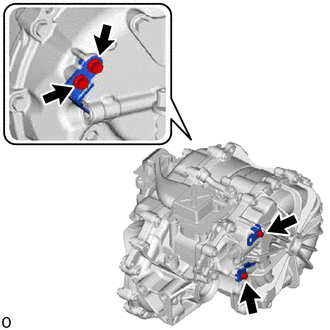
(a) Remove the 2 bolts and front differential support assembly from the rear traction motor with transaxle assembly. |
|

20. REMOVE REAR TRACTION MOTOR FILLER PLUG
HINT:
There is no need to remove this unless the rear traction motor filler plug is replaced.
|
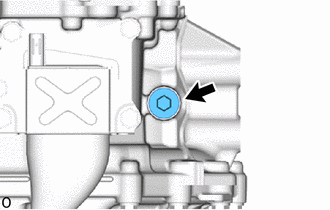
(a) Using a 10 mm hexagon socket wrench, remove the rear traction motor filler plug and gasket from the rear traction motor with transaxle assembly. |
|
|
|
|