| Last Modified: 05-08-2025 | 6.11:8.1.0 | Doc ID: RM100000001HCE2 |
| Model Year Start: 2019 | Model: RAV4 | Prod Date Range: [02/2019 - ] |
| Title: STEERING GEAR / LINKAGE: STEERING GEAR: REASSEMBLY; 2019 - 2025 MY RAV4 RAV4 HV [02/2019 - ] | ||
REASSEMBLY
PROCEDURE
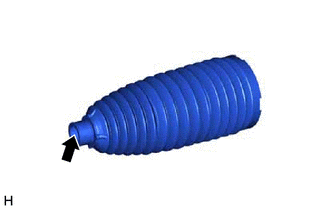
1. INSTALL NO. 2 STEERING RACK BOOT
(a) for Type A:
Apply lithium soap base glycol grease to the inside of the small opening and large opening of a new No. 2 steering rack boot.


|
Lithium Soap Base Glycol Grease |
(b) for Type B:
Apply lithium soap base glycol grease to the inside of the small opening of a new No. 2 steering rack boot.
|
|
Lithium Soap Base Glycol Grease |
(c) Install the No. 2 steering rack boot to the groove on the rack housing.
NOTICE:
- Be careful not to damage or twist the No. 2 steering rack boot.
- Make sure that the No. 2 steering rack boot is free of water, rust, foreign matter, etc.
- Do not touch the inside of the rack boot or rack bar when performing installation.
2. INSTALL NO. 1 STEERING RACK BOOT
HINT:
Perform the same procedure as for the No. 2 steering rack boot.
3. INSTALL NO. 2 STEERING RACK BOOT CLAMP (for LH Side)
(a) Temporarily install a new No. 2 steering rack boot clamp to the No. 2 steering rack boot.
NOTICE:
Do not damage the No. 2 steering rack boot.
HINT:
The protrusion of the No. 2 steering rack boot clamp can be installed at any position.
|
(b) Using SST, install the No. 2 steering rack boot clamp as shown in the illustration. SST: 09521-24010 NOTICE:
|
|
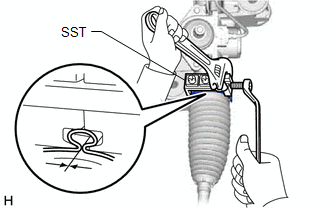
(c) Remove SST and measure the clearance of the No. 2 steering rack boot clamp.
Clearance:
for Type A
1.0 to 5.5 mm (0.0394 to 0.216 in.)
for Type B
2.5 to 4.0 mm (0.0985 to 0.157 in.)
4. INSTALL NO. 2 STEERING RACK BOOT CLAMP (for RH Side)
HINT:
Perform the same procedure as for the LH side.
5. INSTALL STEERING RACK BOOT CLIP (for LH Side)
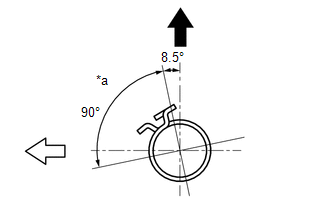
(a) for Type A:
Using pliers, install the steering rack boot clip.
HINT:
Make sure that the tabs of the steering rack boot clip are positioned within the area shown in the illustration.
|
*a |
Clip Tab Positioning Area |
|
|
Up |

|
Rear of Vehicle |
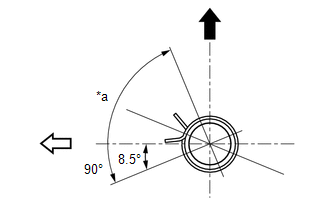
(b) for Type B:
Using pliers, install the steering rack boot clip.
HINT:
Make sure that the tabs of the steering rack boot clip are positioned within the area shown in the illustration.
|
*a |
Clip Tab Positioning Area |
|
|
Up |
|
|
Rear of Vehicle |
6. INSTALL STEERING RACK BOOT CLIP (for RH Side)
HINT:
Perform the same procedure as for the LH side.
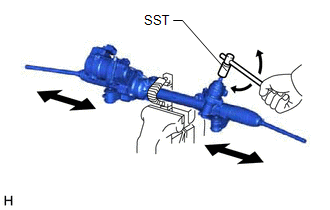
7. INSPECT RACK AND PINION POWER STEERING GEAR ASSEMBLY
|
(a) Using SST, rotate the pinion shaft to see if both the left and the right steering rack boots expand and contract smoothly. SST: 09616-00011 HINT: If the left and right steering rack boots do not expand and contract smoothly, use new No. 2 steering rack boot clamps and reinstall the steering rack boots. |
|
|
|
|