| Last Modified: 01-30-2024 | 6.11:8.1.0 | Doc ID: RM100000001FCMF |
| Model Year Start: 2019 | Model: RAV4 HV | Prod Date Range: [11/2018 - 02/2019] |
| Title: A25A-FXS (COOLING): RADIATOR: REMOVAL; 2019 MY RAV4 HV [11/2018 - 02/2019] | ||
REMOVAL
PROCEDURE
1. REMOVE FRONT FENDER FRONT SPLASH SHIELD RH
2. REMOVE FRONT FENDER FRONT SPLASH SHIELD LH
3. REMOVE NO. 1 ENGINE UNDER COVER
4. REMOVE NO. 2 ENGINE UNDER COVER ASSEMBLY
5. DRAIN ENGINE COOLANT
6. REMOVE FRONT BUMPER COVER
7. REMOVE NO. 2 FRONT BUMPER ENERGY ABSORBER
8. REMOVE FRONT BUMPER REINFORCEMENT SUB-ASSEMBLY
9. REMOVE INLET AIR CLEANER ASSEMBLY
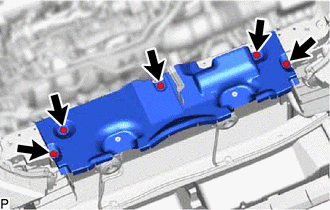
10. REMOVE UPPER RADIATOR AIR GUIDE PLATE
|
(a) Remove the 5 clips and radiator upper air guide plate. |
|
11. REMOVE THERMISTOR ASSEMBLY
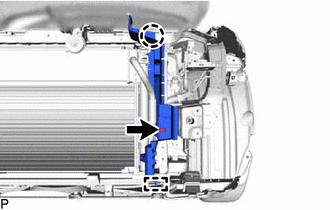
12. REMOVE NO. 1 RADIATOR AIR GUIDE LH
|
(a) Remove the clip. |
|
(b) Detach the claw and guide and remove the No. 1 radiator air guide LH.
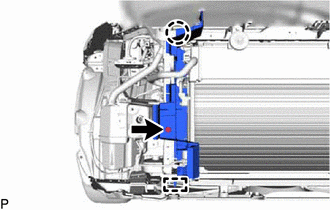
13. REMOVE NO. 1 RADIATOR AIR GUIDE RH
|
(a) Remove the clip. |
|
(b) Detach the claw and guide and remove the No. 1 radiator air guide RH.
14. REMOVE HOOD LOCK ASSEMBLY
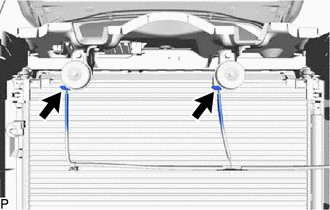
15. REMOVE UPPER RADIATOR SUPPORT SUB-ASSEMBLY
|
(a) Disconnect the 2 horn connectors. |
|
|
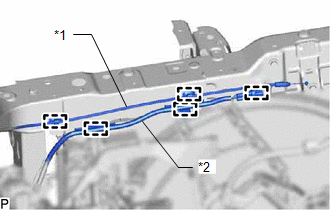
(b) Detach the 2 clamps and disconnect the hood lock control cable assembly from the upper radiator support sub-assembly. |
|
(c) Detach the 3 clamps amd disconnect the wire harness from the upper radiator support sub-assembly.
|
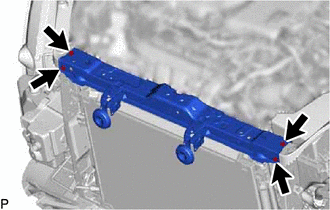
(d) Remove the 4 bolts and upper radiator support sub-assembly. |
|
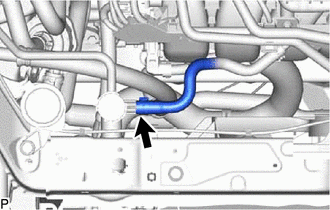
16. DISCONNECT NO. 5 WATER BY-PASS HOSE
|
(a) Slide the clip and disconnect the No. 5 water by-pass hose from the radiator assembly. |
|
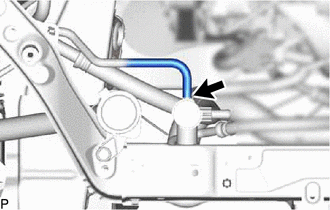
17. DISCONNECT NO. 6 WATER BY-PASS HOSE
|
(a) Disconnect the No. 6 water by-pass hose from the radiator assembly. |
|
18. DISCONNECT NO. 1 RADIATOR HOSE
|
(a) Detach the clamp and disconnect the No. 1 radiator hose from the fan with motor assembly. |
|
(b) Slide the clip and disconnect the No. 1 radiator hose from the radiator assembly.
19. DISCONNECT NO. 2 RADIATOR HOSE
|
(a) Detach the clamp and disconnect the No. 2 radiator hose from the fan with motor assembly. |
|
(b) Slide the clip and disconnect the No. 2 radiator hose from the radiator assembly.
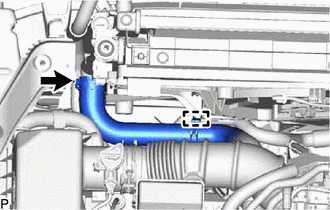
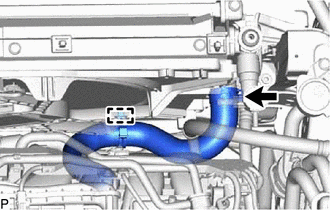
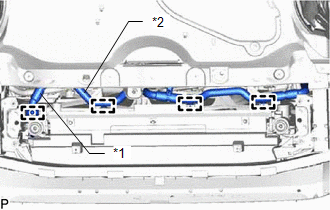
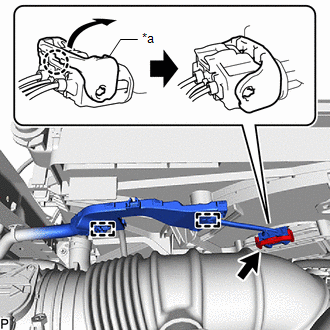
20. DISCONNECT INVERTER COOLING HOSE
|
(a) Detach the clamp and disconnect the No. 4 inverter cooling hose from the fan with motor assembly. |
|
(b) Detach the 3 clamps and disconnect the No. 5 inverter cooling hose from the fan with motor assembly.
21. REMOVE RADIATOR ASSEMBLY
|
(a) Detach the claw and raise the lock lever to disconnect the cooling fan motor connector as shown in the illustration. NOTICE: After disconnecting the cooling fan motor connector, make sure that dirt, water or other foreign matter does not contact the connecting parts of the cooling fan motor connector. |
|
(b) Detach the 2 wire harness clamps.
|
(c) Detach the 2 claws. |
|
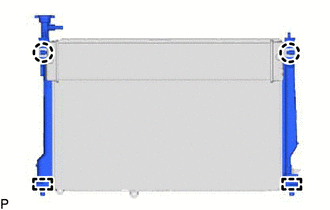
(d) Detach the 2 guides and disconnect the cooler condenser assembly with the radiator assembly (for Inverter Coolant) from the radiator assembly.
NOTICE:
Make sure not to damage the cooler condenser assembly with the radiator assembly (for Inverter Coolant) when disconnecting the cooler condenser assembly with the radiator assembly (for Inverter Coolant).
(e) Remove the radiator assembly with the fan with motor assembly from the vehicle body.
NOTICE:
Do not apply excessive force to the cooler condenser assembly with the radiator assembly (for Inverter Coolant) or pipe and hose when removing the radiator assembly with the fan with motor assembly.
|
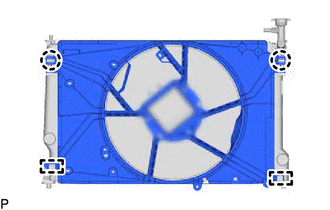
(f) Detach the 2 claws. |
|
(g) Detach the 2 guides and remove the fan with motor assembly from the radiator assembly.
NOTICE:
Do not damage the radiator assembly when removing the fan with motor assembly.
22. REMOVE RADIATOR SUPPORT CUSHION
(a) Remove the 2 radiator support cushions from the radiator assembly.
23. REMOVE LOWER RADIATOR SUPPORT
(a) Remove the 2 lower radiator supports from the radiator assembly.
24. REMOVE FILLER NECK
(a) Pull out the retainer to disengage the lock claws and pull off the filler neck.
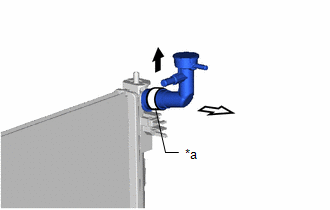
|
*a |
Retainer |

|
Pulling in this Direction |

|
Remove in this Direction |
NOTICE:
If the filler neck O-ring is damaged, replace it with a new one.
|
|
|
![2019 MY RAV4 HV [11/2018 - 02/2019]; A25A-FXS (ENGINE MECHANICAL): ENGINE ASSEMBLY: REMOVAL+](/t3Portal/stylegraphics/info.gif)
