| Last Modified: 01-30-2024 | 6.11:8.1.0 | Doc ID: RM100000001F9K8 |
| Model Year Start: 2019 | Model: RAV4 | Prod Date Range: [11/2018 - 08/2020] |
| Title: INTERIOR PANELS / TRIM: INSTRUMENT PANEL SAFETY PAD: INSTALLATION; 2019 - 2020 MY RAV4 RAV4 HV [11/2018 - 08/2020] | ||
INSTALLATION
PROCEDURE
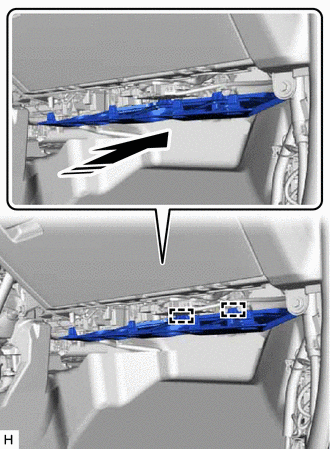
1. INSTALL INSTRUMENT PANEL SAFETY PAD ASSEMBLY
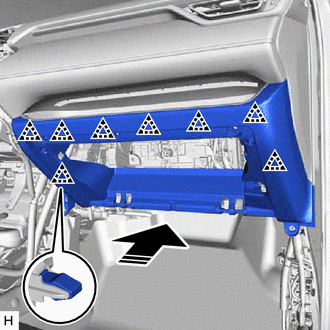
(a) Push in the direction indicated by the arrow shown in the illustration and insert the guide to set the instrument panel safety pad assembly.
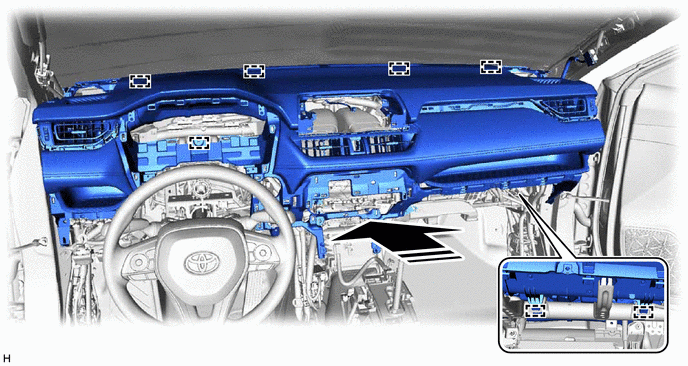

|
Install in this Direction |
- |
- |
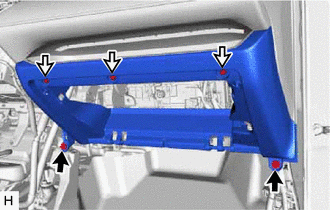
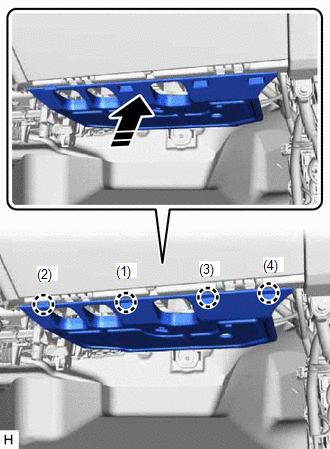
(b) Install the instrument panel safety pad assembly with the 5 bolts <B>, nut <E> and 2 clips <D>.
(c) Attach the clamp.


|
Bolt <B> |

|
Nut <E> |

|
Clip <D> |
- |
- |
|
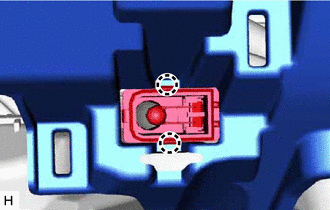
(d) for Automatic Air Conditioning System: Attach the claw to install the cooler (room temp. sensor) thermistor. |
|
|
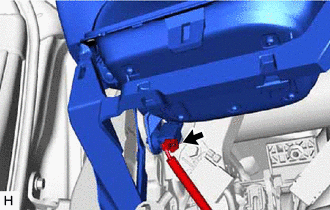
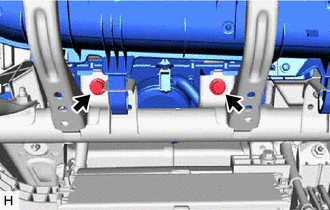
(e) Install the steering column assembly with 2 nuts for the instrument panel reinforcement assembly. Torque: 36 N·m {367 kgf·cm, 27 ft·lbf} |
|

|
(f) w/ Interior Illumination: Connect the connector. |
|
|
(g) Connect each connector. |
|
(h) Install the 2 bolts <C>.
|
|
Bolt <C> |
Torque:
20 N·m {204 kgf·cm, 15 ft·lbf}
|
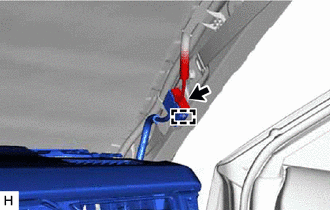
(i) Connect the connector and attach the guide. |
|
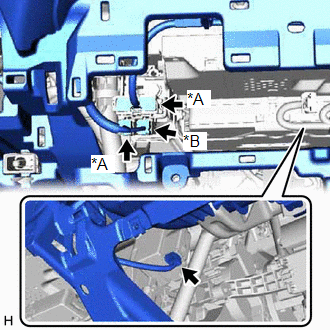
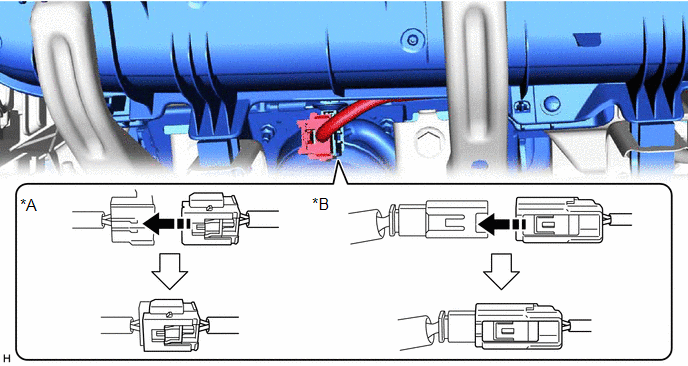
(j) Connect the airbag connector.
NOTICE:
When handling the airbag connector, take care not to damage the airbag wire harness.
|
*A |
for Dual Type |
*B |
for Single Type |
|
|
Slide in this Direction |
- |
- |
2. INSTALL LOWER STEERING COLUMN COVER
Click here
![2019 - 2024 MY RAV4 RAV4 HV [11/2018 - ]; WIPER / WASHER: WIPER SWITCH: INSTALLATION+](/t3Portal/stylegraphics/info.gif)
3. INSTALL HAZARD WARNING SIGNAL SWITCH ASSEMBLY
Click here
4. INSTALL FRONT NO. 2 SPEAKER ASSEMBLY
Click here
5. INSTALL NO. 2 SPEAKER HOLE COVER
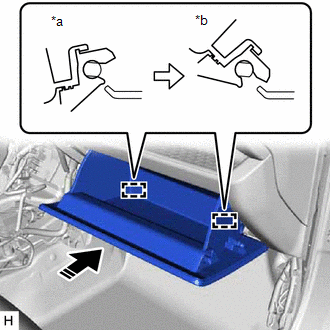
(a) Insert the guide in direction indicated by the arrow shown in the illustration.
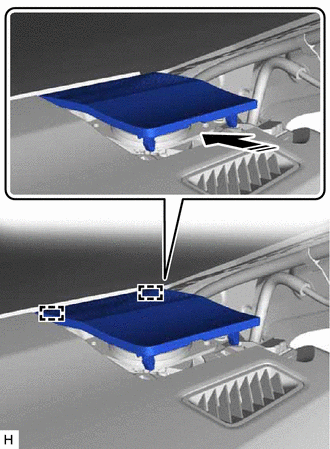
|
|
Install in this Direction |
(b) Attach the clip to install the No. 2 speaker hole cover as shown in the illustration.
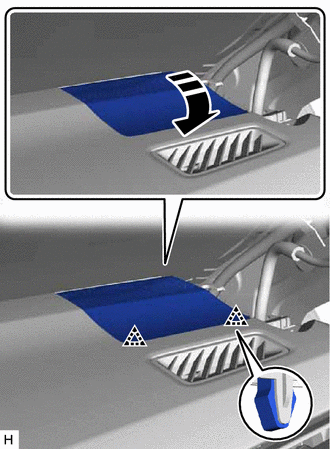
|
|
Install in this Direction |
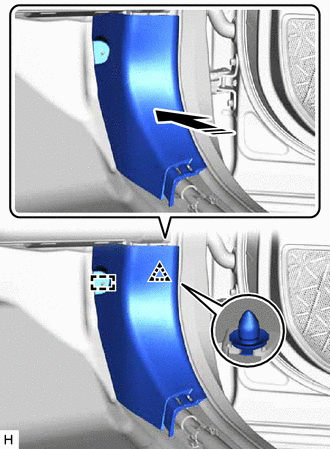
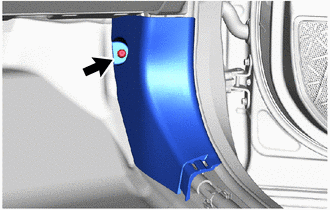
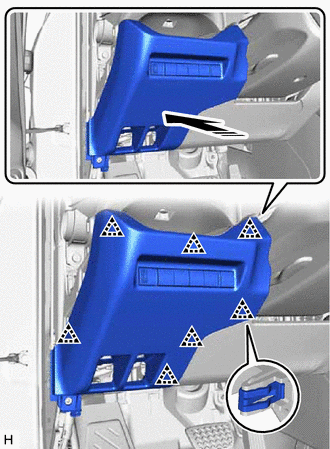
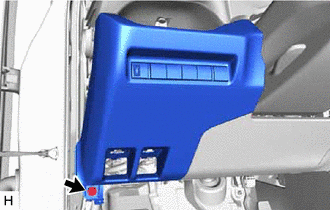
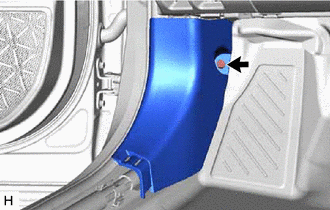
6. INSTALL FRONT PILLAR GARNISH RH
HINT:
Use the same procedure described for the LH side.
Click here
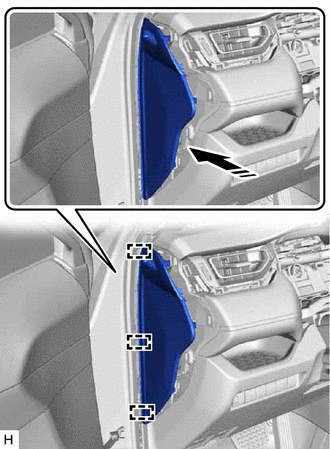
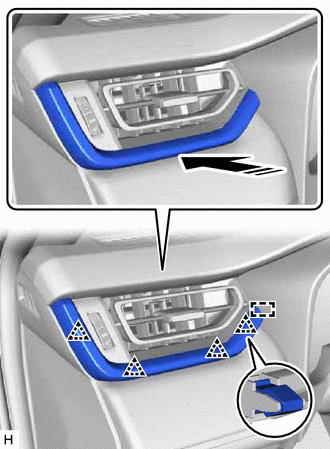
7. INSTALL INSTRUMENT SIDE PANEL RH
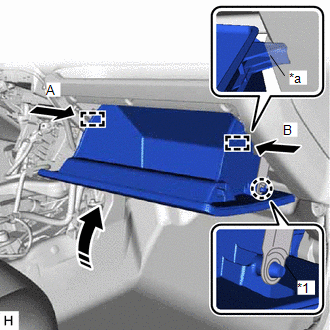
(a) Attach the guide as shown in the illustration.
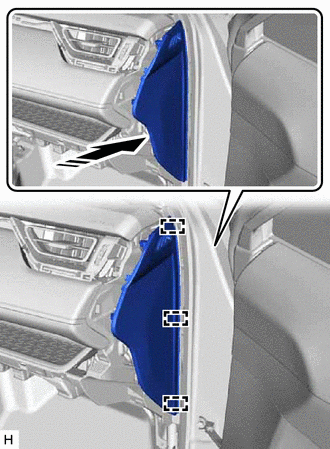
|
|
Install in this Direction |
(b) Attach the clip to install the instrument side panel RH as shown in the illustration.
|
|
Install in this Direction |
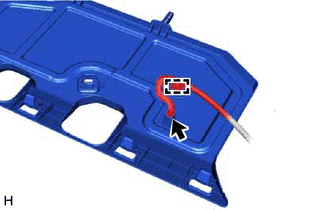
8. INSTALL NO. 2 INSTRUMENT CLUSTER FINISH PANEL GARNISH
(a) Attach the clip to install the No. 2 instrument cluster finish panel garnish as shown in the illustration.
|
|
Install in this Direction |
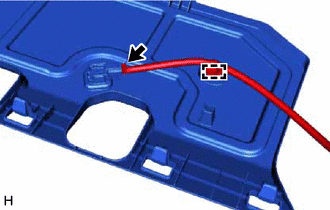
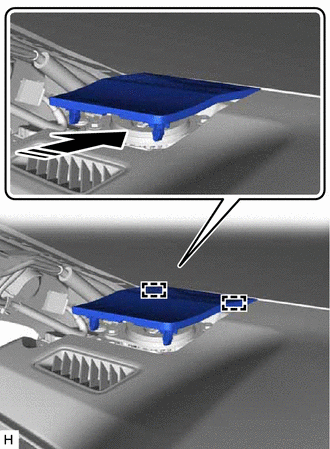
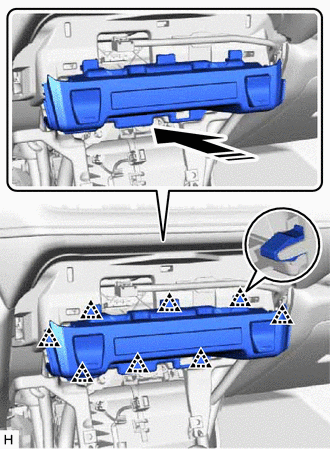
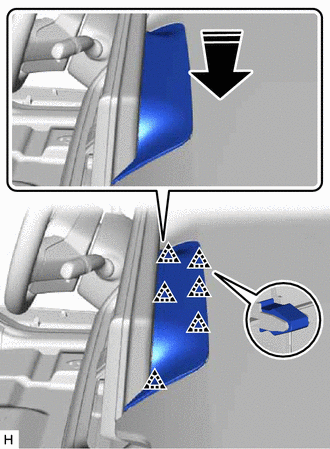
9. INSTALL LOWER NO. 2 INSTRUMENT PANEL FINISH PANEL
(a) Attach the clip to install the lower No. 2 instrument panel finish panel as shown in the illustration.
|
|
Install in this Direction |
(b) Install the 3 screws <A> and 2 bolts <B>.
|
|
Bolt <B> |
|
|
Screw <A> |
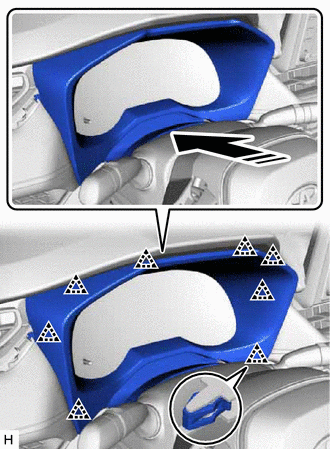
10. INSTALL GLOVE COMPARTMENT DOOR ASSEMBLY
(a) With the glove compartment door assembly in the assembly position, attach the hinge horizontally.
|
*a |
Assembly Position |
|
*b |
Closed Position |
|
|
Install in this Direction |
NOTICE:
Attach the hinges from the top will deform the hinges. Be sure to install the glove compartment door assembly horizontally.
(b) Slightly bend the stoppers (A) and (B) in the directions indicated by the arrows in the illustration and attach the stoppers to install the glove compartment door assembly.
|
*1 |
Glove Compartment Door Stopper Sub-assembly |
|
*a |
Stopper |
|
|
Install in this Direction |
(c) Attach the claw to install the glove compartment door stopper sub-assembly.
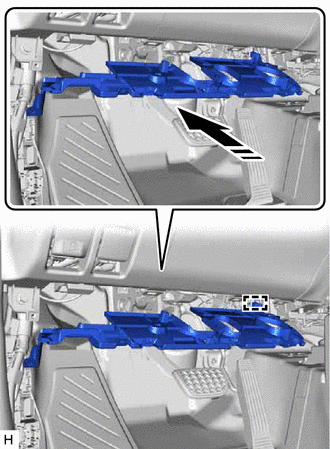
11. INSTALL NO. 2 INSTRUMENT PANEL UNDER COVER SUB-ASSEMBLY
(a) w/ Foot light:
Attach the clamp and connect the connector.
HINT:
Even if there is no foot light, if there is a connector, connect the connector and attach the clamp.
(b) Insert the guide in the direction indicated by the arrow shown in the illustration.
|
|
Install in this Direction |
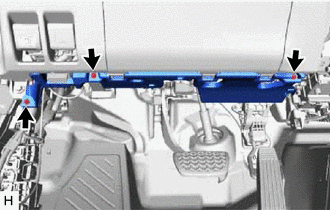
(c) Lift up in the installation direction, attach the claw in the order shown in the illustration to install the No. 2 instrument panel under cover sub-assembly.
|
|
Install in this Direction |
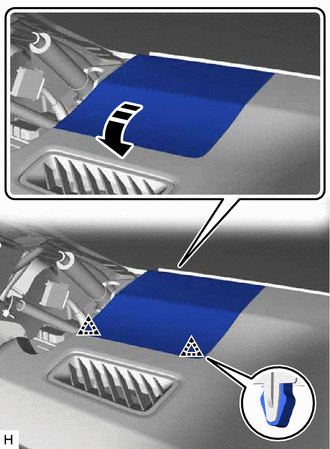
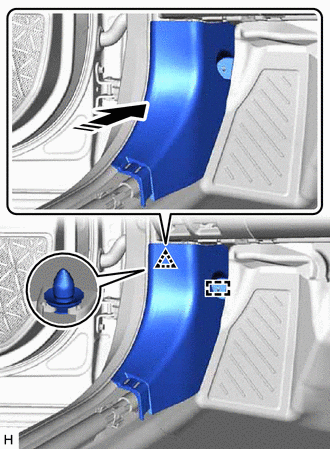
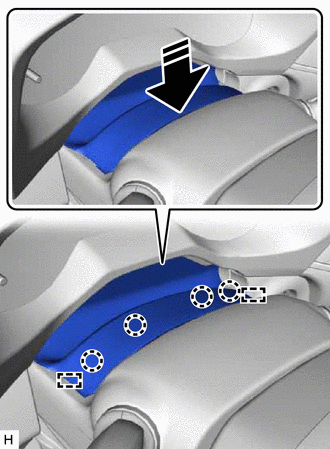
12. INSTALL COWL SIDE TRIM BOARD RH
(a) Attach the clamp and clip to install the cowl side trim board RH in the direction indicated by the arrow shown in the illustration.
|
|
Install in this Direction |
|
(b) Install the cap nut. |
|
13. INSTALL FRONT DOOR SCUFF PLATE RH
HINT:
Use the same procedure described for the LH side.
Click here
14. INSTALL FRONT DOOR OPENING TRIM WEATHERSTRIP RH
(a) Install the front door opening trim weatherstrip RH.
15. INSTALL FRONT NO. 2 SPEAKER ASSEMBLY
Click here
16. INSTALL NO. 1 SPEAKER HOLE COVER
(a) Insert the guide in direction indicated by the arrow shown in the illustration.
|
|
Install in this Direction |
(b) Attach the clip to install the No. 1 speaker hole cover as shown in the illustration.
|
|
Install in this Direction |
17. INSTALL FRONT PILLAR GARNISH LH
Click here
18. INSTALL LOWER NO. 1 INSTRUMENT PANEL AIRBAG ASSEMBLY
Click here
19. INSTALL LOWER INSTRUMENT PANEL FINISH PANEL ASSEMBLY
(a) w/ Smart Key System:
Connect the connector.
(b) Attach the clip to install the lower instrument panel finish panel assembly as shown in the illustration.

|
|
Install in this Direction |
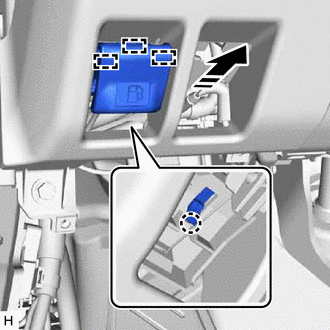
20. INSTALL FUSE BOX OPENING COVER
(a) for HV Model:
Connect the connector.
|
(b) Attach the clamp. |
|

(c) Connect each connector.
(d) Attach the clip to install the fuse box opening cover as shown in the illustration.
|
|
Install in this Direction |
|
|
Bolt <B> |
(e) Install the bolt <B>.
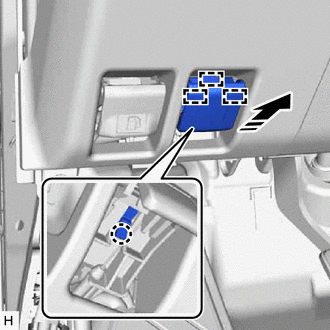
21. INSTALL FUEL LID LOCK OPEN LEVER SUB-ASSEMBLY (for Gasoline Model)
(a) Attach the guide and claw to install the fuel lid lock open lever sub-assembly in the direction indicated by the arrow as shown in the illustration.
|
|
Install in this Direction |
22. INSTALL HOOD LOCK CONTROL LEVER SUB-ASSEMBLY
(a) Attach the guide and claw to install the hood lock control lever sub-assembly in the direction indicated by the arrow shown in the illustration.
|
|
Install in this direction |
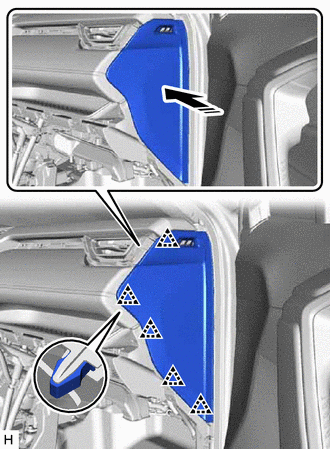
23. INSTALL INSTRUMENT SIDE PANEL LH
(a) Attach the guide as shown in the illustration.
|
|
Install in this Direction |
(b) Attach the clip to install the instrument side panel LH as shown in the illustration.
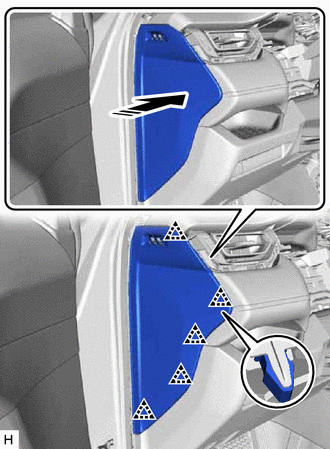
|
|
Install in this Direction |
24. INSTALL FRONT DOOR OPENING TRIM WEATHERSTRIP LH
(a) Install the front door opening trim weatherstrip LH.
25. INSTALL NO. 1 INSTRUMENT PANEL UNDER COVER SUB-ASSEMBLY
|
(a) w/ Foot light: (1) Attach the claw to install the DLC3. (2) Attach the clamp and connect the connector. |
|
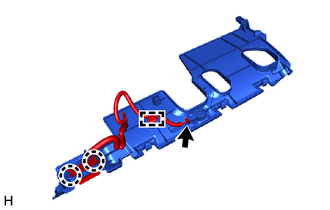
(b) w/o Foot Light:
|
(1) Attach the claw to install the DLC3. HINT: Even if there is no foot light, if there is a connector, connect the connector and attach the clamp. |
|
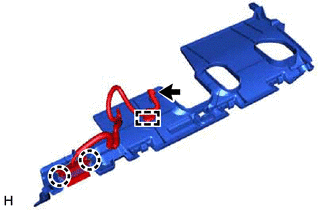
(c) Insert the guide in the direction indicated by the arrow shown in the illustration.
|
|
Install in this Direction |
(d) Lift up in the direction indicated by the arrow shown in the illustration to attach the guide and claw to install the No. 1 instrument panel under cover sub-assembly.
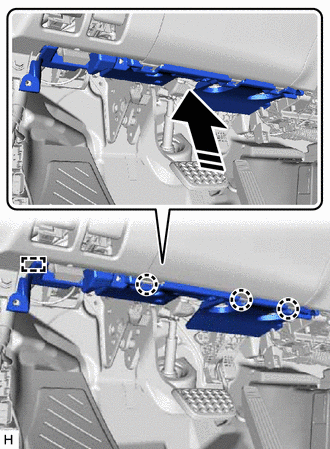
|
|
Install in this Direction |
(e) Install the 3 screws <A>.
|
|
Screw <A> |
26. INSTALL COWL SIDE TRIM BOARD LH
(a) Attach the guide and clip to install the cowl side trim board LH in the direction indicated by the arrow shown in the illustration.
|
|
Install in this Direction |
|
(b) Install the cap nut. |
|
27. INSTALL FRONT DOOR SCUFF PLATE LH
Click here
28. INSTALL LOWER CENTER INSTRUMENT PANEL FINISH PANEL
(a) Connect each connector.
(b) Attach the clip to install the lower center instrument panel finish panel.
|
|
Install in this Direction |
29. INSTALL AIR CONDITIONING CONTROL ASSEMBLY
Click here
30. INSTALL COMBINATION METER ASSEMBLY
Click here
31. INSTALL INSTRUMENT CLUSTER FINISH PANEL ASSEMBLY
(a) Attach the clip to install the instrument cluster finish panel assembly.
|
|
Install in this Direction |
(b) Attach the claw and guide.
|
|
Install in this Direction |
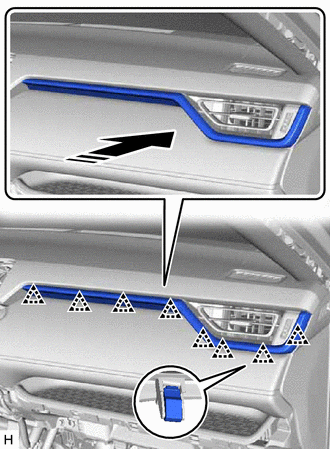
32. INSTALL INSTRUMENT CLUSTER FINISH PANEL GARNISH
(a) Attach the guide and clip to install the instrument cluster finish panel garnish as shown in the illustration.
|
|
Install in this Direction |
33. INSTALL RADIO AND DISPLAY RECEIVER ASSEMBLY WITH BRACKET
Click here
34. INSTALL CENTER UPPER INSTRUMENT CLUSTER FINISH PANEL
(a) Attach the clip to install the center upper instrument cluster finish panel.
|
|
Install in this Direction |
35. INSTALL CONSOLE BOX ASSEMBLY
Click here
36. CONNECT CABLE TO NEGATIVE AUXILIARY BATTERY TERMINAL
-
for A25A-FKS:
Click here
-
for A25A-FXS:
Click here
NOTICE:
When disconnecting the cable, some systems need to be initialized after the cable is reconnected.
Click here
37. INSTALL BATTERY HOLE COVER (for HV Model)
Click here
38. INSTALL REAR NO. 2 FLOOR BOARD (for HV Model)
Click here
39. INSTALL DECK BOARD ASSEMBLY (for HV Model)
Click here
40. CHECK SRS WARNING LIGHT
(a) w/ Occupant Classification System:
Click here
(b) w/o Occupant Classification System:
Click here
41. PERFORM DIAGNOSTIC SYSTEM CHECK
(a) w/ Occupant Classification System:
Click here
(b) w/o Occupant Classification System:
Click here
42. PERFORM SYSTEM INITIALIZATION AND CALIBRATION
Click here
|
|
|