| Last Modified: 09-10-2025 | 6.11:8.1.0 | Doc ID: RM100000001YV9C |
| Model Year Start: 2022 | Model: Avalon HV | Prod Date Range: [08/2021 - ] |
| Title: A25A-FXS (EMISSION CONTROL): EGR COOLER: INSTALLATION; 2022 MY Avalon HV [08/2021 - ] | ||
INSTALLATION
PROCEDURE
PROCEDURE
1. INSTALL EGR COOLER ASSEMBLY
|
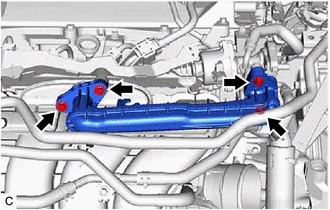
(a) Using an 8 mm socket wrench, loosen the 4 bolts of the No. 1 EGR pipe sub-assembly. HINT:
|
|
|
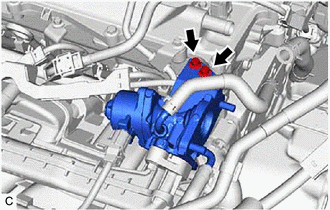
(b) Using an 8 mm socket wrench, loosen the 2 bolts of the EGR valve assembly. |
|
|
(c) Install a new EGR cooler gasket to the EGR cooler assembly. NOTICE: Make sure that the claws of the EGR cooler gasket are toward the EGR cooler assembly side. |
|
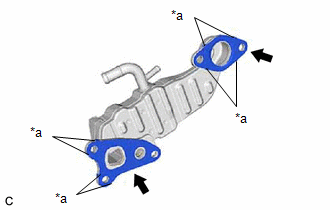
(d) Install a new EGR valve gasket to the EGR cooler assembly.
NOTICE:
Make sure that the claws of the EGR valve gasket are toward the EGR cooler assembly side.
|
(e) Type A: (1) Temporarily install the EGR cooler assembly to the cylinder head sub-assembly and EGR valve assembly with the 3 bolts and 2 nuts. (2) Tighten the 3 bolts and 2 nuts in the order shown in the illustration. Torque: 24 N·m {245 kgf·cm, 18 ft·lbf} |
|

(f) Type B:
(1) Temporarily install the EGR cooler assembly to the cylinder head sub-assembly and EGR valve assembly with the 2 bolts and 3 nuts.
(2) Tighten the 2 bolts and 3 nuts in the order shown in the illustration.
Torque:
24 N·m {245 kgf·cm, 18 ft·lbf}
(g) Connect the No. 3 water by-pass hose and No. 4 water by-pass hose to the EGR cooler assembly and slide the 2 clips to secure them.
(h) Using an 8 mm socket wrench, tighten the 2 bolts of the EGR valve assembly.
Torque:
10 N·m {102 kgf·cm, 7 ft·lbf}
(i) Using an 8 mm socket wrench, tighten the 4 bolts of the No. 1 EGR pipe sub-assembly.
Torque:
10 N·m {102 kgf·cm, 7 ft·lbf}
2. INSTALL INVERTER WITH CONVERTER ASSEMBLY
Click here
![2019 - 2022 MY Avalon HV [04/2018 - ]; HYBRID / BATTERY CONTROL: INVERTER WITH CONVERTER: INSTALLATION](/t3Portal/stylegraphics/info.gif)
3. ADD ENGINE COOLANT (for Engine)
Click here
4. INSPECT FOR COOLANT LEAK (for Engine)
Click here
5. INSPECT FOR EXHAUST GAS LEAK
Click here
|
|
|