| Last Modified: 08-21-2023 | 6.11:8.1.0 | Doc ID: RM100000001PX3M |
| Model Year Start: 2021 | Model: Avalon | Prod Date Range: [08/2020 - ] |
| Title: A25A-FKS (ENGINE CONTROL): ACTIVE CONTROL ENGINE MOUNT: REMOVAL; 2021 - 2022 MY Avalon [08/2020 - ] | ||
REMOVAL
PROCEDURE
1. REMOVE VACUUM SWITCHING VALVE (for Active Control Engine Mount System)
Click here
![2021 - 2022 MY Avalon [08/2020 - ]; A25A-FKS (ENGINE CONTROL): VACUUM SWITCHING VALVE (for Engine Mounting): REMOVAL](/t3Portal/stylegraphics/info.gif)
2. REMOVE FRONT WHEEL OPENING EXTENSION PAD LH
Click here
3. REMOVE FRONT WHEEL OPENING EXTENSION PAD RH
Click here
4. REMOVE NO. 1 ENGINE UNDER COVER
Click here
5. REMOVE NO. 2 ENGINE UNDER COVER ASSEMBLY
Click here
6. REMOVE FRONT ENGINE MOUNTING INSULATOR
|
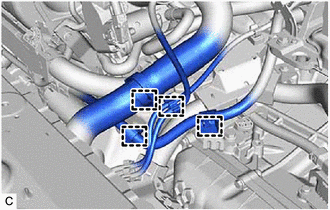
(a) Disengage the 4 clamps to separate the radiator hose, vacuum hoses and No. 2 engine wire from the No. 1 radiator bracket. |
|
|
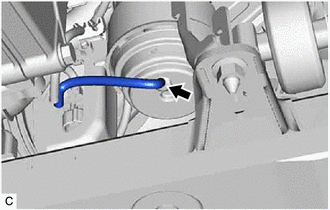
(b) Remove the bolt and No. 1 radiator bracket from the front engine mounting bracket. |
|
|
(c) Disengage the 2 clamps to separate the vacuum hoses from the front engine mounting insulator. |
|

|
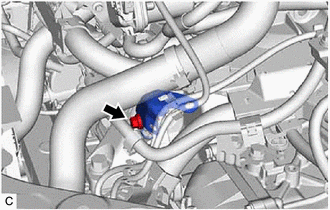
(d) Remove the vacuum hose from the front engine mounting insulator. |
|
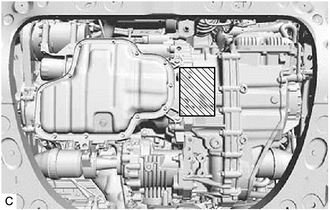
(e) Support the engine assembly with transaxle using a jack and wooden block.

|
Wooden Block Placement Location |
|
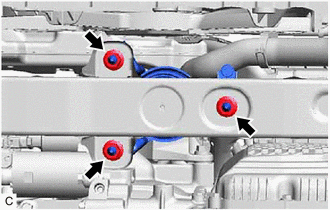
(f) Remove the 4 bolts and front engine mounting bracket. |
|
|
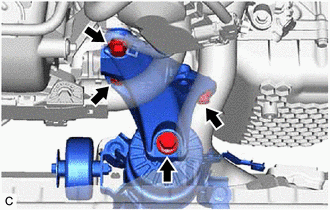
(g) Remove the 3 nuts and front engine mounting insulator from the front frame assembly. |
|
|
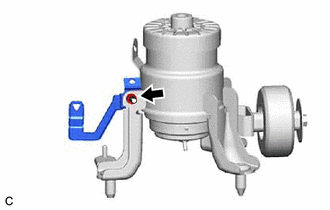
(h) Remove the nut and stay from the front engine mounting insulator. |
|
|
|
|