| Last Modified: 08-21-2023 | 6.11:8.1.0 | Doc ID: RM100000001B4F4 |
| Model Year Start: 2019 | Model: Avalon HV | Prod Date Range: [04/2018 - ] |
| Title: A25A-FXS (ENGINE CONTROL): CAMSHAFT OIL CONTROL SOLENOID: REMOVAL; 2019 - 2022 MY Avalon HV [04/2018 - ] | ||
REMOVAL
CAUTION / NOTICE / HINT
NOTICE:
This procedure includes the removal of small-head bolts. Refer to Small-Head Bolts of Basic Repair Hint to identify the small-head bolts.
Click here
![2019 - 2022 MY Avalon Avalon HV [04/2018 - ]; INTRODUCTION: REPAIR INSTRUCTION: PRECAUTION](/t3Portal/stylegraphics/info.gif)
PROCEDURE
1. REMOVE NO. 1 ENGINE COVER SUB-ASSEMBLY
Click here
2. REMOVE CAM TIMING OIL CONTROL SOLENOID ASSEMBLY
|
(a) Disconnect the cam timing oil control solenoid assembly connector. |
|
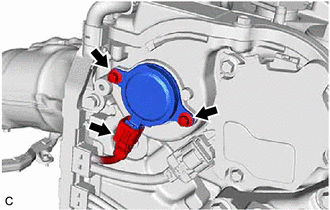
(b) Using an 8 mm socket wrench, remove the 2 bolts and cam timing oil control solenoid assembly from the No. 2 timing chain cover assembly.
NOTICE:
If the cam timing oil control solenoid assembly has been struck or dropped, replace it.
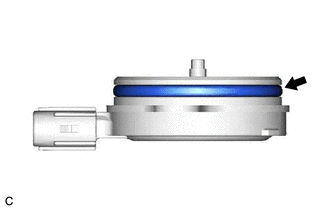
3. REMOVE O-RING
HINT:
Perform this procedure only when replacement of the O-ring is necessary.
|
(a) Remove the O-ring from the cam timing oil control solenoid assembly. NOTICE:
|
|
|
|
|