| Last Modified: 08-21-2023 | 6.11:8.1.0 | Doc ID: RM100000001AYSO |
| Model Year Start: 2019 | Model: Avalon | Prod Date Range: [04/2018 - ] |
| Title: 2GR-FKS (ENGINE CONTROL): CAMSHAFT POSITION SENSOR: INSTALLATION; 2019 - 2022 MY Avalon [04/2018 - ] | ||
INSTALLATION
PROCEDURE
1. INSTALL VVT SENSOR (for Exhaust Side of Bank 2)
(a) Apply a light coat of engine oil to the O-ring of the VVT sensor.
NOTICE:
If reusing the VVT sensor, be sure to inspect the O-ring.
(b) Clean the bolt and bolt hole.
|
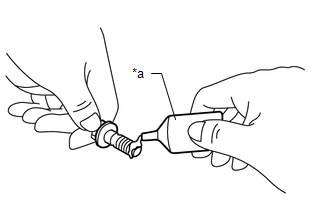
(c) Apply adhesive to 2 or 3 threads at the end of the bolt. Adhesive: Toyota Genuine Adhesive 1324, Three Bond 1324 or equivalent |
|
(d) Install the VVT sensor to the cylinder head cover sub-assembly LH with the bolt.
Torque:
10 N·m {102 kgf·cm, 7 ft·lbf}
NOTICE:
- If the VVT sensor has been struck or dropped, replace it.
- Make sure that the O-ring is not cracked or moved out of place when installing the VVT sensor.
(e) Connect the VVT sensor connector.
2. INSTALL VVT SENSOR (for Intake Side of Bank 2)
(a) Apply a light coat of engine oil to the O-ring of the VVT sensor.
NOTICE:
If reusing the VVT sensor, be sure to inspect the O-ring.
(b) Clean the bolt and bolt hole.
|
(c) Apply adhesive to 2 or 3 threads at the end of the bolt. Adhesive: Toyota Genuine Adhesive 1324, Three Bond 1324 or equivalent |
|
(d) Install the VVT sensor to the cylinder head cover sub-assembly LH with the bolt.
Torque:
10 N·m {102 kgf·cm, 7 ft·lbf}
NOTICE:
- If the VVT sensor has been struck or dropped, replace it.
- Make sure that the O-ring is not cracked or moved out of place when installing the VVT sensor.
(e) Connect the VVT sensor connector.
3. INSTALL VVT SENSOR (for Exhaust Side of Bank 1)
(a) Apply a light coat of engine oil to the O-ring of the VVT sensor.
NOTICE:
If reusing the VVT sensor, be sure to inspect the O-ring.
(b) Clean the bolt and bolt hole.
|
(c) Apply adhesive to 2 or 3 threads at the end of the bolt. Adhesive: Toyota Genuine Adhesive 1324, Three Bond 1324 or equivalent |
|
(d) Install the VVT sensor to the cylinder head cover sub-assembly with the bolt.
Torque:
10 N·m {102 kgf·cm, 7 ft·lbf}
NOTICE:
- If the VVT sensor has been struck or dropped, replace it.
- Make sure that the O-ring is not cracked or moved out of place when installing the VVT sensor.
(e) Connect the VVT sensor connector.
4. INSTALL VVT SENSOR (for Intake Side of Bank 1)
(a) Apply a light coat of engine oil to the O-ring of the VVT sensor.
NOTICE:
If reusing the VVT sensor, be sure to inspect the O-ring.
(b) Clean the bolt and bolt hole.
|
(c) Apply adhesive to 2 or 3 threads at the end of the bolt. Adhesive: Toyota Genuine Adhesive 1324, Three Bond 1324 or equivalent |
|
(d) Install the VVT sensor to the cylinder head cover sub-assembly with the bolt.
Torque:
10 N·m {102 kgf·cm, 7 ft·lbf}
NOTICE:
- If the VVT sensor has been struck or dropped, replace it.
- Make sure that the O-ring is not cracked or moved out of place when installing the VVT sensor.
(e) Connect the VVT sensor connector.
5. INSTALL INTAKE AIR SURGE TANK ASSEMBLY
Click here
![2019 - 2022 MY Avalon [04/2018 - ]; 2GR-FKS (INTAKE / EXHAUST): INTAKE MANIFOLD: INSTALLATION](/t3Portal/stylegraphics/info.gif)
6. INSPECT FOR ENGINE OIL LEAK
Click here
|
|
|