| Last Modified: 08-21-2023 | 6.11:8.1.0 | Doc ID: RM100000001AQVP |
| Model Year Start: 2019 | Model: Avalon HV | Prod Date Range: [04/2018 - 08/2019] |
| Title: DOOR / HATCH: HOOD LOCK CONTROL CABLE ASSEMBLY: REMOVAL; 2019 MY Avalon Avalon HV [04/2018 - 08/2019] | ||
REMOVAL
PROCEDURE
1. REMOVE FRONT WHEEL LH
Click here
![2019 - 2022 MY Avalon Avalon HV [04/2018 - ]; MAINTENANCE: TIRE AND WHEEL: REMOVAL+](/t3Portal/stylegraphics/info.gif)
2. REMOVE FRONT WHEEL OPENING EXTENSION PAD LH
HINT:
Use the same procedure as for the RH side.
Click here
3. REMOVE FRONT FENDER SPLASH SHIELD SUB-ASSEMBLY LH
HINT:
Use the same procedure as for the RH side.
Click here
4. REMOVE COOL AIR INTAKE DUCT SEAL
Click here
5. REMOVE HOOD LOCK ASSEMBLY
|
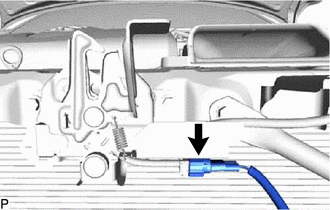
(a) Disconnect the connector. |
|
|
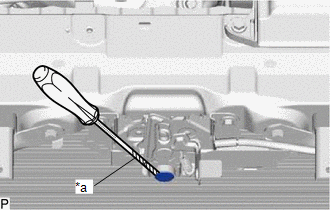
(b) Using a screwdriver with its tip wrapped with protective tape, remove the hood lock nut cap. |
|
|
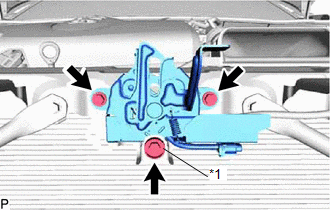
(c) Remove the 2 bolts and hood lock bolt. |
|
|
(d) Disconnect the hood lock control cable assembly to remove the hood lock assembly. |
|
6. REMOVE FRONT DOOR SCUFF PLATE LH
Click here
7. REMOVE COWL SIDE TRIM SUB-ASSEMBLY LH
Click here
8. REMOVE NO. 1 INSTRUMENT PANEL UNDER COVER SUB-ASSEMBLY
Click here
9. DISCONNECT HOOD LOCK CONTROL LEVER SUB-ASSEMBLY
Click here
10. REMOVE HOOD LOCK CONTROL LEVER SUB-ASSEMBLY
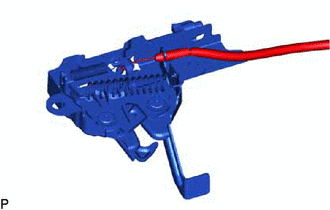
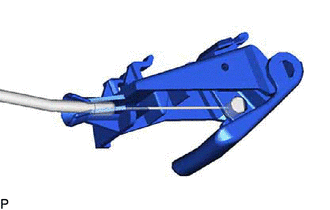
(a) for Type A:
|
(1) Disconnect the hood lock control cable assembly to remove the hood lock control lever sub-assembly. HINT: When changing the hood lock control lever sub-assembly from type A to type B, the hood lock control cable assembly must also be changed to type B. |
|
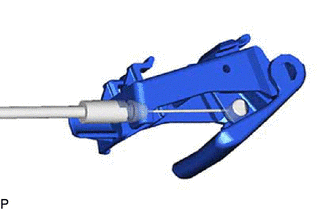
(b) for Type B:
|
(1) Disconnect the hood lock control cable assembly to remove the hood lock control lever sub-assembly. HINT: When changing the hood lock control lever sub-assembly from type B to type A, the hood lock control cable assembly must also be changed to type A. |
|
11. REMOVE HOOD LOCK CONTROL CABLE ASSEMBLY
|
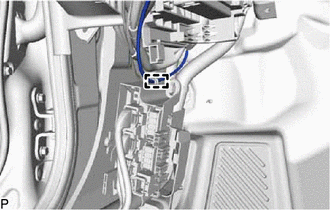
(a) Disengage the clamp. |
|
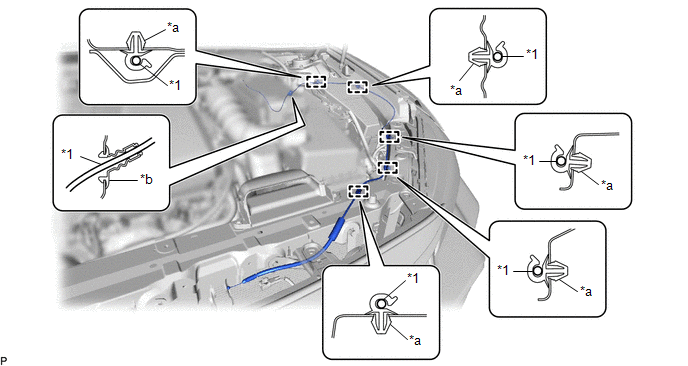
(b) Using a screwdriver, disengage the 5 clamps and grommet as shown in the illustration.
|
*1 |
Hood Lock Control Cable Assembly |
- |
- |
|
*a |
Clamp |
*b |
Grommet |
HINT:
Tape the screwdriver tip before use.
(c) Pull the hood lock control cable assembly from the engine compartment to remove it.
HINT:
- When changing the hood lock control cable assembly from type A to type B, the hood lock control lever sub-assembly must also be changed to type B.
- When changing the hood lock control cable assembly from type B to type A, the hood lock control lever sub-assembly must also be changed to type A.
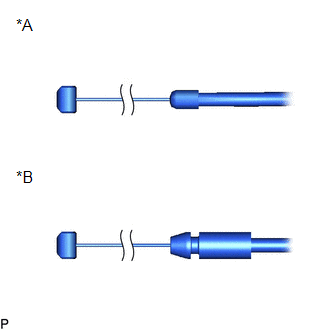
|
*A |
Type A |
|
*B |
Type B |
|
|
|