| Last Modified: 02-14-2025 | 6.11:8.1.0 | Doc ID: RM100000001KZ4P |
| Model Year Start: 2020 | Model: Camry HV | Prod Date Range: [09/2019 - 10/2020] |
| Title: CELLULAR COMMUNICATION: DCM(TELEMATICS TRANSCEIVER): REMOVAL; 2020 MY Camry HV [09/2019 - 10/2020] | ||
REMOVAL
CAUTION / NOTICE / HINT
The necessary procedures (adjustment, calibration, initialization, or registration) that must be performed after parts are removed and installed, or replaced during DCM (telematics transceiver) removal/installation are shown below.
Necessary Procedures After Parts Removed/Installed/Replaced
|
Replaced Part or Performed Procedure |
Necessary Procedure |
Effect/Inoperative Function when Necessary Procedure not Performed |
Link |
|---|---|---|---|
| *: for Toyota Entune Remote Connect Compatible Type | |||
|
Replacement of DCM (telematics transceiver) |
DCM activation |
Safety connect system |
|
|
Replacement of DCM (telematics transceiver)* |
Code registration (Smart key System (for Start Function)) |
Telematics system |
|
PROCEDURE
1. REMOVE NO. 1 METER HOOD CLUSTER
2. REMOVE NO. 2 INSTRUMENT PANEL GARNISH SUB-ASSEMBLY
3. REMOVE LOWER CENTER INSTRUMENT PANEL FINISH PANEL
4. REMOVE LOWER INSTRUMENT PANEL FINISH PANEL ASSEMBLY
5. REMOVE NO. 3 INSTRUMENT PANEL REGISTER ASSEMBLY
6. REMOVE AIR CONDITIONING CONTROL ASSEMBLY (for 7 Inch Display)
7. REMOVE RADIO AND DISPLAY RECEIVER ASSEMBLY WITH BRACKET (for 7 Inch Display)
8. REMOVE RADIO AND DISPLAY RECEIVER ASSEMBLY WITH BRACKET (for 8 Inch Display)
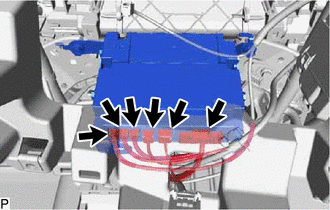
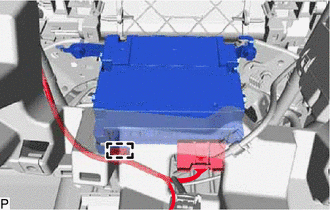
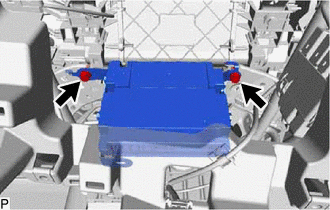
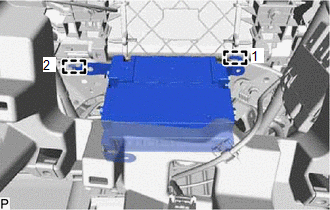
9. REMOVE DCM (TELEMATICS TRANSCEIVER) WITH BRACKET
|
(a) Disconnect the 6 connectors. |
|
|
(b) Disengage the clamp. |
|
|
(c) Remove the 2 bolts. |
|
|
(d) Disengage the 2 guides in the order shown in the illustration to remove the DCM (telematics transceiver) with bracket. |
|
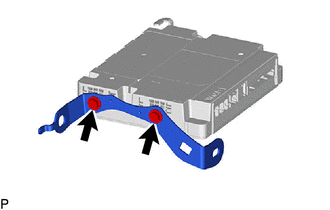
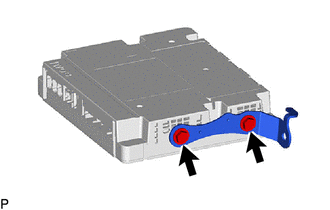
10. REMOVE NO. 1 TELEPHONE BRACKET
|
(a) Remove the 2 screws and No. 1 telephone bracket. |
|
11. REMOVE NO. 2 TELEPHONE BRACKET
|
(a) Remove the 2 screws and No. 2 telephone bracket. |
|
12. REMOVE DCM (TELEMATICS TRANSCEIVER)
|
|
|
![2020 - 2024 MY Camry HV [09/2019 - ]; CELLULAR COMMUNICATION: SAFETY CONNECT SYSTEM: DCM ACTIVATION](/t3Portal/stylegraphics/info.gif)
