| Last Modified: 02-14-2025 | 6.11:8.1.0 | Doc ID: RM10000000162CQ |
| Model Year Start: 2018 | Model: Camry HV | Prod Date Range: [07/2017 - 10/2020] |
| Title: SUPPLEMENTAL RESTRAINT SYSTEMS: STEERING PAD: REMOVAL; 2018 - 2020 MY Camry HV [07/2017 - 10/2020] | ||
REMOVAL
CAUTION / NOTICE / HINT
The necessary procedures (adjustment, calibration, initialization or registration) that must be performed after parts are removed and installed, or replaced during horn button assembly removal/installation are shown below.
Necessary Procedures After Parts Removed/Installed/Replaced
|
Replaced Part or Performed Procedure |
Necessary Procedure |
Effect/Inoperative Function when Necessary Procedure not Performed |
Link |
|---|---|---|---|
|
*: When performing learning using the Techstream.
Click here
|
|||
|
Disconnect cable from negative auxiliary battery terminal |
Perform steering sensor zero point calibration |
Lane departure alert system (w/ Steering Control) |
|
|
Pre-collision system |
|||
|
Intelligent clearance sonar system* |
|||
|
Lighting system (w/ AFS)(EXT) |
|||
|
Memorize steering angle neutral point |
Parking assist monitor system |
|
|
|
Panoramic view monitor system |
|
||
PROCEDURE
1. PRECAUTION
CAUTION:
Be sure to read Precaution thoroughly before servicing.
Click here
![2018 - 2020 MY Camry HV [07/2017 - 10/2020]; SUPPLEMENTAL RESTRAINT SYSTEMS: AIRBAG SYSTEM: PRECAUTION](/t3Portal/stylegraphics/info.gif)
NOTICE:
After turning the power switch off, waiting time may be required before disconnecting the cable from the negative (-) auxiliary battery terminal. Therefore, make sure to read the disconnecting the cable from the negative (-) auxiliary battery terminal notices before proceeding with work.
Click here
2. REMOVE LUGGAGE TRIM SERVICE HOLE COVER
Click here
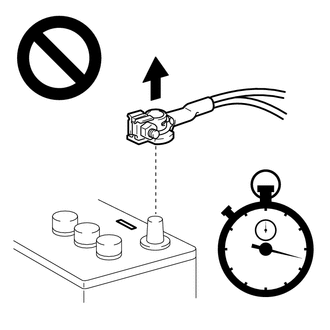
3. DISCONNECT CABLE FROM NEGATIVE AUXILIARY BATTERY TERMINAL
Click here
CAUTION:
Wait at least 90 seconds after disconnecting the cable from the negative (-) auxiliary battery terminal to disable the SRS system.
NOTICE:
When disconnecting the cable, some systems need to be initialized after the cable is reconnected.
Click here
4. REMOVE LOWER NO. 2 STEERING WHEEL COVER (w/ Cover)
(a) Using a screwdriver with its tip wrapped with protective tape, disengage each claw to remove the 3 lower No. 2 steering wheel covers.
HINT:
Be careful when disengaging the claws, as the lower No. 2 steering wheel cover may fly off.
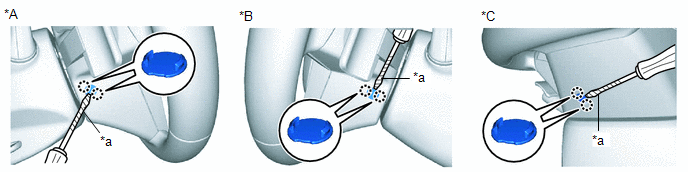
|
*A |
for LH Side |
*B |
for RH Side |
|
*C |
for Under Side |
- |
- |
|
*a |
Protective Tape |
- |
- |
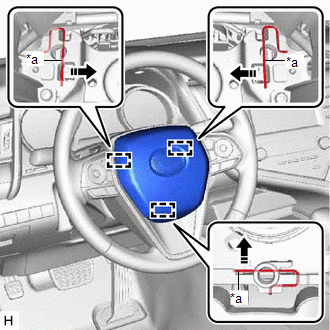
5. REMOVE HORN BUTTON ASSEMBLY
CAUTION:
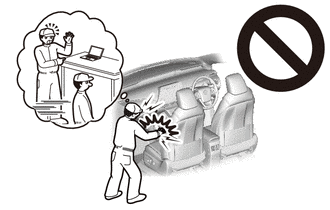
When storing the horn button assembly, keep the airbag deployment side facing upward.
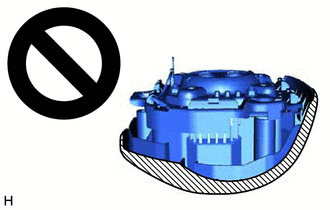

|
Deployment Side |
(a) Check that the power switch is off.
(b) Check that the cable is disconnected from the negative (-) auxiliary battery terminal.
CAUTION:
Wait at least 90 seconds after disconnecting the cable from the negative (-) auxiliary battery terminal to disable the SRS system.
(c) Using a thin screwdriver, push the 3 torsion springs to disengage the 3 pins as shown in the illustration.
|
*a |
Torsion Spring |

|
Push in this Direction |
NOTICE:
Lightly hold the horn button assembly so that it does not fall.
HINT:
Insert the thin screwdriver from the 3 holes of the steering wheel lower cover.
(d) Pull out the horn button assembly from the steering wheel assembly and hold the horn button assembly with one hand.
NOTICE:
When separating the horn button assembly, do not pull the airbag wire harness.
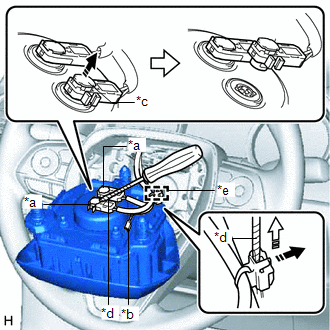
(e) Disconnect the horn connector from the horn button assembly.
|
*a |
Airbag Connector |
|
*b |
Horn Connector |
|
*c |
Airbag Connector Locking Button |
|
*d |
Protective Tape |
|
*e |
Wire Harness Clamp |
|
|
Release in this Direction |

|
Remove in this Direction |
(f) Using a screwdriver with its tip wrapped with protective tape, release the 2 airbag connector locking buttons.
(g) Disconnect the 2 airbag connectors.
NOTICE:
When disconnecting any airbag connector, take care not to damage the airbag wire harness.
(h) Using a screwdriver with its tip wrapped with protective tape, release the lock and remove the wire harness clamp to remove the horn button assembly.
|
|
|