| Last Modified: 02-14-2025 | 6.11:8.1.0 | Doc ID: RM10000000151KC |
| Model Year Start: 2018 | Model: Camry HV | Prod Date Range: [07/2017 - ] |
| Title: INTERIOR PANELS / TRIM: FRONT CONSOLE BOX: INSTALLATION; 2018 - 2024 MY Camry HV [07/2017 - ] | ||
INSTALLATION
PROCEDURE
1. INSTALL CONSOLE BOX ASSEMBLY
(a) Install the console box assembly with the 4 bolts and 2 screws.
2. INSTALL CONSOLE BOX CARPET
(a) Install the console box carpet as shown in the illustration.
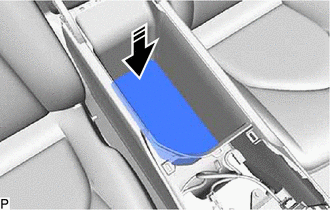

|
Install in this Direction |
3. INSTALL INSTRUMENT PANEL CUP HOLDER
(a) Engage the 2 claws.
(b) Install the instrument panel cup holder with the 3 screws.
4. INSTALL FRONT CONSOLE BOX INSERT SUB-ASSEMBLY
(a) Install the front console box insert sub-assembly with the 5 screws.
5. INSTALL SHIFT POSITION INDICATOR
6. INSTALL REAR UPPER CONSOLE PANEL SUB-ASSEMBLY
(a) Connect each connector.
(b) Engage the clamp.
(c) Engage the 6 clips and 7 claws to install the rear upper console panel sub-assembly as shown in the illustration.
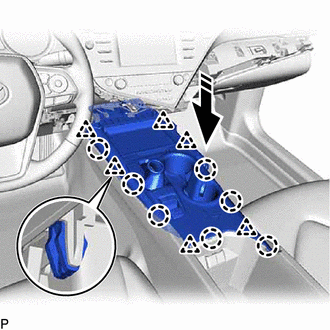

|
Install in this Direction |
(d) Move the shift lever to P.
7. INSTALL SHIFT LEVER KNOB SUB-ASSEMBLY
8. INSTALL SHIFT LOCK RELEASE BUTTON COVER
9. INSTALL LOWER CENTER INSTRUMENT PANEL FINISH PANEL
(a) Connect each connector.
(b) Engage the clamp.
(c) Engage the 7 clips to install the lower center instrument panel finish panel as shown in the illustration.
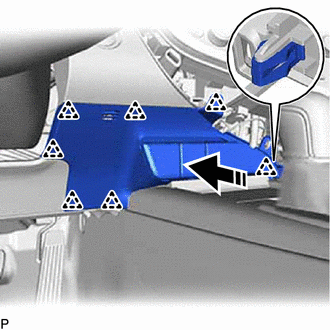

|
Install in this Direction |
10. INSTALL INSTRUMENT PANEL FINISH PLATE GARNISH
(a) Engage the 2 guides, claw and clip to install the instrument panel finish plate garnish as shown in the illustration.
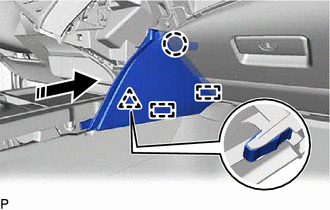

|
Install in this Direction |
11. INSTALL NO. 2 INSTRUMENT PANEL GARNISH SUB-ASSEMBLY
(a) Engage the 11 clips to install the No. 2 instrument panel garnish sub-assembly as shown in the illustration.
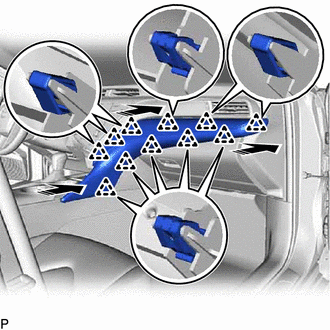

|
Install in this Direction |
12. INSTALL NO. 1 METER HOOD CLUSTER
(a) w/ Illumination:
(1) Connect the connector.
(b) Engage the 3 guides and 7 clips to install the No. 1 meter hood cluster as shown in the illustration.
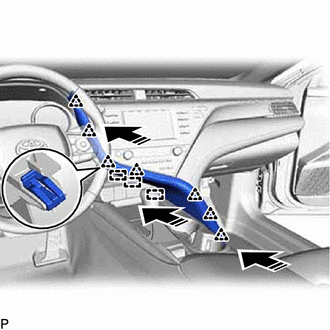

|
Install in this Direction |
|
|
|
![2018 - 2024 MY Camry HV [07/2017 - ]; P710 (HYBRID TRANSMISSION / TRANSAXLE): SHIFT LEVER: REASSEMBLY+](/t3Portal/stylegraphics/info.gif)