| Last Modified: 02-14-2025 | 6.11:8.1.0 | Doc ID: RM10000000151K5 |
| Model Year Start: 2018 | Model: Camry HV | Prod Date Range: [07/2017 - 10/2020] |
| Title: INTERIOR PANELS / TRIM: INSTRUMENT PANEL SAFETY PAD: DISASSEMBLY; 2018 - 2020 MY Camry HV [07/2017 - 10/2020] | ||
DISASSEMBLY
PROCEDURE
1. REMOVE INSTRUMENT PANEL PASSENGER AIRBAG ASSEMBLY
Click here
![2018 - 2020 MY Camry HV [07/2017 - 10/2020]; SUPPLEMENTAL RESTRAINT SYSTEMS: FRONT PASSENGER AIRBAG ASSEMBLY: REMOVAL+](/t3Portal/stylegraphics/info.gif)
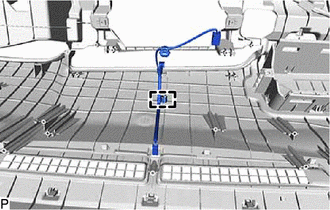
2. REMOVE NO. 1 SIDE DEFROSTER NOZZLE DUCT
(a) Remove the screw <C>.
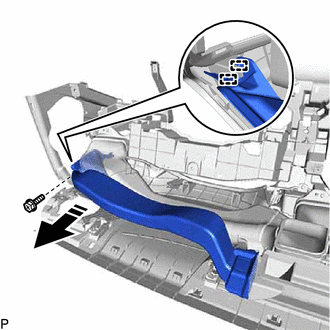

|
Remove in this Direction |
(b) Disengage the 2 guides as shown in the illustration.
(c) Disengage the claw to remove the No. 1 side defroster nozzle duct as shown in the illustration.
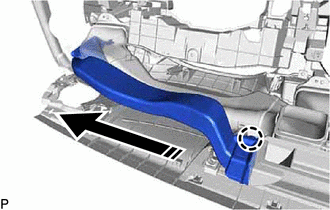
|
|
Remove in this Direction |
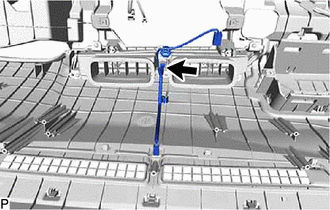
3. REMOVE NO. 2 SIDE DEFROSTER NOZZLE DUCT
(a) Remove the screw <C>.
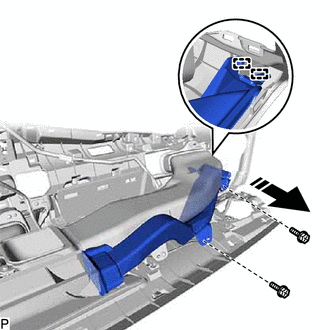
|
|
Remove in this Direction |
(b) Disengage the 2 guides as shown in the illustration.
(c) Disengage the claw to remove the No. 2 side defroster nozzle duct as shown in the illustration.
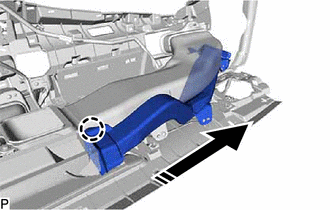
|
|
Remove in this Direction |
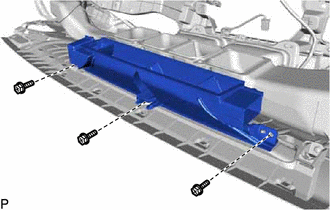
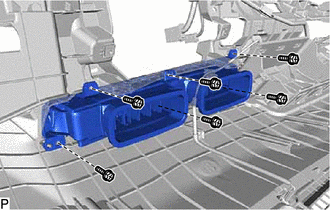
4. REMOVE DEFROSTER NOZZLE ASSEMBLY
|
(a) Remove the 3 screws <C> and defroster nozzle assembly. |
|
5. REMOVE METER MIRROR SUB-ASSEMBLY (w/ Headup Display)
Click here
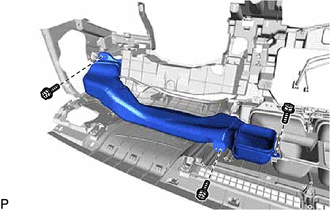
6. REMOVE NO. 1 HEATER TO REGISTER DUCT SUB-ASSEMBLY
|
(a) Remove the 3 screws <C> and No. 1 heater to register duct sub-assembly. |
|
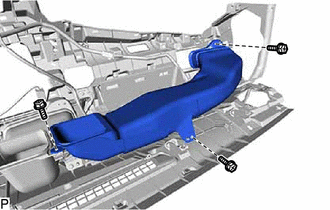
7. REMOVE NO. 3 HEATER TO REGISTER DUCT SUB-ASSEMBLY
|
(a) Remove the 3 screws <C> and No. 3 heater to register duct sub-assembly. |
|
8. REMOVE TELEPHONE AND GPS ANTENNA CORD (w/ Manual (SOS) Switch)
Click here
9. REMOVE TELEPHONE AND GPS ANTENNA ASSEMBLY WITH BRACKET (w/ Manual (SOS) Switch)
Click here
10. REMOVE ANTENNA CORD SUB-ASSEMBLY (w/ Navigation System)
Click here
11. REMOVE NAVIGATION ANTENNA ASSEMBLY WITH BRACKET (w/ Navigation System)
Click here
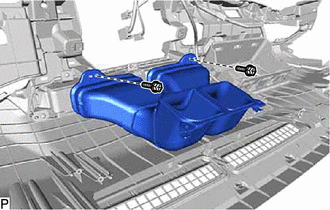
12. REMOVE NO. 2 HEATER TO REGISTER DUCT SUB-ASSEMBLY
|
(a) Remove the 2 screws <C> and No. 2 heater to register duct sub-assembly. |
|
13. REMOVE AUTOMATIC LIGHT CONTROL SENSOR
Click here
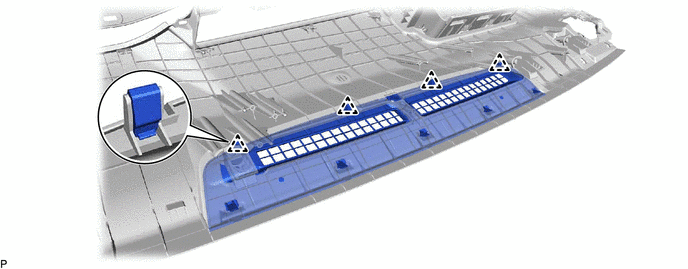
14. REMOVE NO. 2 INSTRUMENT PANEL REGISTER ASSEMBLY
|
(a) Disconnect the connector. |
|
|
(b) Remove the 6 screws <C> and No. 2 instrument panel register assembly. |
|
15. REMOVE NO. 3 INSTRUMENT PANEL WIRE
|
(a) Disengage the clamp to remove the No. 3 instrument panel wire. |
|
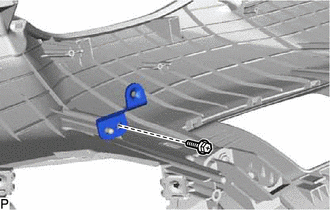
16. REMOVE NO. 1 METER BRACKET SUB-ASSEMBLY
|
(a) Remove the screw <C> and No. 1 meter bracket sub-assembly. |
|
17. REMOVE NO. 2 METER BRACKET SUB-ASSEMBLY (w/ Headup Display)
|
(a) Remove the screw <C> and No. 2 meter bracket sub-assembly. |
|
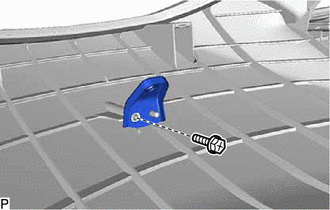
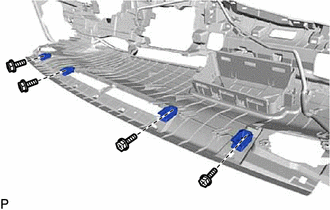
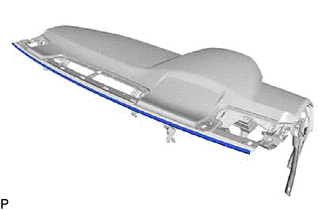
18. REMOVE NO. 1 DEFROSTER NOZZLE GARNISH
(a) Disengage the 4 clips.
(b) Disengage the 5 guides to remove the No. 1 defroster nozzle garnish.
19. REMOVE INSTRUMENT PANEL HOLE COVER (w/ Headup Display)
|
(a) Disengage the 5 claws. |
|
|
(b) Disengage the 3 guides to remove the instrument panel hole cover. |
|

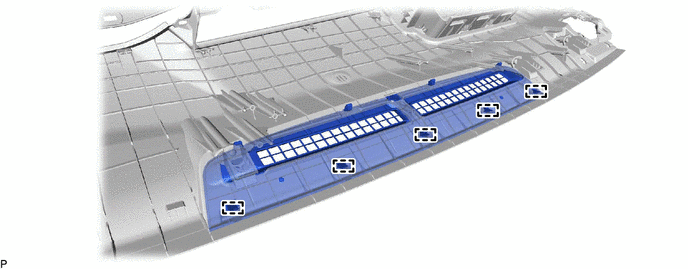
20. REMOVE NO. 1 INSTRUMENT PANEL PIN
|
(a) Remove the 4 screws <C> and 4 No. 1 instrument panel pins. |
|
21. REMOVE ANTENNA CORD SUB-ASSEMBLY
Click here
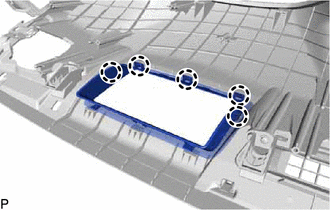
22. REMOVE INSTRUMENT PANEL CUSHION
|
(a) Remove the instrument panel cushion. |
|
23. REMOVE GLOVE COMPARTMENT DOOR LOCK CYLINDER ASSEMBLY
(a) Move the glove compartment door lever as shown in the illustration.
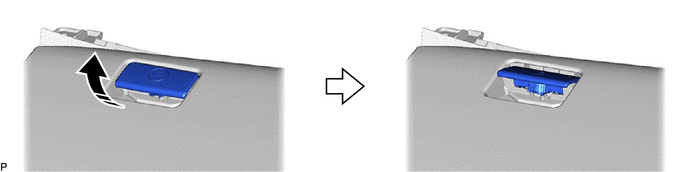
|
|
Move in this Direction |
- |
- |
(b) Using a screwdriver, press the cylinder lock plate to release it and pull out the glove compartment door lock cylinder assembly from the glove compartment door lever to remove it as shown in the illustration.
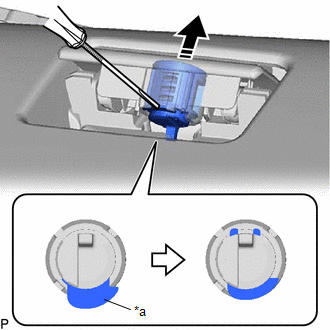
|
*a |
Cylinder Lock Plate |
|
|
Remove in this Direction |
|
|
|