- Headlight ECU sub-assembly LH
- Headlight assembly LH
| Last Modified: 02-14-2025 | 6.11:8.1.0 | Doc ID: RM1000000014YME |
| Model Year Start: 2018 | Model: Camry HV | Prod Date Range: [07/2017 - 10/2020] |
| Title: LIGHTING (EXT): HEADLIGHT ASSEMBLY: REMOVAL; 2018 - 2020 MY Camry HV [07/2017 - 10/2020] | ||
REMOVAL
CAUTION / NOTICE / HINT
The necessary procedures (adjustment, calibration, initialization or registration) that must be performed after parts are removed and installed, or replaced during headlight assembly removal/installation are shown below.
Necessary Procedure After Parts Removed/Installed/Replaced
|
Replaced Part or Performed Procedure |
Necessary Procedure |
Effect/Inoperative Function when Necessary Procedure not Performed |
Link |
|---|---|---|---|
|
Front bumper assembly (w/ Panoramic view monitor system) |
Front television camera view adjustment |
Panoramic view monitor system |
|
|
|
|
Lighting system (w/ AFS)(EXT) |
HINT:
- Use the same procedure for the RH side and LH side.
- The following procedure is for the LH side.
PROCEDURE
1. REMOVE FRONT BUMPER ASSEMBLY
2. REMOVE HEADLIGHT ASSEMBLY
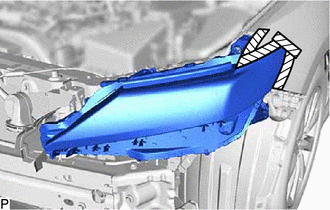
(a) Apply protective tape around the headlight assembly as shown in the illustration.


|
Protective Tape |
|
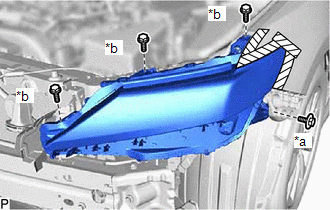
(b) Remove the bolt and 3 screws. |
|
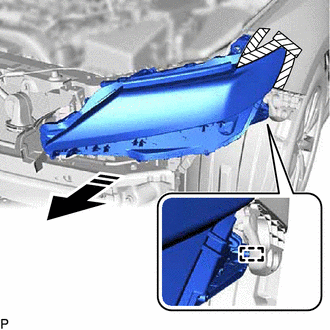
(c) Disengage the guide to separate the headlight assembly as shown in the illustration.


|
Remove in this Direction |
(d) for Bulb Type Turn Signal Light:
(1) Disengage the clamp.
(e) w/o AFS:
(1) Disconnect each connector to remove the headlight assembly.
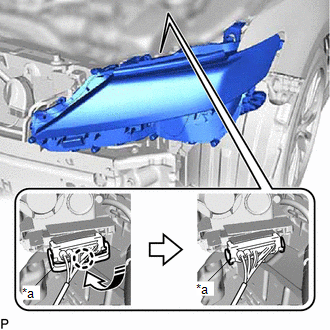
(f) w/ AFS:
(1) Disengage the claw, pull down the connector lock lever as shown in the illustration and disconnect the connector to remove the headlight assembly.

|
*a |
Connector Lock Lever |

|
Disconnect in this Direction |
|
|
|
![2018 - 2020 MY Camry HV [07/2017 - 10/2020]; PARK ASSIST / MONITORING: PANORAMIC VIEW MONITOR SYSTEM: INITIALIZATION](/t3Portal/stylegraphics/info.gif)
