| Last Modified: 11-20-2023 | 6.11:8.1.0 | Doc ID: RM1000000014V5D |
| Model Year Start: 2018 | Model: Camry | Prod Date Range: [06/2017 - 09/2019] |
| Title: SEAT: REAR SEAT ASSEMBLY (for Fold Down Seat Type): REMOVAL; 2018 - 2019 MY Camry [06/2017 - 09/2019] | ||
REMOVAL
CAUTION / NOTICE / HINT
The necessary procedures (adjustment, calibration, initialization or registration) that must be performed after parts are removed and installed, or replaced during rear seat assembly removal/installation are shown below.
Necessary Procedures After Parts Removed/Installed/Replaced
|
Replaced Part or Performed Procedure |
Necessary Procedure |
Effect/Inoperative Function when Necessary Procedure not Performed |
Link |
|---|---|---|---|
|
*: When performing learning using the Techstream.
Click here
|
|||
|
Disconnect cable from negative battery terminal |
Perform steering sensor zero point calibration |
Lane departure alert system (w/ Steering Control) |
|
|
Pre-collision system |
|||
|
Intelligent clearance sonar system* |
|||
|
Memorize steering angle neutral point |
Parking assist monitor system |
|
|
|
Panoramic view monitor system |
|
||
CAUTION:
- Wear protective gloves. Sharp areas on the parts may injure your hands.
-
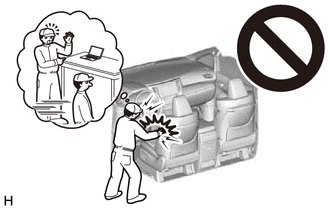
Some of these service operations affect the SRS airbag system. Read the precautionary notices concerning the SRS airbag system before servicing.
Click here
![2018 - 2019 MY Camry [06/2017 - 09/2019]; SUPPLEMENTAL RESTRAINT SYSTEMS: AIRBAG SYSTEM: PRECAUTION](/t3Portal/stylegraphics/info.gif)
PROCEDURE
1. PRECAUTION
NOTICE:
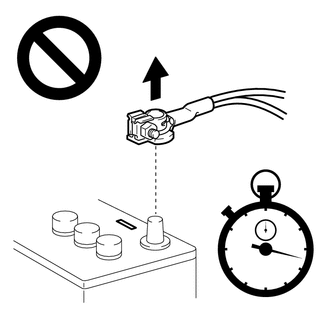
After turning the ignition switch off, waiting time may be required before disconnecting the cable from the negative (-) battery terminal. Therefore, make sure to read the disconnecting the cable from the negative (-) battery terminal notices before proceeding with work.
Click here
2. DISCONNECT CABLE FROM NEGATIVE BATTERY TERMINAL
for A25A-FKS:
Click here
for 2GR-FKS:
Click here
CAUTION:
- Wait at least 90 seconds after disconnecting the cable from the negative (-) battery terminal to disable the SRS system.
- If an airbag deploys for any reason, it may cause a serious injury.
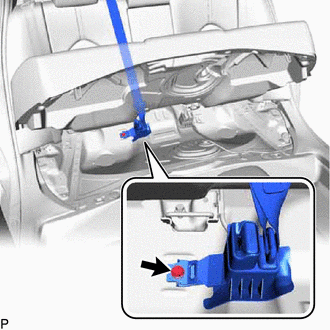
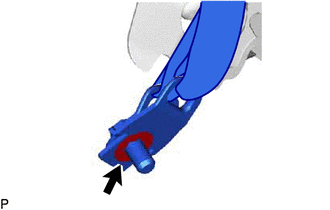
3. DISCONNECT REAR CENTER SEAT OUTER BELT ASSEMBLY (for TMC Made)
(a) Using a screwdriver with its tip wrapped with protective tape, disconnect the rear center seat outer belt assembly as shown in the illustration.
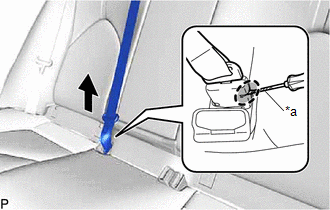
|
*a |
Protective Tape |

|
Insert Screwdriver Here |
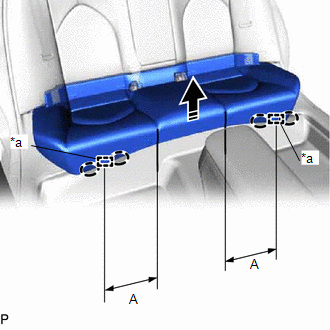
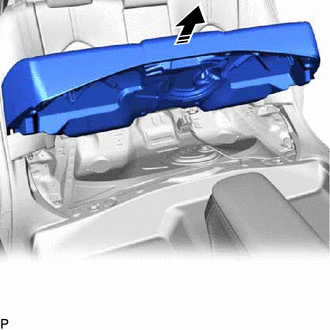
4. REMOVE REAR SEAT CUSHION ASSEMBLY (for TMC Made)
(a) Lift the front edge of the rear seat cushion assembly as shown in the illustration and disengage the 2 rear seat cushion frame hooks on the front side of the rear seat cushion assembly from the rear seat cushion lock hooks.
NOTICE:
Be sure to hold the parts of the seat cushion assembly directly next to the rear seat cushion frame hooks when lifting it. Lifting a different part of the cushion may deform the rear seat cushion frame.
Standard Measurement:
|
Area |
Measurement |
|---|---|
|
A |
245 mm (9.64 in.) |

|
*a |
Rear Seat Cushion Frame Hook (Front Side) |
|
*b |
Rear Seat Cushion Frame Hook (Rear Side) |
|
|
Place Hand Here |

|
Remove in this Direction (1) |

|
Remove in this Direction (2) |
(b) Disengage the 2 rear seat cushion frame hooks on the rear side of the rear seat cushion assembly as shown in the illustration and remove the rear seat cushion assembly.
NOTICE:
Be careful not to damage the vehicle body.
5. REMOVE REAR SEAT HEADREST ASSEMBLY LH (for TMMK Made)
(a) w/ Removable Headrest:
(1) Remove the rear seat headrest assembly LH.
6. REMOVE REAR SEAT HEADREST ASSEMBLY RH (for TMMK Made)
(a) w/ Removable Headrest:
(1) Remove the rear seat headrest assembly RH.
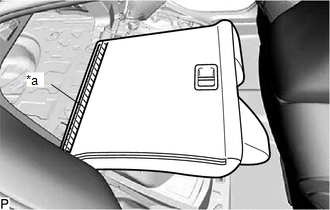
7. REMOVE REAR SEAT CUSHION ASSEMBLY (for TMMK Made)
(a) Lift the front edge of the rear seat cushion assembly as shown in the illustration and disengage the 2 rear seat cushion frame hooks from the rear seat cushion lock hooks.
|
*a |
Rear Seat Cushion Frame Hook |
|
|
Place Hand Here |
|
|
Remove in this Direction |
NOTICE:
Be sure to hold the parts of the rear seat cushion assembly directly next to the rear seat cushion frame hooks when lifting it. Lifting a different part of the rear seat cushion assembly may deform the rear seat cushion frame.
HINT:
When lifting the rear seat cushion assembly, make sure to hold the area shown in the illustration.
Standard Measurement:
|
Area |
Measurement |
|---|---|
|
A |
245 mm (9.64 in.) |
|
(b) Loosen the bolt and separate the rear seat inner belt assembly RH and rear center seat outer belt assembly as a set from the anchor part of the floor panel. |
|
|
(c) Remove the washer and bolt to disconnect the rear seat inner belt assembly RH. |
|
|
(d) Pass the rear seat inner belt assembly RH and rear center seat outer belt assembly as shown in the illustration. |
|
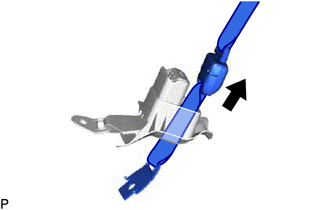
|
(e) Pass the rear seat inner belt assembly RH and rear center seat outer belt assembly through the rear seat cushion assembly as shown in the illustration. |
|
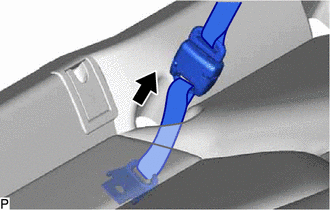
(f) Remove the rear seat cushion assembly as shown in the illustration.
|
|
Remove in this Direction |
8. REMOVE REAR SEAT CUSHION LOCK HOOK
(a) Disengage the 2 claws to remove the rear seat cushion lock hook as shown in the illustration.
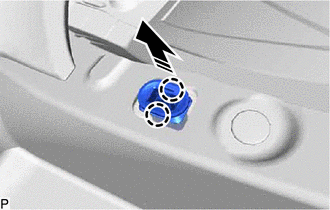
|
|
Remove in this Direction |
HINT:
Use the same procedure for the RH side and LH side.
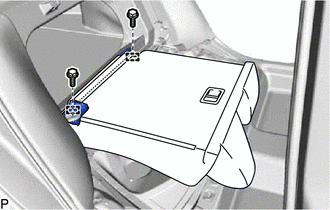
9. REMOVE REAR SEATBACK ASSEMBLY LH
(a) Fold the rear seatback assembly LH forward.
(b) for TMC Made:
|
(1) Disengage the fastener. |
|
|
(2) Remove the 2 bolts. |
|
(3) Disengage the 2 guides and remove the rear seatback assembly LH.
NOTICE:
Be careful not to damage the vehicle body.
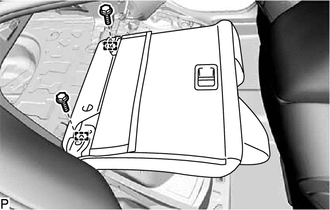
(c) for TMMK Made:
|
(1) Remove the 2 bolts. |
|
(2) Disengage the 2 guides and remove the rear seatback assembly LH.
NOTICE:
Be careful not to damage the vehicle body.
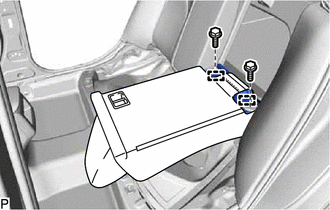
10. REMOVE REAR SEATBACK ASSEMBLY RH
(a) Fold the rear seatback assembly RH forward.
(b) for TMC Made:
|
(1) Disengage the fastener. |
|
|
(2) Remove the 2 bolts. |
|
(3) Disengage the 2 guides and remove the rear seatback assembly RH.
NOTICE:
Be careful not to damage the vehicle body.
(c) for TMMK Made:
|
(1) Remove the 2 bolts. |
|
(2) Disengage the 2 guides and remove the rear seatback assembly RH.
NOTICE:
Be careful not to damage the vehicle body.
11. DISCONNECT REAR DOOR OPENING TRIM WEATHERSTRIP LH
(a) Disconnect the rear door opening trim weatherstrip LH.
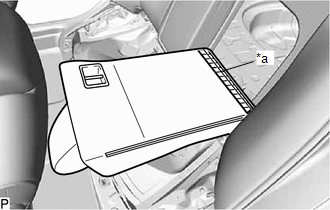
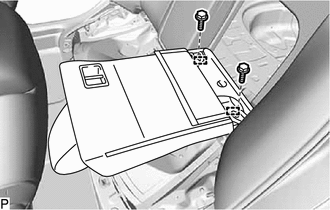
12. REMOVE REAR SIDE SEATBACK ASSEMBLY LH
(a) Disconnect the rear seat outer belt LH from the rear seat shoulder belt guide LH.
(b) Disconnect the connector.
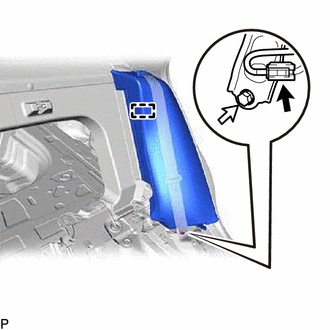
NOTICE:
When disconnecting any airbag connector, take care not to damage the airbag wire harness.
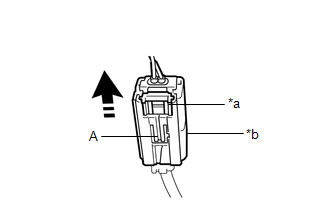
|
*a |
White Housing Lock |
|
*b |
Yellow CPA |
|
|
Slide |
(1) Push down the white housing lock and slide the yellow CPA as shown in the illustration. (At this time, the connector cannot be disconnected yet.)
NOTICE:
Do not push down the part (A) shown in the illustration when disconnecting the connector.
(2) Push down the white housing lock again and disconnect the connector.
(c) Remove the bolt.
(d) Disengage the hook and remove the rear side seatback assembly LH.
NOTICE:
Be careful not to damage the vehicle body.
13. DISCONNECT REAR DOOR OPENING TRIM WEATHERSTRIP RH
HINT:
Use the same procedure as for the LH side.
14. REMOVE REAR SIDE SEATBACK ASSEMBLY RH
HINT:
Use the same procedure as for the LH side.
|
|
|