| Last Modified: 11-20-2023 | 6.11:8.1.0 | Doc ID: RM1000000014TH4 |
| Model Year Start: 2018 | Model: Camry | Prod Date Range: [06/2017 - 10/2020] |
| Title: AUDIO / VIDEO: RADIO RECEIVER: REMOVAL; 2018 - 2020 MY Camry [06/2017 - 10/2020] | ||
REMOVAL
PROCEDURE
1. PRECAUTION (w/o Navigation System)
NOTICE:
-
When replacing the radio and display receiver assembly, always replace it with a new one. If a radio and display receiver assembly which was installed to another vehicle is used, the following may occurs:
- A communication malfunction DTC may be stored.
- The radio and display receiver assembly may not operate normally.
2. PRECAUTION (w/ Navigation System)
NOTICE:
-
When replacing the radio and display receiver assembly or navigation ECU, always replace it with a new one. If a radio and display receiver assembly or navigation ECU which was installed to another vehicle is used, the following may occur:
- A communication malfunction DTC may be stored.
- The radio and display receiver assembly or navigation ECU may not operate normally.
- After replacing the radio and display receiver assembly, if "New software is not compatible with the system. Contact your dealer." is displayed on the multi-display, update the software of the navigation ECU.
3. REMOVE NO. 1 METER HOOD CLUSTER
Click here
![2018 - 2019 MY Camry [06/2017 - 09/2019]; INTERIOR PANELS / TRIM: FRONT CONSOLE BOX: REMOVAL+](/t3Portal/stylegraphics/info.gif)
4. REMOVE NO. 2 INSTRUMENT PANEL GARNISH SUB-ASSEMBLY
Click here
5. REMOVE LOWER INSTRUMENT PANEL FINISH PANEL ASSEMBLY
Click here
6. REMOVE NO. 3 INSTRUMENT PANEL REGISTER ASSEMBLY
Click here
7. REMOVE AIR CONDITIONING CONTROL ASSEMBLY (for 7 Inch Display)
Click here
8. REMOVE RADIO AND DISPLAY RECEIVER ASSEMBLY WITH BRACKET (for 7 Inch Display)
(a) Release the tilt and telescopic lever and fully extend and lower the steering column assembly.
|
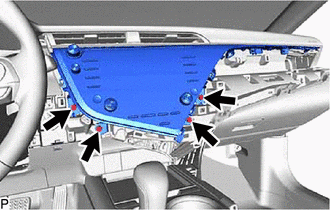
(b) Remove the 4 bolts. |
|
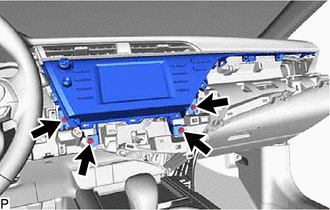
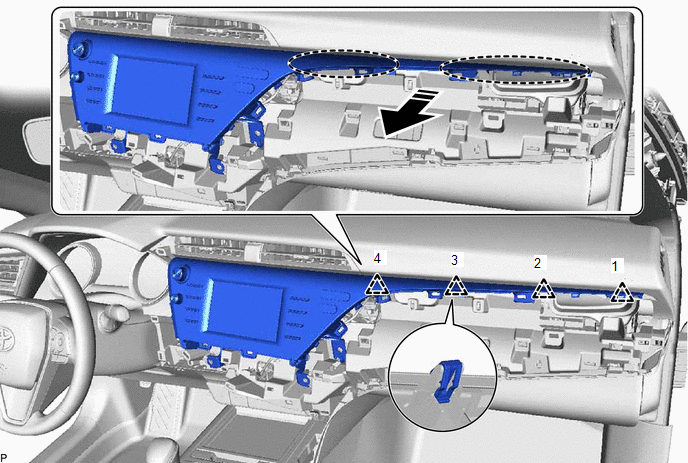
(c) Disengage the 4 clips in the order shown in the illustration.

|
Place Hand Here |

|
Remove in this Direction |
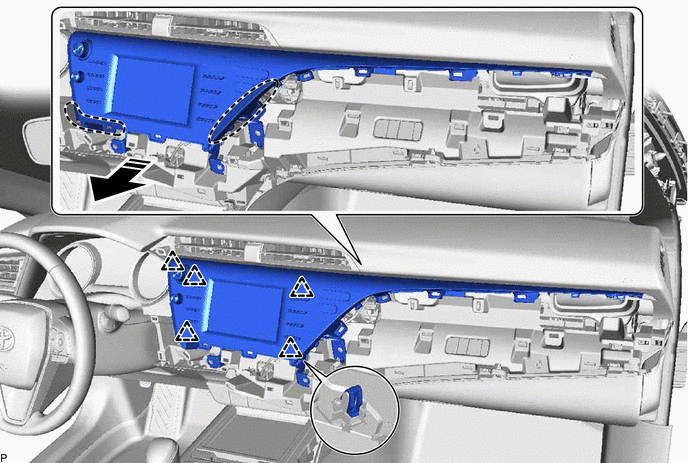
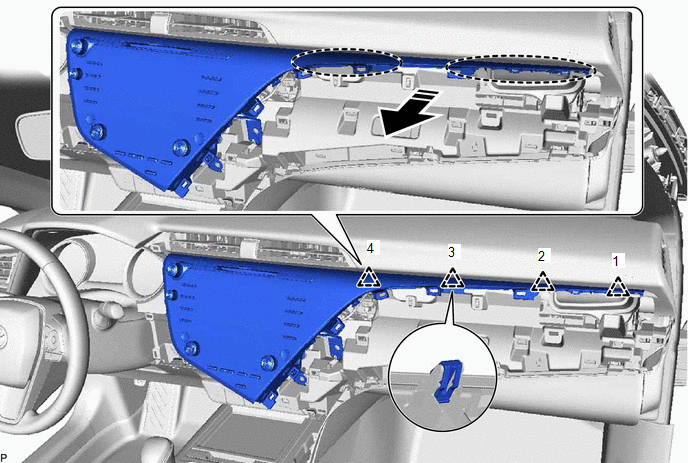
(d) Disengage the 5 clips as shown in the illustration.
|
|
Place Hand Here |
|
Remove in this Direction |
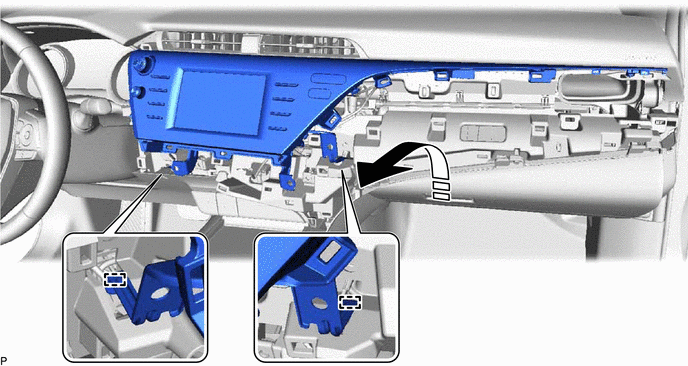
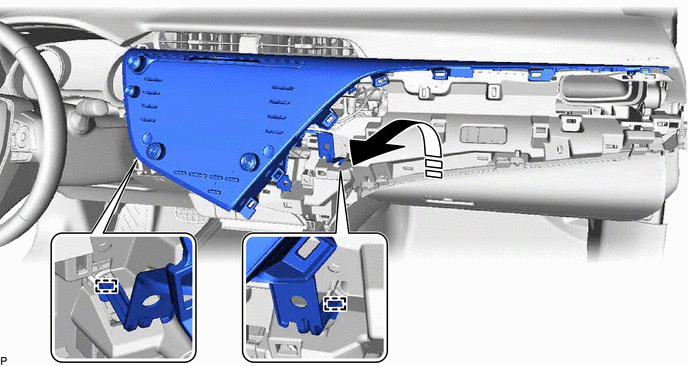
(e) Disengage the 2 guides as shown in the illustration.
|
|
Remove in this Direction |
- |
- |
(f) Disconnect each connector and remove the radio and display receiver assembly with bracket.
9. REMOVE RADIO AND DISPLAY RECEIVER ASSEMBLY WITH BRACKET (for 8 Inch Display)
(a) Release the tilt and telescopic lever and fully extend and lower the steering column assembly.
|
(b) Remove the 4 bolts. |
|
(c) Disengage the 4 clips in the order shown in the illustration.
|
|
Place Hand Here |
|
Remove in this Direction |
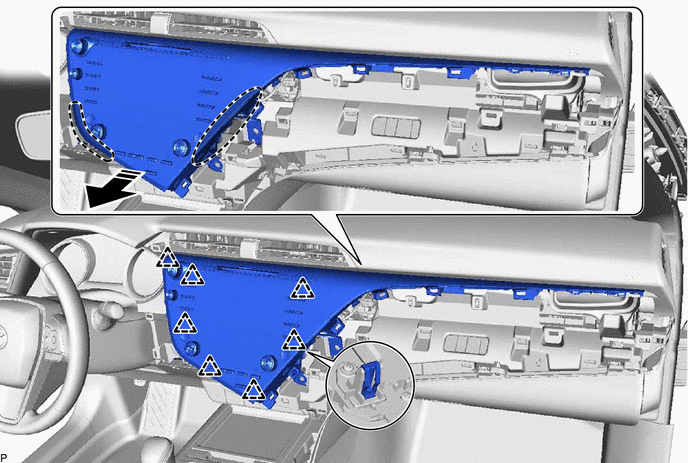
(d) Disengage the 7 clips as shown in the illustration.
|
|
Place Hand Here |
|
Remove in this Direction |
(e) Disengage the 2 guides as shown in the illustration.
|
|
Remove in this Direction |
- |
- |
(f) Disconnect each connector and remove the radio and display receiver assembly with bracket.
10. REMOVE TELLTALE LIGHT ASSEMBLY (for 7 Inch Display)
Click here
11. REMOVE MULTI-MEDIA MODULE WIRE (for 8 Inch Display)
|
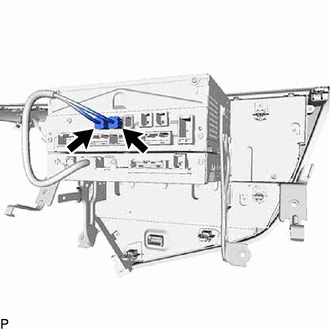
(a) Disconnect the connector. |
|

(b) Disengage the claw to remove the multi-media module wire.
12. DISCONNECT NAVIGATION ECU WITH WIRE (w/ Navigation System)
|
(a) Disconnect the 2 connectors to disconnect the navigation ECU with wire. |
|
13. REMOVE NO. 1 RADIO RECEIVER BRACKET
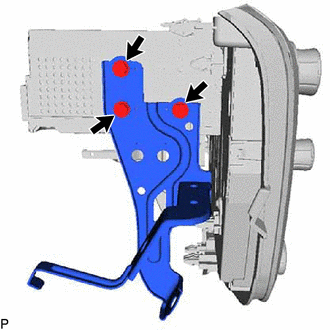
(a) w/o Navigation System:
|
(1) Remove the 3 screws and No. 1 radio receiver bracket. |
|

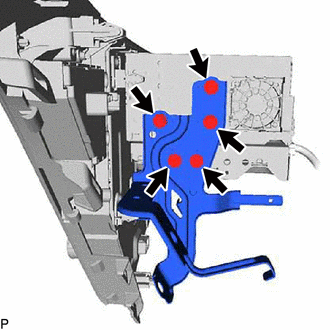
(b) w/ Navigation System:
|
(1) Remove the 5 screws and No. 1 radio receiver bracket. |
|
14. REMOVE NO. 2 RADIO RECEIVER BRACKET
(a) w/o Navigation System:
|
(1) Remove the 3 screws and No. 2 radio receiver bracket. |
|
(b) w/ Navigation System:
|
(1) Remove the 5 screws and No. 2 radio receiver bracket. |
|

15. REMOVE NAVIGATION ECU WITH WIRE (w/ Navigation System)
16. REMOVE RADIO AND DISPLAY RECEIVER ASSEMBLY
|
|
|