| Last Modified: 08-28-2024 | 6.11:8.1.0 | Doc ID: RM1000000018CT2 |
| Model Year Start: 2018 | Model: Sienna | Prod Date Range: [11/2017 - ] |
| Title: WIPER / WASHER: RAIN SENSOR: INSTALLATION; 2018 - 2020 MY Sienna [11/2017 - ] | ||
INSTALLATION
PROCEDURE
1. INSTALL RAIN SENSOR TAPE
NOTICE:
The rain sensor tape can be reused. However, replace it with a new one if it is dirty or damaged.
HINT:
This step should be performed only when the rain sensor tape needs to be replaced.
|
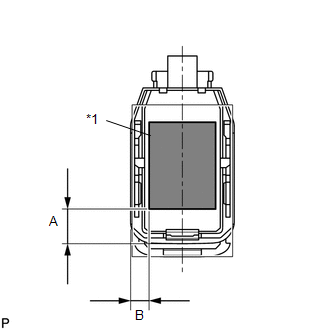
(a) Remove the release sheet (sensor side) from new rain sensor tape and apply the tape to the position indicated in the illustration (the sensing part of the rain sensor) while pushing out air bubbles with your fingers. Text in Illustration
Standard Clearance:
|
|
(b) Remove the release sheet (glass side) from the rain sensor tape.
NOTICE:
- Check that the old rain sensor tape is not left on the windshield glass. If the tape is still on the windshield glass, remove it before installing the rain sensor.
- Do not touch the sensor tape surface or the glass surface directly with your fingers.
- Clean up dirt on the glass with a piece of cloth, etc.
2. INSTALL RAIN SENSOR
NOTICE:
- Do not touch the sensor tape surface or the glass surface directly with your fingers.
- Clean up dirt on the glass with a piece of cloth, etc.
- After installing the rain sensor, there should be no air bubbles between the windshield glass and the rain sensor tape.
|
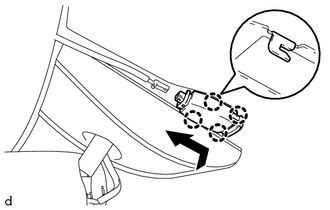
(a) Engage the 4 claws and install the rain sensor as shown in the illustration. |
|
|
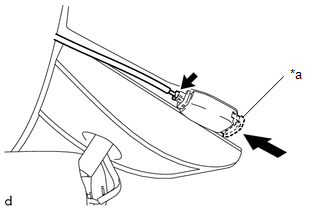
(b) Connect the rain sensor connector. |
|
(c) Gradually attach the rain sensor to the glass surface to prevent air bubbles from forming between them.
(d) Push in the stopper.
3. INSTALL RAIN SENSOR COVER
(a) Engage the 3 claws to install the rain sensor cover.
|
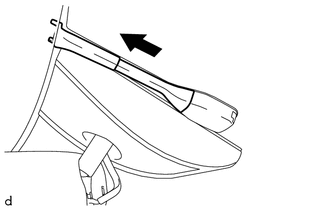
(b) Slide the rain sensor cover as shown in the illustration. |
|
|
|
|


