| Last Modified: 08-28-2024 | 6.11:8.1.0 | Doc ID: RM10000000105HP |
| Model Year Start: 2017 | Model: Sienna | Prod Date Range: [08/2016 - ] |
| Title: UA80F (AUTOMATIC TRANSMISSION / TRANSAXLE): AUTOMATIC TRANSAXLE ASSEMBLY: REMOVAL; 2017 - 2020 MY Sienna [08/2016 - ] | ||
REMOVAL
CAUTION / NOTICE / HINT
CAUTION:
The engine assembly with continuously variable transaxle assembly is very heavy. Be sure to follow the procedure described in the repair manual, or the engine lifter may suddenly drop.
PROCEDURE
1. REMOVE FLYWHEEL HOUSING UNDER COVER
2. REMOVE DRIVE PLATE AND TORQUE CONVERTER SETTING BOLT
3. REMOVE STARTER ASSEMBLY
4. REMOVE ENGINE ASSEMBLY WITH TRANSAXLE
5. DISCONNECT ENGINE WIRE
|
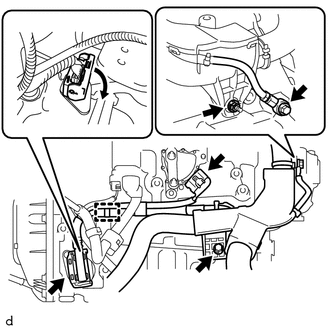
(a) Disconnect the park/neutral position switch connector. |
|
(b) Disconnect the transmission wire connector.
(c) Remove the 2 bolts and nut to disconnect the engine wire from the automatic transaxle case sub-assembly.
(d) Disengage the clamp to disconnect the engine wire from the automatic transaxle case sub-assembly.
6. SEPARATE BREATHER PLUG HOSE
|
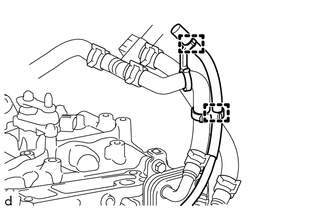
(a) Disengage the 2 clamps to separate the breather plug hose from the hose clamp. |
|
7. REMOVE TRANSVERSE ENGINE ENGINE MOUNTING BRACKET
|
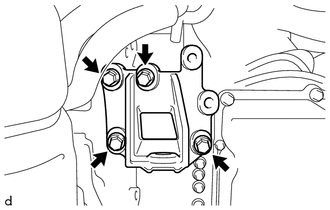
(a) Remove the 4 bolts and transverse engine engine mounting bracket from the transaxle housing. |
|
8. REMOVE TRANSFER STIFFENER PLATE RH
9. REMOVE AUTOMATIC TRANSAXLE ASSEMBLY
|
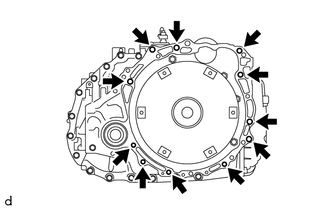
(a) Support the automatic transaxle assembly with a transmission jack. NOTICE: Secure the automatic transaxle assembly to the transmission jack using a suitable adapter, such as a rope or attachment. |
|
(b) Remove the 11 bolts and automatic transaxle assembly from the engine assembly.
NOTICE:
To prevent damage to the knock pins, do not pry between the automatic transaxle assembly and engine assembly.
10. REMOVE TRANSFER ASSEMBLY
11. DISCONNECT NO. 2 OUTLET OIL COOLER HOSE
12. DISCONNECT NO. 1 TRANSMISSION OIL COOLER HOSE
13. DISCONNECT NO. 2 INLET OIL COOLER HOSE
14. DISCONNECT NO. 1 OUTLET OIL COOLER HOSE
15. REMOVE OIL COOLER TUBE ASSEMBLY
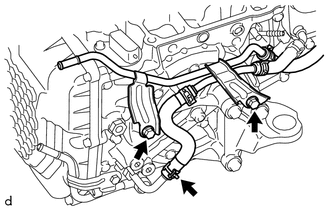
|
(a) Slide the clip and disconnect the No. 1 inlet oil cooler hose. |
|
(b) Remove the 2 bolts and oil cooler tube assembly from the automatic transaxle case sub-assembly and No. 3 engine mounting bracket.
16. REMOVE NO. 3 ENGINE MOUNTING BRACKET
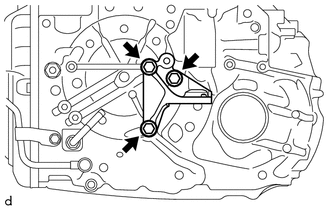
|
(a) Remove the 3 bolts and No. 3 engine mounting bracket from the automatic transaxle case sub-assembly. |
|
17. REMOVE NO. 1 TRANSMISSION CONTROL CABLE BRACKET
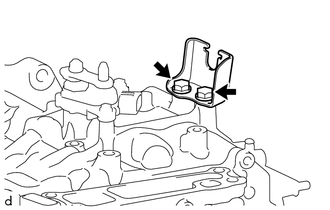
|
(a) Remove the 2 bolts and No. 1 transmission control cable bracket from the automatic transaxle case sub-assembly. |
|
18. REMOVE WIRE HARNESS CLAMP BRACKET
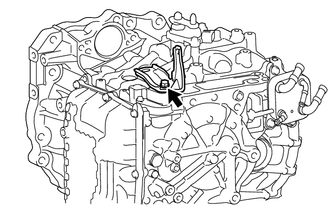
|
(a) Remove the bolt and wire harness clamp bracket from the automatic transaxle case sub-assembly. |
|
19. REMOVE BREATHER PLUG HOSE
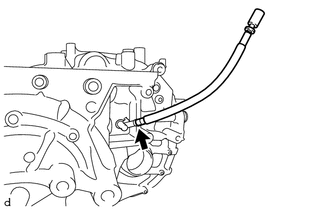
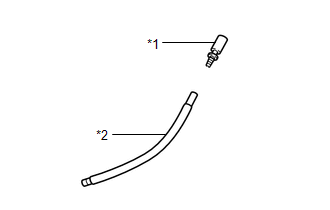
(a) Using a screwdriver, remove the breather plug hose from the automatic transaxle case sub-assembly.
NOTICE:
Be careful not to damage the breather plug.
|
(b) Remove the No. 1 breather plug (ATM) from the breather plug hose. NOTICE: Be careful not to damage the No. 1 breather plug (ATM). |
|
20. REMOVE TORQUE CONVERTER ASSEMBLY
(a) Remove the torque converter assembly from the automatic transaxle assembly.
21. INSPECT TORQUE CONVERTER ASSEMBLY
22. INSPECT DRIVE PLATE AND RING GEAR SUB-ASSEMBLY
|
|
|
![2017 - 2020 MY Sienna [08/2016 - ]; 2GR-FKS (ENGINE MECHANICAL): ENGINE ASSEMBLY: REMOVAL+](/t3Portal/stylegraphics/info.gif)
