| Last Modified: 08-28-2024 | 6.11:8.1.0 | Doc ID: RM100000000Z9KG |
| Model Year Start: 2017 | Model: Sienna | Prod Date Range: [08/2016 - ] |
| Title: 2GR-FKS (ENGINE CONTROL): HEATED OXYGEN SENSOR: INSTALLATION; 2017 - 2020 MY Sienna [08/2016 - ] | ||
INSTALLATION
PROCEDURE
1. INSTALL HEATED OXYGEN SENSOR (for Bank 1)
(a) for 2WD:
|
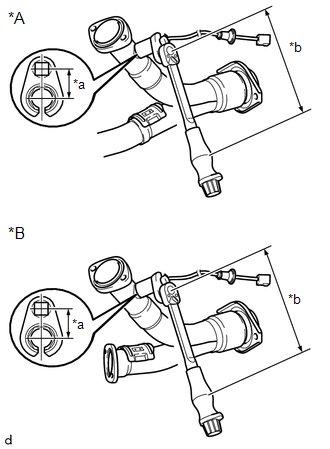
(1) Using SST, install the heated oxygen sensor (for bank 1) to the front exhaust pipe assembly. SST: 09224-00012 Torque: Specified tightening torque : 44 N·m {449 kgf·cm, 32 ft·lbf} NOTICE: If a component has been dropped or subjected to a strong impact, replace heated oxygen sensor (for bank 1). |
|
(b) for AWD:
(1) Using SST, install the heated oxygen sensor (for bank 1) to the No. 3 exhaust pipe sub-assembly.
SST: 09224-00012
Torque:
Specified tightening torque :
44 N·m {449 kgf·cm, 32 ft·lbf}
NOTICE:
If a component has been dropped or subjected to a strong impact, replace heated oxygen sensor (for bank 1).
HINT:
2. INSTALL HEATED OXYGEN SENSOR (for Bank 2)
|
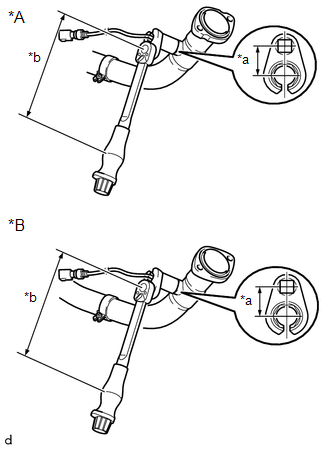
(a) Using SST, install the heated oxygen sensor (for bank 2) to the front exhaust pipe assembly. SST: 09224-00012 Torque: Specified tightening torque : 44 N·m {449 kgf·cm, 32 ft·lbf} NOTICE: If a component has been dropped or subjected to a strong impact, replace heated oxygen sensor (for bank 2). |
|
3. INSTALL FRONT EXHAUST PIPE ASSEMBLY (for 2WD)
4. INSTALL FRONT EXHAUST PIPE ASSEMBLY (for AWD)
5. INSTALL NO. 2 ENGINE UNDER COVER (for AWD)
6. INSTALL NO. 1 ENGINE UNDER COVER
7. INSTALL INSTRUMENT PANEL FINISH PANEL END LH
8. INSPECT FOR EXHAUST GAS LEAK
|
|
|
![2017 - 2020 MY Sienna [08/2016 - ]; INTRODUCTION: REPAIR INSTRUCTION: PRECAUTION](/t3Portal/stylegraphics/info.gif)

