| Last Modified: 08-28-2024 | 6.11:8.1.0 | Doc ID: RM100000000YQVG |
| Model Year Start: 2017 | Model: Sienna | Prod Date Range: [08/2016 - ] |
| Title: 2GR-FKS EMISSION CONTROL: CANISTER: INSTALLATION; 2017 - 2020 MY Sienna [08/2016 - ] | ||
INSTALLATION
PROCEDURE
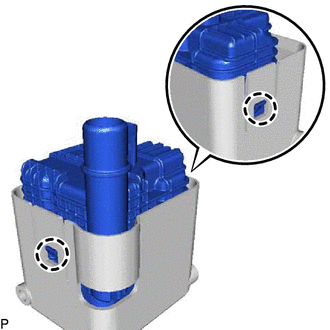
1. INSTALL CHARCOAL CANISTER LEAK DETECTION PUMP SUB-ASSEMBLY

(a) Engage the 2 claws to install a new charcoal canister leak detection pump sub-assembly to the canister.
NOTICE:
- Do not allow foreign matter such as grease, oil or water to adhere to the O-rings.
- Ensure that the claws are engaged properly.
2. INSTALL CANISTER (CHARCOAL CANISTER ASSEMBLY)
(a) Engage the hook.
(b) Install the canister (charcoal canister assembly) with the 3 bolts and clip.
Torque:
29 N·m {296 kgf·cm, 21 ft·lbf}
(c) Connect the fuel emission hose and connector.
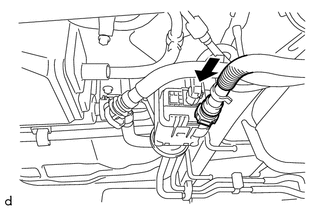
3. CONNECT CHARCOAL CANISTER OUTLET TUBE SUB-ASSEMBLY
|
(a) Connect the charcoal canister outlet tube sub-assembly. NOTICE:
|
|
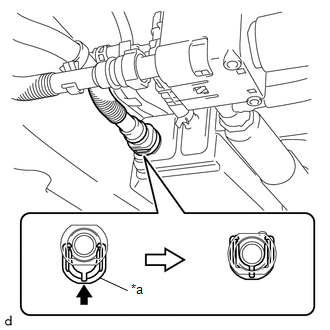
4. CONNECT FUEL TANK VENT HOSE
|
(a) Connect the fuel tank vent hose and lock it by pushing in the retainer as shown in the illustration. NOTICE:
HINT:
|
|
5. INSTALL CHARCOAL CANISTER PROTECTOR
(a) Engage the 4 claws.
(b) Install the charcoal canister protector with the 6 bolts.
Torque:
5.0 N·m {51 kgf·cm, 44 in·lbf}
|
|
|
![2017 - 2020 MY Sienna [08/2016 - ]; 2GR-FKS (FUEL): FUEL SYSTEM: PRECAUTION](/t3Portal/stylegraphics/info.gif)

