| Last Modified: 08-28-2024 | 6.11:8.1.0 | Doc ID: RM100000000VKF5 |
| Model Year Start: 2016 | Model: Sienna | Prod Date Range: [12/2015 - ] |
| Title: WIPER / WASHER: FRONT WIPER MOTOR: INSTALLATION; 2016 - 2020 MY Sienna [12/2015 - ] | ||
INSTALLATION
PROCEDURE
1. INSTALL WINDSHIELD WIPER MOTOR ASSEMBLY
(a) Using a T30 "TORX" socket wrench, install the windshield wiper motor assembly with the 2 bolts.
Torque:
7.5 N·m {76 kgf·cm, 66 in·lbf}
(b) Apply MP grease to the crank arm pivot of the windshield wiper motor assembly.
|
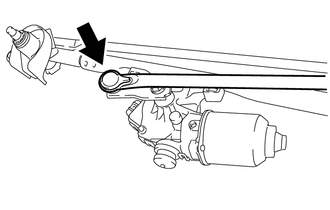
(c) Install the windshield wiper link rod to the crank arm pivot of the windshield wiper motor assembly. |
|
2. INSTALL WINDSHIELD WIPER MOTOR AND LINK ASSEMBLY
|
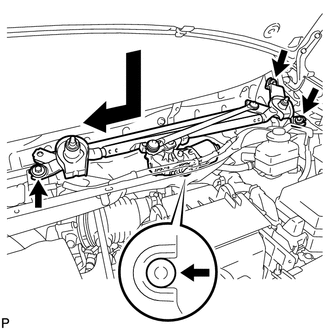
(a) Install the windshield wiper motor and link assembly with the 3 bolts as shown in the illustration. Torque: 7.0 N·m {71 kgf·cm, 62 in·lbf} |
|
(b) Connect the windshield wiper motor connector.
3. INSTALL COWL TOP VENTILATOR LOUVER SUB-ASSEMBLY
|
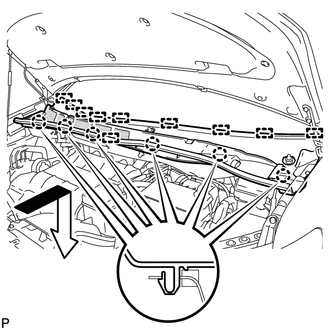
(a) Engage the 10 guides and 6 claws, and install the cowl top ventilator louver sub-assembly as shown in the illustration. |
|
4. INSTALL FRONT FENDER TO COWL SIDE SEAL LH
(a) Wipe off any tape adhesive residue with cleaner.
(b) Engage the 2 guides and clip and apply thorough pressure to the sections with double-sided tape to install a new front fender to cowl side seal LH.
5. INSTALL FRONT FENDER TO COWL SIDE SEAL RH
HINT:
Use the same procedure as for the LH side.
6. INSTALL FRONT WIPER ARM AND BLADE ASSEMBLY LH
(a) Operate the wiper and stop the windshield wiper motor at the automatic stop position.
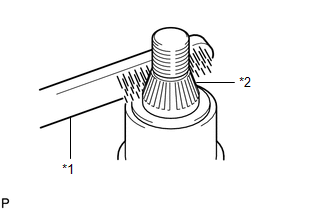
(b) When reusing the front wiper arm and blade assembly LH:
|
(1) Clean the wiper arm serrations. Text in Illustration
|
|
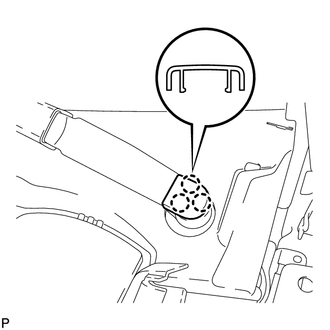
(c) When reusing the windshield wiper link assembly:
|
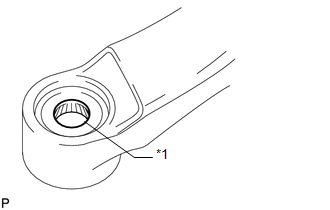
(1) Clean the wiper pivot serrations with a wire brush. Text in Illustration
|
|
|
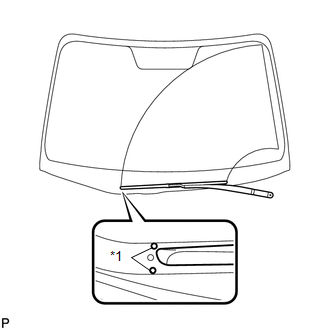
(d) Install the front wiper arm and blade assembly LH with the nut to the position shown in the illustration. Text in Illustration
Torque: 25 N·m {250 kgf·cm, 18 ft·lbf} |
|
7. INSTALL FRONT WIPER ARM AND BLADE ASSEMBLY RH
(a) Operate the wiper and stop the windshield wiper motor at the automatic stop position.
(b) When reusing the front wiper arm and blade assembly RH:
|
(1) Clean the wiper arm serrations. Text in Illustration
|
|
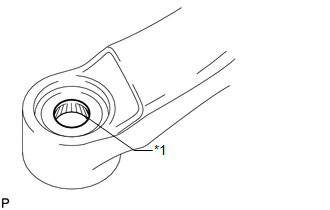
(c) When reusing the windshield wiper link assembly:
|
(1) Clean the wiper pivot serrations with a wire brush. Text in Illustration
|
|
|
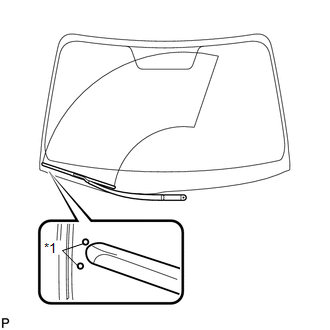
(d) Install the front wiper arm and blade assembly RH with the nut to the position shown in the illustration. Text in Illustration
Torque: 25 N·m {250 kgf·cm, 18 ft·lbf} |
|
8. INSTALL FRONT WIPER ARM HEAD CAP
|
(a) Engage the 3 claws and install the 2 front wiper arm head caps. |
|
|
|
|