| Last Modified: 08-28-2024 | 6.11:8.1.0 | Doc ID: RM100000000VK8G |
| Model Year Start: 2016 | Model: Sienna | Prod Date Range: [12/2015 - 11/2017] |
| Title: DOOR / HATCH: FRONT DOOR: DISASSEMBLY; 2016 - 2017 MY Sienna [12/2015 - 11/2017] | ||
DISASSEMBLY
CAUTION / NOTICE / HINT
HINT:
- Use the same procedure for both the RH and LH sides.
- The procedure described below is for the RH side.
PROCEDURE
1. DISCONNECT CABLE FROM NEGATIVE BATTERY TERMINAL
CAUTION:
Wait at least 90 seconds after disconnecting the cable from the negative (-) battery terminal to disable the SRS system.
NOTICE:
When disconnecting the cable, some systems need to be initialized after the cable is reconnected (See page
![2016 MY Sienna [12/2015 - 08/2016]; INTRODUCTION: REPAIR INSTRUCTION: INITIALIZATION](/t3Portal/stylegraphics/info.gif) ).
).
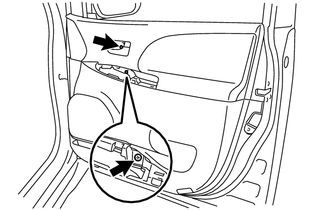
2. REMOVE FRONT DOOR ARMREST BASE PANEL ASSEMBLY
|
(a) Using a moulding remover, disengage the 5 claws and 2 clips. |
|
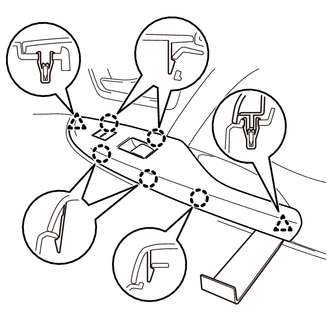
(b) Disconnect the 2 connectors to remove the front door armrest base panel assembly.
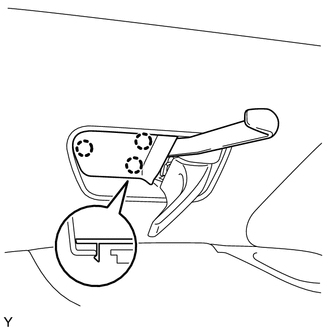
3. REMOVE FRONT DOOR INSIDE HANDLE BEZEL PLUG
|
(a) Using a moulding remover, disengage the 3 claws to remove the front door inside handle bezel plug. |
|
4. REMOVE FRONT DOOR LOWER FRAME BRACKET GARNISH
|
(a) Disengage the clip and 2 guides to remove the front door lower frame bracket garnish. |
|
5. REMOVE FRONT DOOR NO. 1 STIFFENER CUSHION
|
(a) Remove the screw and front door No. 1 stiffener cushion. |
|
6. REMOVE COURTESY LIGHT ASSEMBLY (w/ Courtesy Light)
7. REMOVE FRONT DOOR TRIM BOARD SUB-ASSEMBLY
|
(a) Remove the 2 screws. |
|
|
(b) Disengage the 10 clips. |
|
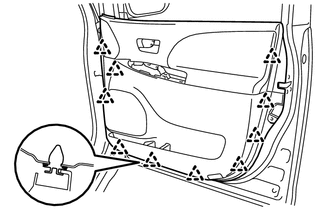
(c) Disconnect the connector. (for Driver Side w/ Memory)
|
(d) Disconnect the front door lock remote control cable and front door inside locking cable to remove the front door trim board sub-assembly. |
|
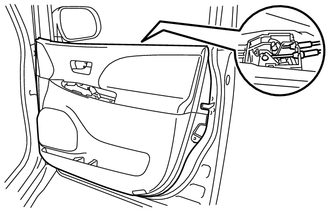
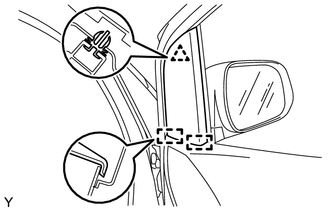
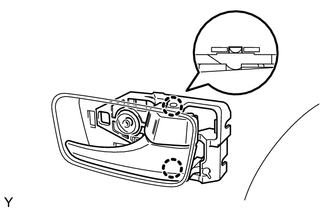
8. REMOVE FRONT DOOR INSIDE HANDLE SUB-ASSEMBLY
|
(a) Disengage the 2 claws to remove the front door inside handle sub-assembly. |
|
9. REMOVE FRONT DOOR GLASS INNER WEATHERSTRIP
|
(a) Disengage the 8 claws to remove the front door glass inner weatherstrip from the front door trim board sub-assembly, as shown in the illustration. |
|
10. REMOVE SEAT MEMORY SWITCH (for Driver Side with Memory)
HINT:
Use the same procedure as for the LH side (See page
).
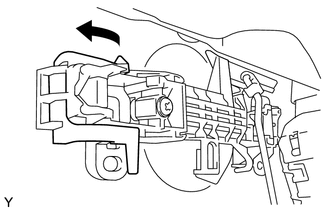
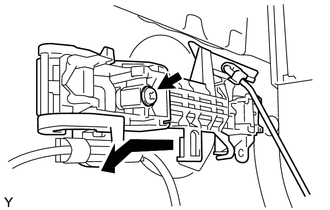
11. REMOVE OUTER MIRROR CONTROL ECU ASSEMBLY (w/ Memory)
12. REMOVE FRONT NO. 1 SPEAKER ASSEMBLY
13. REMOVE SIDE AIRBAG SENSOR
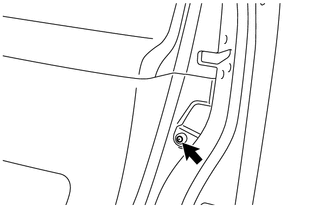
14. REMOVE FRONT DOOR SERVICE HOLE COVER
(a) Remove the bolt to disconnect the ground wire.
(b) Disengage the clamps.
|
(c) Remove the front door service hole cover. NOTICE: Remove any butyl tape remaining on the door side. |
|
15. REMOVE OUTER REAR VIEW MIRROR ASSEMBLY
16. REMOVE FRONT DOOR GLASS OUTER WEATHERSTRIP ASSEMBLY
HINT:
Use the same procedure as for the LH side (See page
).
17. REMOVE FRONT DOOR CHECK ASSEMBLY
|
(a) Remove the 2 nuts and bolt, then remove the front door check assembly. NOTICE: Do not drop or damage the front door check assembly when removing the nuts and bolt. HINT: Remove the front door check assembly through the service hole. |
|

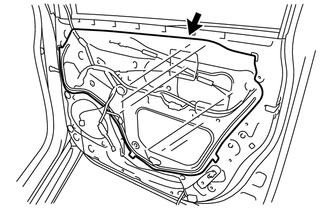
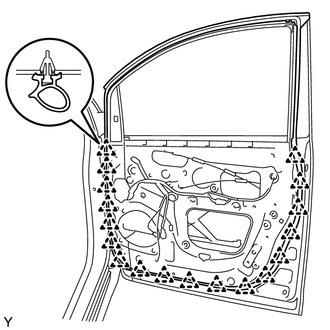
18. REMOVE FRONT DOOR WEATHERSTRIP
|
(a) Disengage the 18 clips to remove the front door weatherstrip. |
|
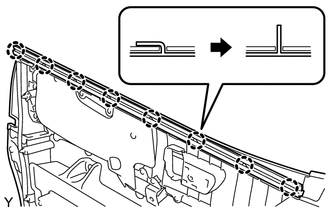
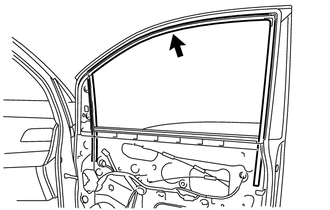
19. REMOVE FRONT DOOR GLASS RUN
|
(a) Remove the front door glass run. |
|
20. REMOVE FRONT DOOR FRONT LOWER FRAME SUB-ASSEMBLY
|
(a) Remove the service hole cover. Text in Illustration
|
|

(b) Remove the 3 bolts, screw and front door front lower frame sub-assembly.
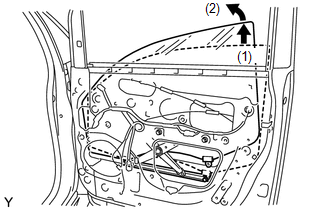
21. REMOVE FRONT DOOR GLASS SUB-ASSEMBLY
|
(a) Connect the power window regulator switch assembly. |
|
(b) Connect the cable to the negative (-) battery terminal.
(c) Move the front door glass sub-assembly so that the door glass bolts can be seen.
(d) Disconnect the cable from the negative (-) battery terminal.
(e) Disconnect the power window regulator switch assembly.
(f) Remove the 2 bolts.
NOTICE:
Do not drop or damage the front door glass sub-assembly when removing the bolts.
|
(g) Remove the front door glass sub-assembly in the direction indicated by the arrows in the illustration. NOTICE: Do not drop or damage the front door glass sub-assembly. |
|
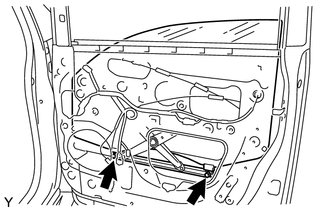
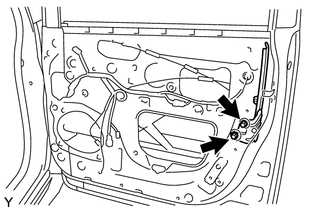
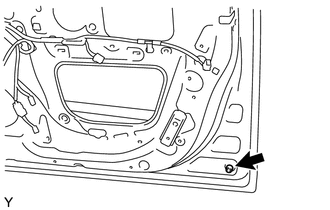
22. REMOVE FRONT DOOR REAR LOWER FRAME SUB-ASSEMBLY
|
(a) Remove the 2 bolts and front door rear lower frame sub-assembly. |
|
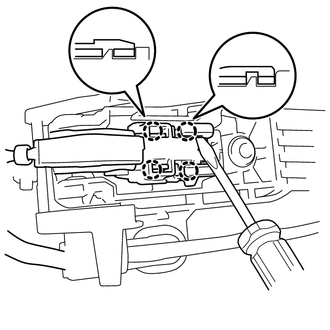
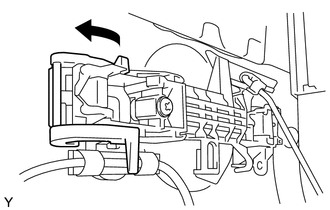
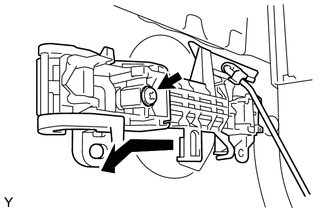
23. REMOVE FRONT DOOR WINDOW REGULATOR SUB-ASSEMBLY
|
(a) Disconnect the connector. |
|
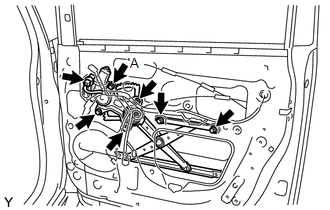
(b) Loosen the bolt A.
(c) Remove the 5 bolts, and then remove the front door window regulator sub-assembly.
NOTICE:
Do not drop or damage the front door window regulator sub-assembly when removing the bolts.
HINT:
Remove the front door window regulator sub-assembly through the service hole.
(d) Remove the bolt A from the window regulator sub-assembly.
24. REMOVE FRONT DOOR OUTSIDE HANDLE COVER (for Driver Side)
|
(a) Remove the hole plug. Text in Illustration
|
|
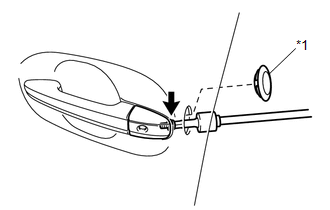
(b) Using a T30 "TORX" socket wrench, loosen the screw to remove the front door outside handle cover with lock cylinder.
|
(c) Disengage the 2 claws to remove the front door outside handle cover from the lock cylinder. |
|
25. REMOVE FRONT DOOR OUTSIDE HANDLE COVER (for Front Passenger Side)
|
(a) Remove the hole plug. Text in Illustration
|
|
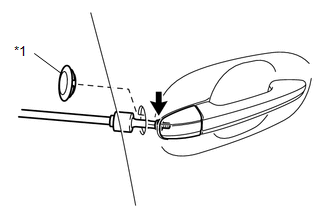
(b) Using a T30 "TORX" socket wrench, loosen the screw to remove the front door outside handle cover.
26. REMOVE FRONT DOOR LOCK ASSEMBLY
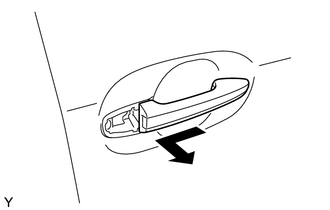
27. REMOVE FRONT DOOR OUTSIDE HANDLE ASSEMBLY (w/o Smart Key System)
|
(a) Pull up the door handle holder in the direction indicated by the arrow as shown in the illustration. |
|
|
(b) Remove the front door outside handle assembly in the direction indicated by the arrow as shown in the illustration. |
|
28. REMOVE FRONT DOOR OUTSIDE HANDLE ASSEMBLY (w/ Smart Key System)
|
(a) Using a screwdriver, disengage the 4 claws to remove the connector cover. |
|
(b) Disconnect the connector.
|
(c) Pull up the door handle holder in the direction indicated by the arrow as shown in the illustration. |
|
|
(d) Remove the front door outside handle assembly in the direction indicated by the arrow as shown in the illustration. |
|
29. REMOVE FRONT DOOR OUTSIDE HANDLE FRONT PAD
|
(a) Disengage the 3 claws to remove the front door outside handle front pad. |
|

30. REMOVE FRONT DOOR OUTSIDE HANDLE REAR PAD
|
(a) Disengage the 2 claws to remove the front door outside handle rear pad. |
|

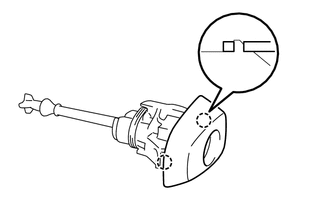
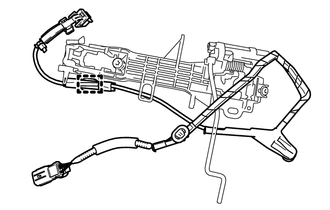
31. REMOVE FRONT DOOR OUTSIDE HANDLE FRAME SUB-ASSEMBLY (w/o Smart Key System)
|
(a) Using a T30 "TORX" socket wrench, loosen the screw. |
|
(b) Slide the front door outside handle frame sub-assembly to remove it.
32. REMOVE FRONT DOOR OUTSIDE HANDLE FRAME SUB-ASSEMBLY (w/ Smart Key System)
|
(a) Disengage the 3 clamps. |
|
(b) Disconnect the connector.
|
(c) Using a T30 "TORX" socket wrench, loosen the screw. |
|
(d) Slide the front door outside handle frame sub-assembly to remove it.
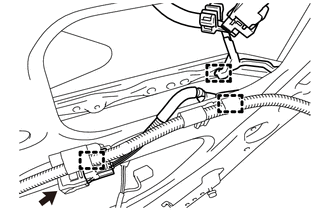
33. REMOVE FRONT DOOR WIRE (w/ Smart Key System)
|
(a) Disengage the clamp to remove the front door wire from the front door outside handle frame sub-assembly. |
|
34. REMOVE DOOR FRAME GARNISH
|
(a) Disengage the clamp to remove the door frame garnish. |
|

35. REMOVE CUSHION
|
(a) Remove the cushion. |
|
|
|
|