| Last Modified: 08-28-2024 | 6.11:8.1.0 | Doc ID: RM100000000VK1Y |
| Model Year Start: 2016 | Model: Sienna | Prod Date Range: [12/2015 - 08/2016] |
| Title: HEATING / AIR CONDITIONING: FRONT AIR CONDITIONING UNIT: REMOVAL; 2016 MY Sienna [12/2015 - 08/2016] | ||
REMOVAL
PROCEDURE
1. RECOVER REFRIGERANT FROM REFRIGERATION SYSTEM
![2016 MY Sienna [12/2015 - 08/2016]; HEATING / AIR CONDITIONING: REFRIGERANT: REPLACEMENT+](/t3Portal/stylegraphics/info.gif)
2. REMOVE V-BANK COVER SUB-ASSEMBLY
3. REMOVE NO. 1 ENGINE UNDER COVER
4. DRAIN ENGINE COOLANT
5. REMOVE INTAKE AIR SURGE TANK ASSEMBLY
(See page
)
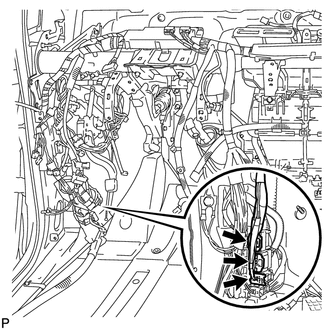
6. DISCONNECT HEATER WATER OUTLET HOSE A
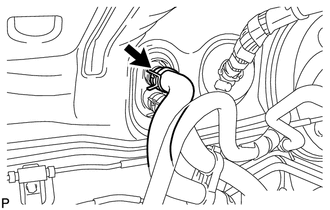
(a) Slide the clip to disconnect the heater water outlet hose A.
7. DISCONNECT HEATER WATER INLET HOSE A
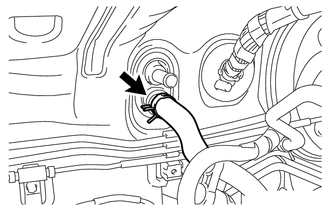
(a) Slide the clip to disconnect the heater water inlet hose A.
8. DISCONNECT AIR CONDITIONER TUBE AND ACCESSORY ASSEMBLY
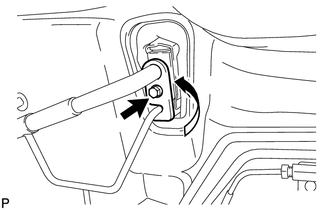
(a) Remove the bolt.
(b) Turn the hook connector counterclockwise and disconnect the air conditioner tube and accessory assembly.
(c) Remove the 2 O-rings from the air conditioner tube and accessory assembly.
NOTICE:
Seal the openings of the disconnected parts using vinyl tape to prevent the entry of moisture and foreign matter.
9. REMOVE INSTRUMENT PANEL SUB-ASSEMBLY
(See page
)
10. REMOVE NO. 3 AIR DUCT SUB-ASSEMBLY
(a) Remove the clip.
(b) Disengage the 3 claws to remove the No. 3 air duct sub-assembly.
11. REMOVE STEERING COLUMN ASSEMBLY
(See page
)
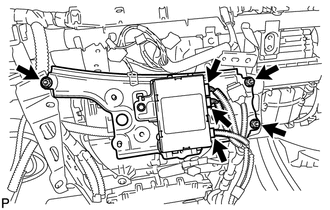
12. REMOVE ECU INTEGRATION BOX RH
13. REMOVE INSTRUMENT PANEL JUNCTION BLOCK ASSEMBLY
14. REMOVE CENTER AIRBAG SENSOR ASSEMBLY
15. DISCONNECT FRONT DOOR WIRE LH
(a) Disconnect the 3 connectors.
16. DISCONNECT FRONT DOOR WIRE RH

(a) Disconnect the 3 connectors.
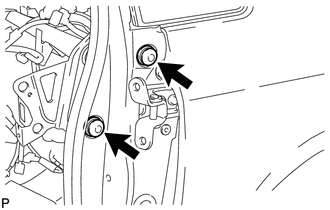
17. REMOVE FRONT DOOR PANEL SUB-ASSEMBLY LH
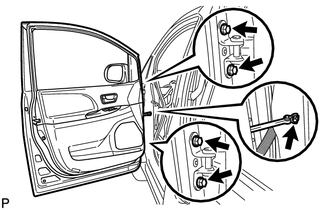
(a) Remove the bolt from the front door check.
(b) Remove the 2 bolts from the front door upper hinge.
(c) Remove the 2 bolts from the front door lower hinge, and then remove the front door panel sub-assembly LH from the vehicle.
NOTICE:
Be careful not to cut, break, or damage the front door wire.
18. REMOVE FRONT DOOR PANEL SUB-ASSEMBLY RH
HINT:
Use the same procedure as for the LH side.
19. REMOVE FRONT FLOOR CARPET ASSEMBLY
(See page
)
20. REMOVE REAR NO. 2 AIR DUCT
(a) Remove the clip.
(b) Disengage the 2 claws to remove the rear No. 2 air duct.
21. REMOVE REAR NO. 4 AIR DUCT
HINT:
Use the same procedure as for the No. 2 air duct.
22. REMOVE NO. 5 INSTRUMENT PANEL BRACKET
(a) Disconnect the 3 connectors.
HINT:
If the vehicle is equipped with USB audio system, disconnect the connectors.
(b) Remove the 3 nuts and No. 5 instrument panel bracket.
23. REMOVE TELEVISION BRACKET
|
(a) Remove the 4 bolts and television bracket. |
|
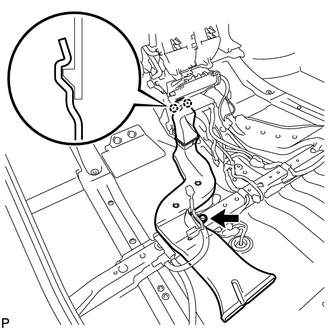
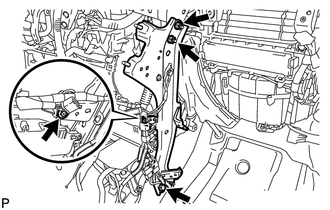
24. REMOVE NO. 1 INSTRUMENT PANEL BRACE SUB-ASSEMBLY
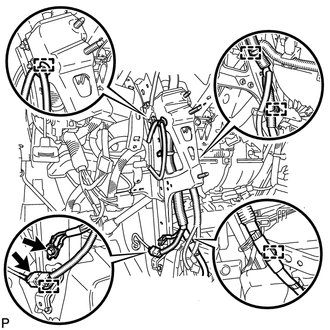
(a) Disconnect the connector.
(b) Disengage the 5 clamps.
(c) Remove the bolt to disconnect the ground wire.
|
(d) Remove the 2 bolts, 2 nuts, and screw to remove the No. 1 instrument panel brace sub-assembly. |
|
25. REMOVE NO. 2 INSTRUMENT PANEL BRACE SUB-ASSEMBLY
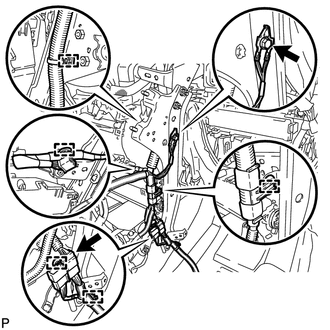
(a) Disconnect the connector.
(b) Disengage the 5 clamps.
(c) Remove the bolt to disconnect the ground wire.
|
(d) Remove the bolt, 2 nuts and screw to remove the No. 2 instrument panel brace sub-assembly. |
|
26. SEPARATE NO. 1 AIR DUCT SUB-ASSEMBLY
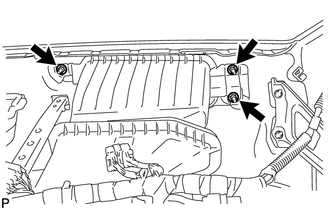
(a) Remove the 3 nuts to separate the No. 1 air duct sub-assembly.
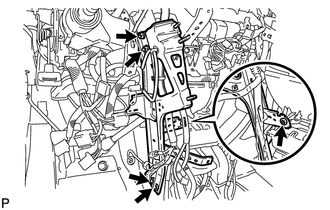
27. SEPARATE INSTRUMENT PANEL WIRE
(a) Disconnect the connectors.
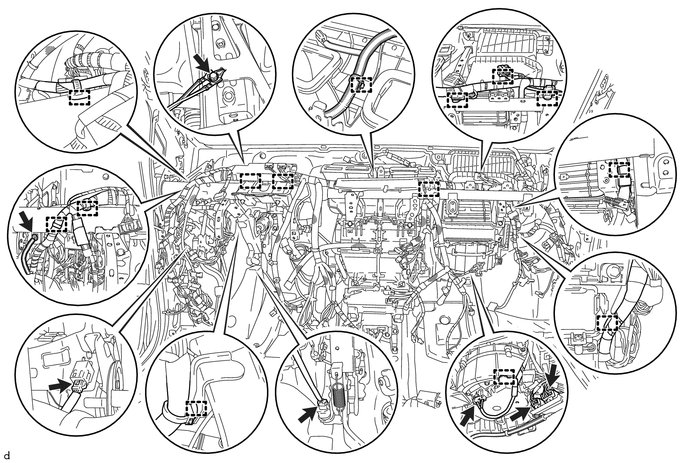
(b) Remove the bolt from the ground wire.
(c) Disengage the clamps to disconnect the instrument panel wire.
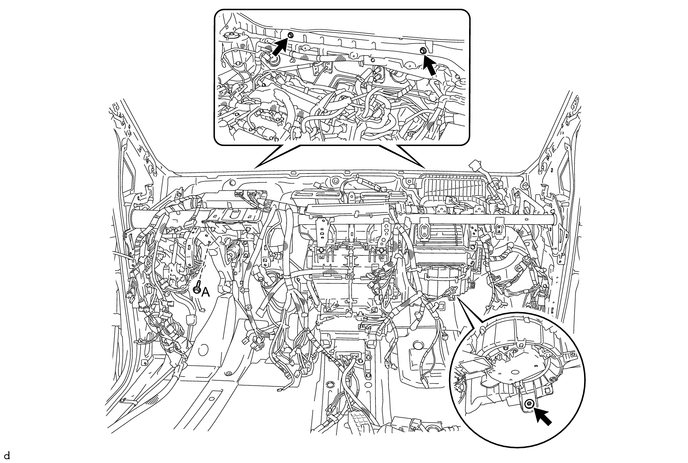
28. REMOVE INSTRUMENT PANEL REINFORCEMENT
(a) Remove the 3 bolts and nut.
|
(b) Remove the 3 caps. |
|

|
(c) Remove the 2 caps. |
|
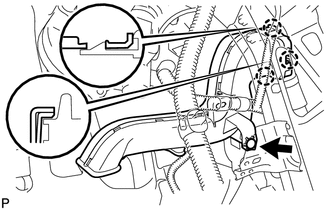
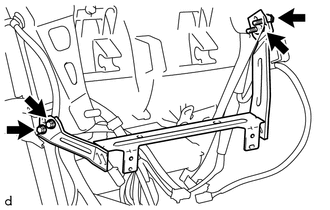
(d) Remove the 5 bolts as shown in the illustration.
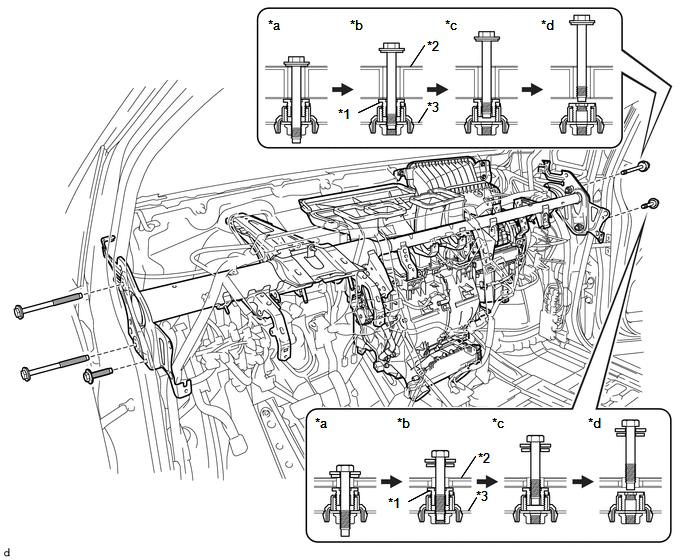
Text in Illustration
|
*1 |
Movable Collar |
*2 |
Body |
|
*3 |
Instrument Panel Reinforcement |
- |
- |
|
*a |
Step 1 |
*b |
Step 2 |
|
*c |
Step 3 |
*d |
Step 4 |
(e) Remove the instrument panel reinforcement with air conditioning unit assembly.
29. REMOVE AIR CONDITIONING UNIT
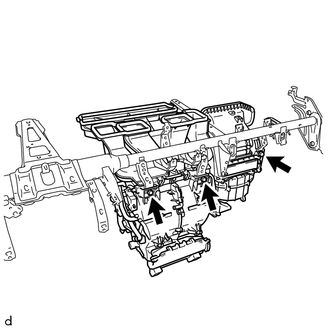
(a) Remove the 3 screws and air conditioning unit.
|
|
|