| Last Modified: 08-28-2024 | 6.11:8.1.0 | Doc ID: RM100000000VJYS |
| Model Year Start: 2016 | Model: Sienna | Prod Date Range: [12/2015 - ] |
| Title: SEAT: SEAT RAIL: REMOVAL; 2016 - 2020 MY Sienna [12/2015 - ] | ||
REMOVAL
PROCEDURE
1. REMOVE FUEL TANK ASSEMBLY
(a) Remove the fuel tank assembly (See page
![2016 MY Sienna [12/2015 - 08/2016]; 2GR-FE FUEL: FUEL TANK: REMOVAL](/t3Portal/stylegraphics/info.gif) ).
).
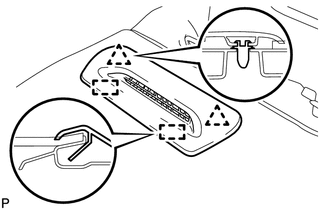
2. REMOVE REAR HEATER AIR OUTLET GRILLE ASSEMBLY
|
(a) Disengage the 2 clips and 2 guides, remove the rear heater air outlet grille assembly. HINT: Use the same procedure for the RH side and LH side. |
|
3. REMOVE SEAT BELT ANCHOR COVER
|
(a) w/ Seat Belt: (1) Disengage the 2 claws and remove the seat belt anchor cover. HINT: Use the same procedure for the RH side and LH side. |
|
|
(b) w/o Seat Belt: (1) Disengage the 2 claws and remove the seat belt anchor cover. HINT: Use the same procedure for the RH side and LH side. |
|
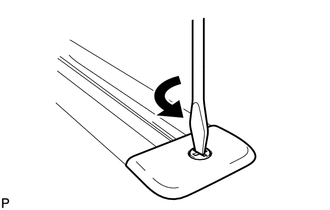
4. REMOVE FLOOR CARPET MOULDING
|
(a) Using a screwdriver, turn the clip 90° counterclockwise to release the lock, and remove the floor carpet moulding. HINT: Use the same procedure for the other 7 mouldings. |
|
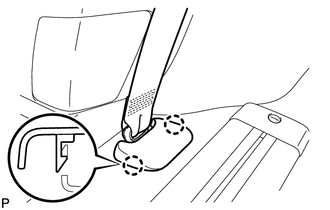
5. REMOVE REAR SEAT LEG COVER LH
|
(a) Disengage the 2 clips, guide, claw and remove the rear seat leg cover LH. HINT: Use the same procedure for the LH side and RH side. |
|
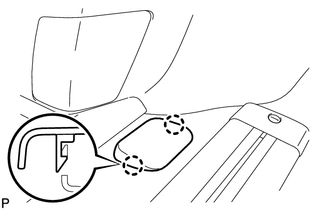
6. REMOVE REAR SEAT LEG COVER RH
|
(a) Disengage the 2 clips, guide and remove the rear seat leg cover RH. HINT: Use the same procedure for the RH side and LH side. |
|
7. REMOVE NO. 1 REAR SEAT LEG GARNISH COVER (for Auto Access Seat Type)
|
(a) Remove the 3 clips and the No. 1 rear seat leg garnish cover. HINT: Use the same procedure for the LH side and RH side. |
|
8. REMOVE NO. 2 REAR SEAT LEG GARNISH COVER (for Auto Access Seat Type)
|
(a) Remove the 2 clips and the No. 2 rear seat leg garnish cover. HINT: Use the same procedure for the LH side and RH side. |
|
9. REMOVE NO. 1 FRONT SEAT LEG LH
(a) 40/40 Tip-Up Seat Type and Ottoman Seat Type:
|
(1) Remove the 4 nuts and No. 1 front seat leg LH. |
|
(b) 60/40 Tip-Up Seat Type:
|
(1) Remove the 4 nuts and No. 1 front seat leg LH. |
|
10. REMOVE NO. 1 FRONT SEAT LEG RH
|
(a) Remove the 4 nuts and No. 1 front seat leg RH. |
|

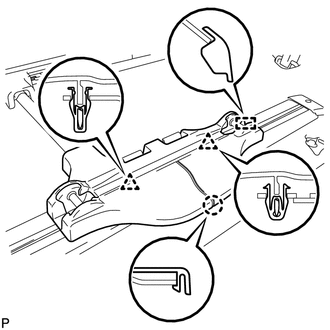
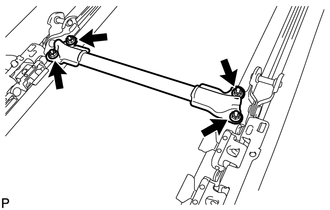
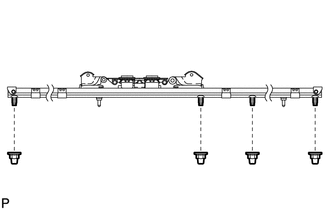
11. REMOVE NO. 1 SEAT TRACK LOWER RAIL PROTECTOR
(a) Using a moulding remover, disengage the 8 claws and remove the No. 1 seat track lower rail protector.
Text in Illustration
|
*1 |
Moulding Remover |
- |
- |
HINT:
Use the same procedure for the RH side and LH side.
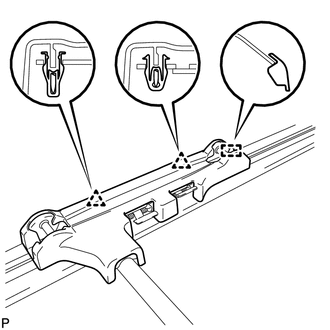
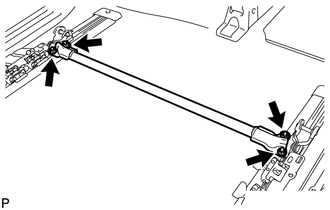
12. REMOVE NO. 2 SEAT TRACK LOWER RAIL PROTECTOR
(a) Using a moulding remover, disengage the 8 claws and remove the No. 2 seat track lower rail protector.
Text in Illustration
|
*1 |
Moulding Remover |
- |
- |
HINT:
Use the same procedure for the RH side and LH side.
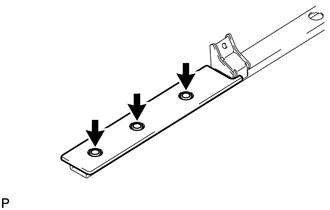
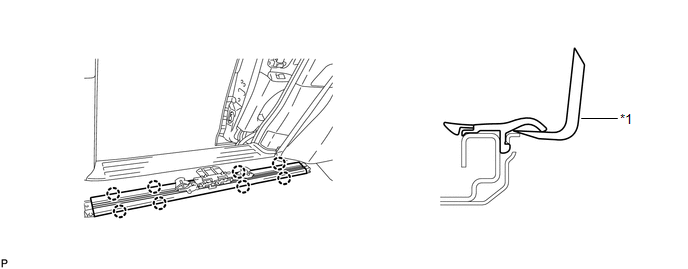
13. REMOVE REAR SEAT OUTER TRACK ASSEMBLY RH
(a) Disengage the clips and peel back the floor carpet.
HINT:
Peel back the floor carpet enough to allow removal and installation of the rear seat outer track assembly.
|
(b) Remove the bolt. |
|
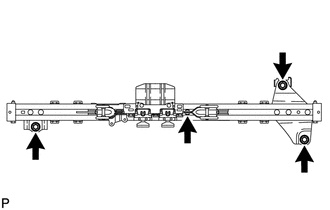
(c) Using a T50 "TORX" socket wrench, remove the 3 bolts and the rear seat outer track assembly RH.
14. REMOVE REAR SEAT OUTER TRACK ASSEMBLY LH
HINT:
Use the same procedure for the RH side and LH side.
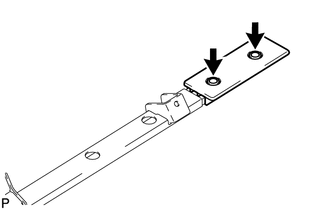
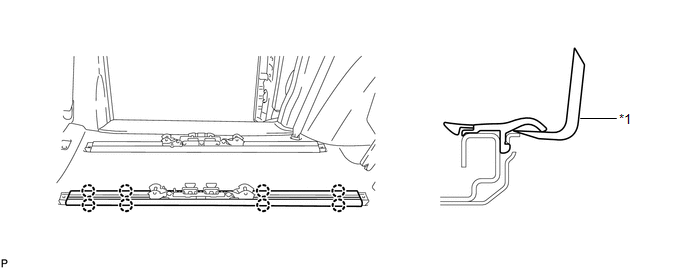
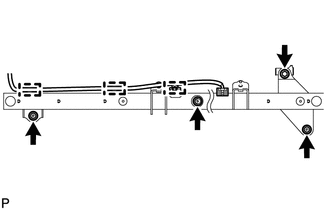
15. REMOVE REAR SEAT INNER TRACK ASSEMBLY RH
(a) Disengage the clips and peel back the floor carpet.
HINT:
Peel back the floor carpet enough to allow removal and installation of the rear seat inner track assembly.
|
(b) Remove the 4 nuts from the bottom of the vehicle and remove the rear seat inner track assembly RH. |
|
16. REMOVE REAR SEAT INNER TRACK ASSEMBLY LH
HINT:
Use the same procedure for the RH side and LH side.
17. REMOVE NO. 1 SEAT LEG RH (for Auto Access Seat Type)
(a) Disengage the clips and peel back the floor carpet.
HINT:
Peel back the floor carpet enough to allow removal and installation of the rear No. 1 seat leg assembly.
|
(b) Disengage the 3 clamps and separate the seat wire. |
|
(c) Remove the bolt.
(d) Using a T50 "TORX" socket wrench, remove the 3 bolts and the No. 1 seat leg assembly RH.
18. REMOVE NO. 1 SEAT LEG LH (for Auto Access Seat Type)
(a) Disengage the clips and peel back the floor carpet.
HINT:
Peel back the floor carpet enough to allow removal and installation of the rear No. 1 seat leg assembly.
|
(b) Remove the 4 nuts from the bottom of the vehicle and remove the No. 1 seat leg assembly LH. |
|
|
|
|