| Last Modified: 08-28-2024 | 6.11:8.1.0 | Doc ID: RM100000000VJY3 |
| Model Year Start: 2016 | Model: Sienna | Prod Date Range: [12/2015 - 08/2018] |
| Title: SEAT: REAR NO. 2 SEAT ASSEMBLY(for Manual Seat Type RH Side): DISASSEMBLY; 2016 - 2018 MY Sienna [12/2015 - 08/2018] | ||
DISASSEMBLY
CAUTION / NOTICE / HINT
NOTICE:
Wear protective gloves. Sharp areas on the parts may injure your hands.
HINT:
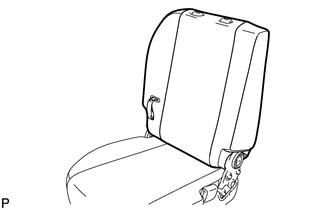
Pull the seatback strap to raise the seatback.
PROCEDURE
1. REMOVE REAR NO. 2 SEAT COVER BEZEL
|
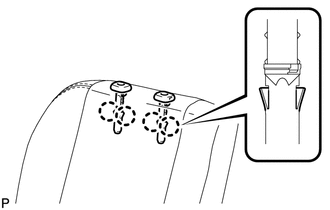
(a) Remove the 2 screws. |
|
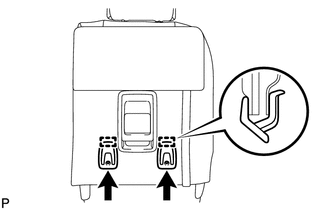
(b) Disengage the 2 guides and remove the 2 rear No. 2 seat cover bezels.
2. REMOVE REAR SEATBACK LOCK STRIKER COVER
|
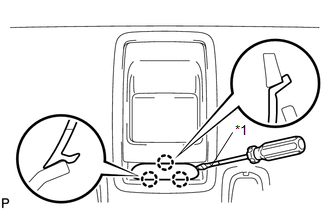
(a) Using a screwdriver with its tip wrapped in protective tape, disengage the 3 claws and remove the rear seatback lock striker cover. Text in Illustration
|
|
3. REMOVE HANDLE 3RD SEAT
|
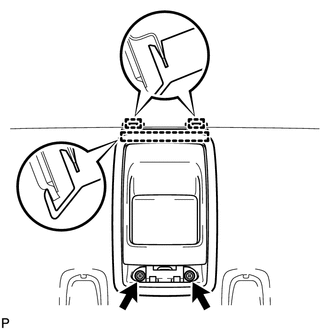
(a) Remove the 2 screws. |
|
(b) Disengage the 3 guides and separate the handle 3rd seat.
|
(c) Disconnect the 4 cable clamps and remove the handle 3rd seat. |
|
4. REMOVE REAR SEATBACK LOCK CONTROL BEZEL
|
(a) Remove the screw. |
|
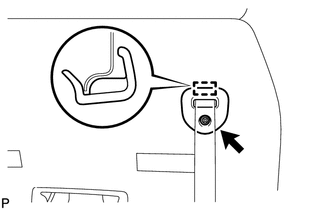
(b) Disengage the guide and remove the rear seatback lock control bezel.
5. REMOVE REAR NO. 2 SEAT RECLINING COVER LH
|
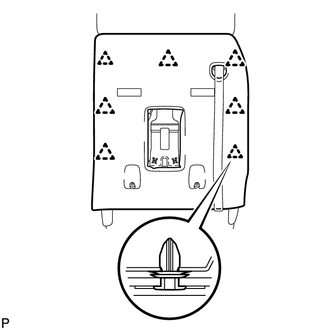
(a) Disengage the 7 clips and remove the rear seatback board cover RH. |
|
|
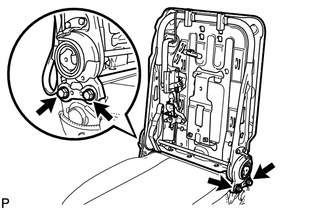
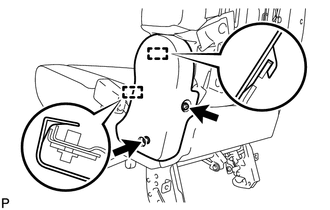
(b) Remove the 2 screws. |
|
(c) Disengage the 2 guides and remove the rear No. 2 seat reclining cover LH.
6. REMOVE REAR NO. 2 SEAT RECLINING COVER RH
|
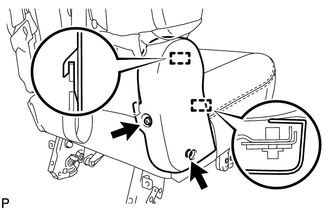
(a) Remove the 2 screws. |
|
(b) Disengage the 2 guides and remove the rear No. 2 seat reclining cover RH.
7. REMOVE REAR NO. 2 SEAT INNER BELT ASSEMBLY RH
8. REMOVE NO. 2 SEAT HEADREST ASSEMBLY
|
(a) Remove the 8 hog rings and 2 clips. |
|
|
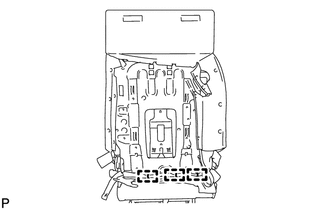
(b) Remove the 3 hog rings. |
|
|
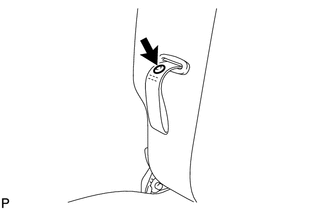
(c) Remove the clip and pass the No. 2 seat reclining release handle sub-assembly through the No. 2 seatback cover with pad RH. |
|
|
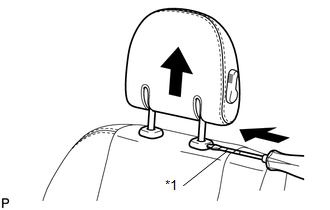
(d) Using a screwdriver with its tip wrapped in protective tape, release the lock inside the headrest support and remove the No. 2 seat headrest assembly. Text in Illustration
HINT: When removing the headrest, turn back the No. 2 seatback cover with pad RH and make sure the cable attached to the headrest assembly does not catch on anything inside the No. 2 seatback frame sub-assembly RH. |
|
9. REMOVE REAR NO. 2 SEAT HEADREST SUPPORT ASSEMBLY
|
(a) Disengage the 4 claws and remove the 2 rear No. 2 seat headrest support assemblies. |
|
10. REMOVE NO. 2 SEATBACK COVER WITH PAD RH
|
(a) Remove the No. 2 seatback cover with pad RH. |
|
11. REMOVE NO. 2 SEATBACK COVER SUB-ASSEMBLY RH
|
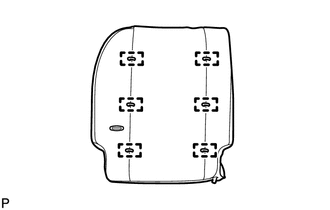
(a) Remove the 6 hog rings and No. 2 seatback cover sub-assembly RH. |
|
12. REMOVE NO. 2 SEATBACK FRAME SUB-ASSEMBLY RH
|
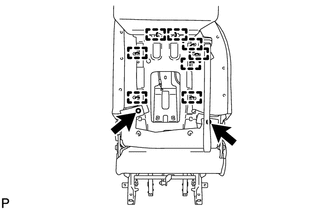
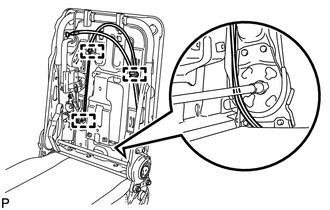
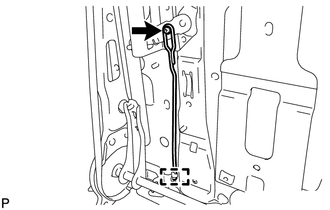
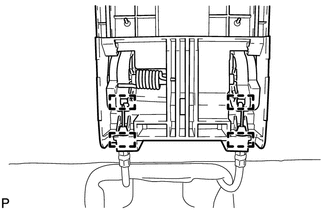
(a) Disconnect the 3 cable clamps and separate the 2 reclining remote control cable assemblies. |
|
|
(b) Remove the 4 bolts and No. 2 seatback frame sub-assembly RH. |
|
13. REMOVE NO. 2 SEAT RECLINING RELEASE HANDLE SUB-ASSEMBLY
|
(a) Remove the nut, No. 2 seat reclining release handle sub-assembly and reclining bolt lock plate. |
|
14. REMOVE NO. 1 RECLINING RELEASE HANDLE SUB-ASSEMBLY
|
(a) Remove the nut and No. 1 reclining release handle sub-assembly. |
|
15. REMOVE RECLINING CONTROL LINK SUB-ASSEMBLY RH
|
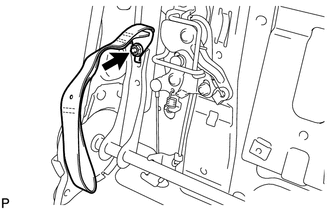
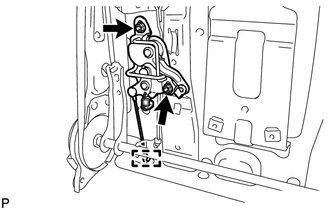
(a) Remove the 2 nuts. |
|
(b) Disconnect the cable and remove the reclining control link sub-assembly RH.
|
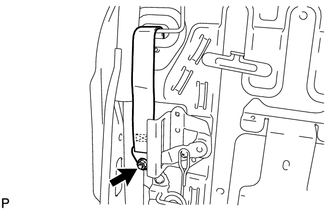
(c) Separate the rear seatback connecting wire. |
|
(d) Remove the screw and rear seatback connecting wire.
16. REMOVE NO. 2 SEAT CUSHION COVER WITH PAD RH
|
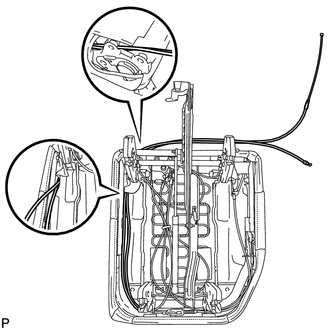
(a) Pass the 2 reclining remote control cable assemblies through the opening in the No. 2 seat cushion cover with pad RH and No. 2 seat cushion frame sub-assembly RH. |
|
|
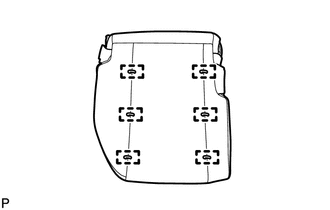
(b) Disengage the 6 hooks and remove the No. 2 seat cushion cover with pad RH. |
|
17. REMOVE NO. 2 SEAT CUSHION COVER SUB-ASSEMBLY RH
|
(a) Remove the 6 hog rings and No. 2 seat cushion cover sub-assembly RH. |
|
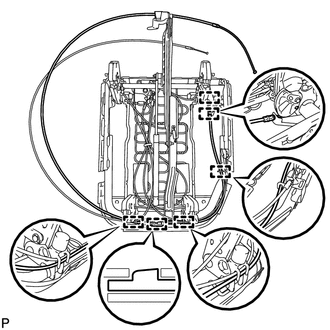
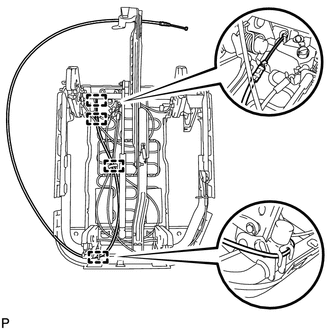
18. REMOVE RECLINING REMOTE CONTROL CABLE ASSEMBLY
|
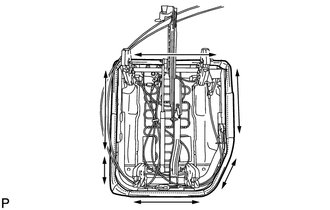
(a) Disconnect the 6 cable clamps and remove the reclining remote control cable assembly. |
|
|
(b) Disconnect the 4 cable clamps and remove the reclining remote control cable assembly. |
|
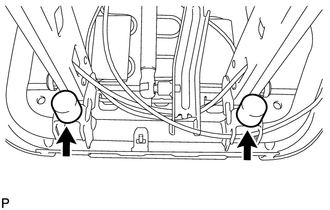
19. REMOVE REAR SEAT CUSHION
|
(a) Remove the 2 rear seat cushions. |
|
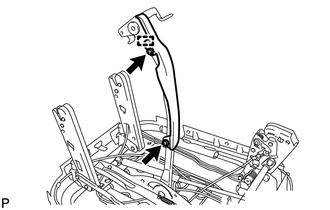
20. REMOVE NO. 2 SEAT HINGE COVER
|
(a) Remove the 2 screws. |
|
(b) Disengage the guide and remove the No. 2 seat hinge cover.
|
|
|
![2016 - 2020 MY Sienna [12/2015 - ]; SEAT BELT: REAR NO. 2 SEAT INNER BELT ASSEMBLY(for RH Side): REMOVAL+](/t3Portal/stylegraphics/info.gif)
