| Last Modified: 08-28-2024 | 6.11:8.1.0 | Doc ID: RM100000000VIRE |
| Model Year Start: 2016 | Model: Sienna | Prod Date Range: [12/2015 - ] |
| Title: DRIVE SHAFT / PROPELLER SHAFT: REAR DRIVE SHAFT ASSEMBLY: DISASSEMBLY; 2016 - 2020 MY Sienna [12/2015 - ] | ||
DISASSEMBLY
PROCEDURE
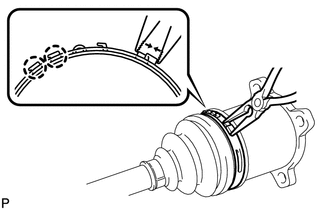
1. REMOVE REAR NO. 2 DRIVE SHAFT INBOARD JOINT BOOT CLAMP
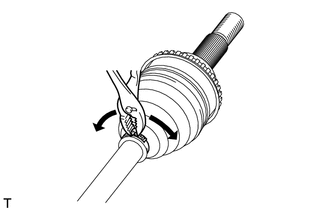
|
(a) Using needle-nose pliers, disengage the 2 claws and remove the rear No. 2 drive shaft inboard joint boot clamp as shown in the illustration. |
|
2. REMOVE REAR DRIVE SHAFT INBOARD JOINT BOOT CLAMP
HINT:
Perform the same procedure as for the rear drive shaft inboard joint boot clamp.
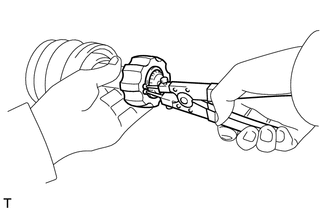
3. SEPARATE REAR DRIVE SHAFT INBOARD JOINT BOOT
(a) Separate the rear drive shaft inboard joint boot from the rear drive shaft inboard joint assembly.
4. REMOVE REAR DRIVE SHAFT INBOARD JOINT ASSEMBLY
|
(a) Put matchmarks on the rear drive shaft inboard joint assembly and rear drive shaft outboard joint shaft assembly. Text in Illustration
NOTICE: Do not use a punch for the marks. |
|
|
(b) Using a screwdriver, remove the drive shaft snap ring from the rear drive shaft inboard joint assembly. |
|

(c) Remove the rear drive shaft inboard joint assembly from the rear drive shaft outboard joint shaft assembly.
NOTICE:
Be careful not to drop the balls.
|
(d) Put matchmarks on the rear drive shaft outboard joint shaft assembly, inner race and ball cage. Text in Illustration
NOTICE: Do not use a punch for the marks. |
|
(e) Remove the 8 balls and slide the ball cage toward the outboard joint.
|
(f) Using a snap ring expander, remove the shaft snap ring. |
|
|
(g) Using a brass bar and a hammer, remove the inner race from the rear drive shaft outboard joint shaft assembly. NOTICE: Be careful not to damage the inner race. |
|
(h) Remove the ball cage.
5. REMOVE REAR DRIVE SHAFT INBOARD JOINT BOOT
(a) Remove the rear drive shaft inboard joint boot from the rear drive shaft outboard joint shaft assembly.
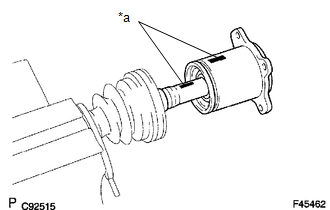
6. REMOVE REAR DRIVE SHAFT OUTBOARD JOINT BOOT CLAMP
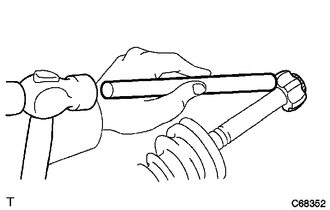
|
(a) Using a pliers, remove the rear drive shaft outboard joint boot clamp as shown in the illustration. |
|
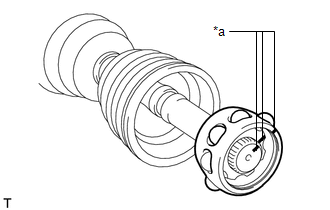
7. REMOVE REAR NO. 2 DRIVE SHAFT OUTBOARD JOINT BOOT CLAMP
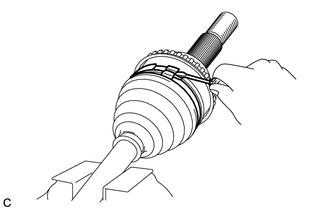
|
(a) Using a screwdriver, release the staked part of the rear No. 2 drive shaft outboard joint boot clamp and separate the rear No. 2 drive shaft outboard joint boot clamp as shown in the illustration. |
|
8. REMOVE REAR DRIVE SHAFT OUTBOARD JOINT BOOT
(a) Remove the rear drive shaft outboard joint boot from the rear drive shaft outboard joint shaft assembly.
(b) Remove the old grease from the rear drive shaft outboard joint assembly.
NOTICE:
Do not disassemble the rear drive shaft outboard joint shaft assembly.
|
|
|