| Last Modified: 08-28-2024 | 6.11:8.1.0 | Doc ID: RM100000000VIK8 |
| Model Year Start: 2016 | Model: Sienna | Prod Date Range: [12/2015 - 08/2016] |
| Title: U660E (AUTOMATIC TRANSMISSION / TRANSAXLE): AUTOMATIC TRANSAXLE ASSEMBLY(When Not Using the Engine Support Bridge): REMOVAL; 2016 MY Sienna [12/2015 - 08/2016] | ||
REMOVAL
CAUTION / NOTICE / HINT
NOTICE:
If automatic transaxle parts are replaced, refer to Parts Replacement Compensation Table to determine if any additional operations are necessary (See page
![2016 MY Sienna [12/2015 - 08/2016]; U660E (AUTOMATIC TRANSMISSION / TRANSAXLE): AUTOMATIC TRANSAXLE SYSTEM: PRECAUTION](/t3Portal/stylegraphics/info.gif) ).
).
PROCEDURE
1. REMOVE ENGINE ASSEMBLY WITH TRANSAXLE
2. REMOVE STARTER ASSEMBLY
3. REMOVE MANIFOLD STAY
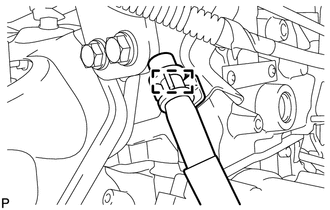
4. SEPARATE BREATHER PLUG HOSE
|
(a) Disengage the clamp to separate the breather plug hose from the hose clamp. |
|
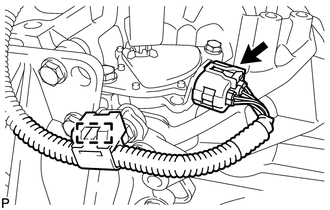
5. DISCONNECT ENGINE WIRE
|
(a) Disconnect the park/neutral position switch connector. |
|
(b) Disengage the clamp to separate the engine wire from the automatic transaxle assembly.
|
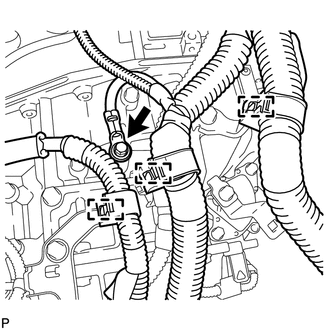
(c) Remove the bolt to separate the ground wire from the automatic transaxle assembly. |
|
(d) Disengage the 3 clamps to separate the engine wire from the automatic transaxle assembly.
|
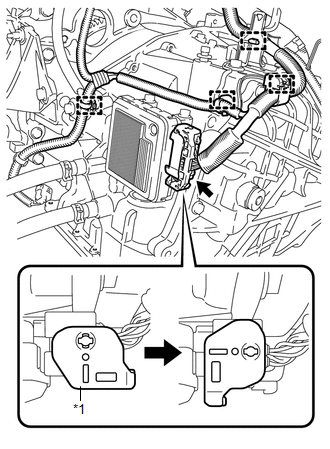
(e) Turn the lock lever and disconnect the connector from the TCM. Text in Illustration
|
|
(f) Disengage the 4 clamps to separate the engine wire from the automatic transaxle assembly.
6. REMOVE AUTOMATIC TRANSAXLE ASSEMBLY
|
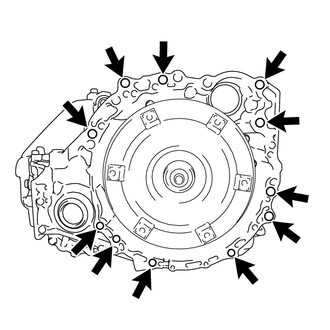
(a) Remove the 11 bolts and automatic transaxle assembly from the engine assembly. NOTICE: To prevent damage to the knock pins, do not pry between the automatic transaxle assembly and engine assembly. |
|
7. REMOVE TORQUE CONVERTER ASSEMBLY
|
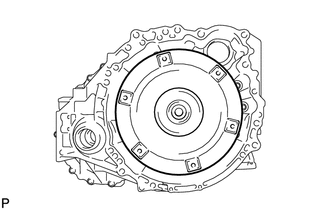
(a) Remove the torque converter assembly from the automatic transaxle assembly. NOTICE: Remove the torque converter assembly from the input shaft horizontally. |
|
8. REMOVE FRONT ENGINE MOUNTING BRACKET
|
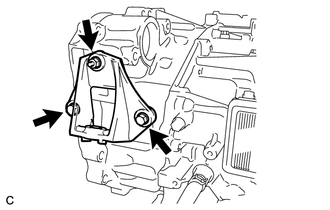
(a) Remove the 2 bolts, nut and front engine mounting bracket from the automatic transaxle assembly. |
|
|
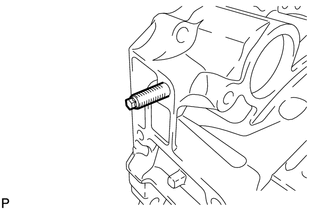
(b) Using an E8 "TORX" socket wrench, remove the stud bolt from the automatic transaxle assembly. |
|
9. REMOVE TCM
|
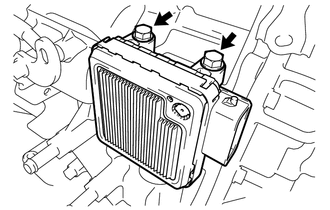
(a) Remove the 2 bolts and TCM from the automatic transaxle assembly. |
|
10. REMOVE OIL COOLER TUBE CLAMP
|
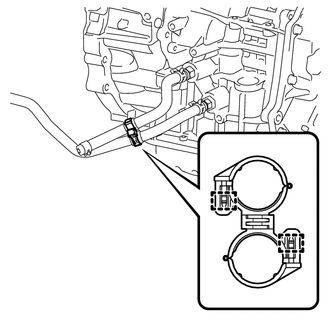
(a) Disengage the 2 clamps to remove the oil cooler tube clamp from the No. 1 oil cooler inlet hose and No. 1 oil cooler outlet hose. |
|
11. REMOVE NO. 1 OIL COOLER OUTLET HOSE
|
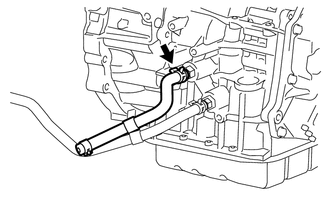
(a) Loosen the hose clip and remove the No. 1 oil cooler outlet hose from the automatic transaxle assembly. |
|
12. REMOVE NO. 1 OIL COOLER INLET HOSE
|
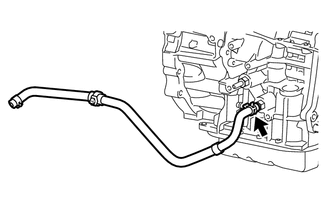
(a) Loosen the hose clip and remove the No. 1 oil cooler inlet hose from the automatic transaxle assembly. |
|
13. REMOVE WIRE HARNESS CLAMP BRACKET
|
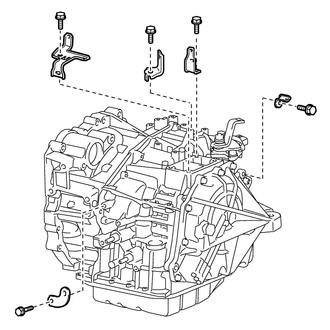
(a) Remove the 5 bolts and 5 wire harness clamp brackets from the automatic transaxle assembly. |
|
14. REMOVE NO. 1 TRANSMISSION CONTROL CABLE BRACKET
|
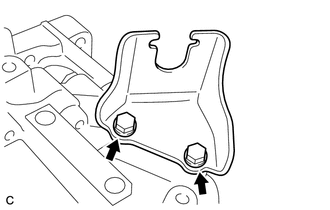
(a) Remove the 2 bolts and No. 1 transmission control cable bracket from the automatic transaxle assembly. |
|
15. REMOVE SPEEDOMETER DRIVEN HOLE COVER SUB-ASSEMBLY
|
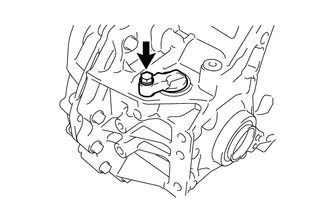
(a) Remove the bolt and speedometer driven hole cover sub-assembly from the automatic transaxle assembly. |
|
(b) Remove the O-ring from the speedometer driven hole cover sub-assembly.
16. INSPECT TORQUE CONVERTER ASSEMBLY
|
|
|
