| Last Modified: 08-28-2024 | 6.11:8.1.0 | Doc ID: RM100000000VIFZ |
| Model Year Start: 2016 | Model: Sienna | Prod Date Range: [12/2015 - 08/2016] |
| Title: 2GR-FE COOLING: RADIATOR: REMOVAL; 2016 MY Sienna [12/2015 - 08/2016] | ||
REMOVAL
PROCEDURE
1. REMOVE NO. 1 ENGINE UNDER COVER
![2016 MY Sienna [12/2015 - 08/2016]; 2GR-FE INTAKE / EXHAUST: EXHAUST MANIFOLD: REMOVAL+](/t3Portal/stylegraphics/info.gif)
2. DRAIN ENGINE COOLANT
3. REMOVE AIR CLEANER INLET COVER ASSEMBLY SEAL
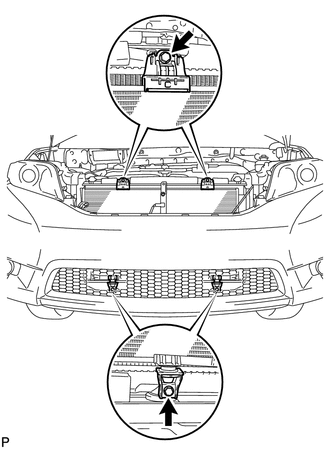
4. REMOVE RADIATOR GRILLE SUB-ASSEMBLY
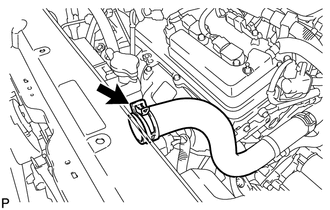
5. DISCONNECT NO. 1 RADIATOR HOSE
|
(a) Loosen the clamp and disconnect the No. 1 radiator hose from the radiator. |
|
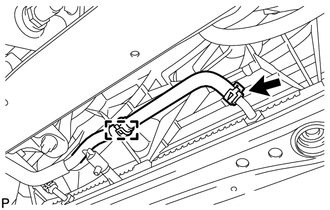
6. DISCONNECT NO. 2 RADIATOR HOSE
|
(a) Loosen the clamp and disconnect the No. 2 radiator hose from the radiator. |
|

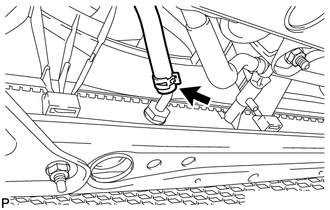
7. DISCONNECT INLET OIL COOLER HOSE
|
(a) Loosen the clamp and disconnect the inlet oil cooler hose and clamp from the radiator. |
|
8. DISCONNECT OUTLET OIL COOLER HOSE
|
(a) Loosen the clamp and disconnect the outlet oil cooler hose. |
|
9. REMOVE MILLIMETER WAVE RADAR SENSOR (w/ Dynamic Radar Cruise Control System)
10. REMOVE HOOD LOCK NUT CAP
11. REMOVE HOOD LOCK ASSEMBLY
12. REMOVE UPPER RADIATOR SUPPORT SUB-ASSEMBLY
|
(a) Disconnect the clamp of the hood lock control cable. |
|
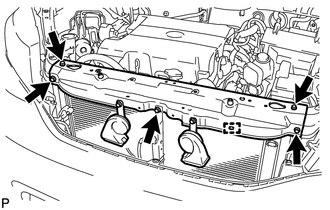
(b) Disconnect the 2 horn connectors.
(c) Remove the 5 bolts and upper radiator support.
13. REMOVE NO. 2 RADIATOR ASSEMBLY
|
(a) Remove the 4 bolts and the 4 cooler brackets. |
|
|
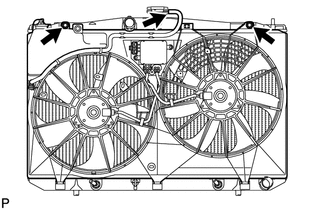
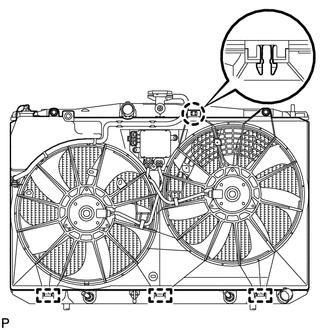
(b) Disconnect the 3 wire harness clamps and connector. |
|

|
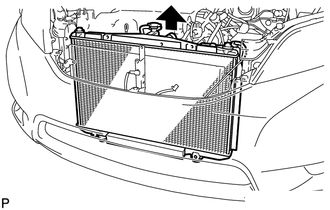
(c) Remove the radiator assembly and fan assembly with motor from the vehicle. NOTICE: Do not apply any excessive force to the cooler condenser assembly or pipe when removing the radiator assembly. |
|
|
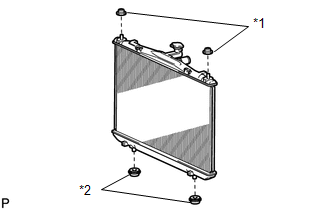
(d) Remove the 2 radiator support cushions and the 2 lower radiator supports from the radiator. Text in Illustration
|
|
|
(e) Disconnect the radiator reservoir tank hose. |
|
(f) Remove the 2 bolts.
|
(g) Disengage the claw and pull up the fan assembly with motor from the radiator assembly to remove the fan assembly with motor. |
|
(h) Remove the radiator drain cock plug from the radiator.
|
|
|