| Last Modified: 08-28-2024 | 6.11:8.1.0 | Doc ID: RM100000000VI8V |
| Model Year Start: 2016 | Model: Sienna | Prod Date Range: [12/2015 - 08/2016] |
| Title: 2GR-FE (ENGINE CONTROL): CAMSHAFT POSITION SENSOR: INSTALLATION; 2016 MY Sienna [12/2015 - 08/2016] | ||
INSTALLATION
PROCEDURE
1. INSTALL VVT SENSOR (for Intake Side of Bank 1)
|
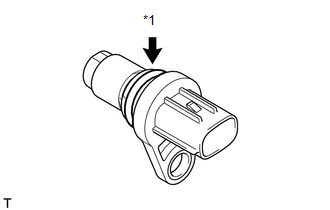
(a) Apply a light coat of engine oil to the O-ring of the sensor. Text in Illustration
NOTICE:
|
|
(b) Install the sensor with the bolt.
Torque:
10 N·m {102 kgf·cm, 7 ft·lbf}
(c) Connect the sensor connector.
2. INSTALL VVT SENSOR (for Exhaust Side of Bank 1)
|
(a) Apply a light coat of engine oil to the O-ring of the sensor. Text in Illustration
NOTICE:
|
|
(b) Install the sensor with the bolt.
Torque:
10 N·m {102 kgf·cm, 7 ft·lbf}
(c) Connect the sensor connector.
3. INSTALL VVT SENSOR (for Intake Side of Bank 2)
|
(a) Apply a light coat of engine oil to the O-ring of the sensor. Text in Illustration
NOTICE:
|
|
(b) Install the sensor with the bolt.
Torque:
10 N·m {102 kgf·cm, 7 ft·lbf}
(c) Connect the sensor connector.
4. INSTALL VVT SENSOR (for Exhaust Side of Bank 2)
|
(a) Apply a light coat of engine oil to the O-ring of the sensor. Text in Illustration
NOTICE:
|
|
(b) Install the sensor with the bolt.
Torque:
10 N·m {102 kgf·cm, 7 ft·lbf}
(c) Connect the sensor connector.
5. INSTALL INTAKE AIR SURGE TANK ASSEMBLY
6. ADD ENGINE COOLANT
7. INSPECT FOR COOLANT LEAK
8. INSPECT FOR OIL LEAK
|
|
|

![2016 MY Sienna [12/2015 - 08/2016]; 2GR-FE INTAKE / EXHAUST: INTAKE MANIFOLD: INSTALLATION](/t3Portal/stylegraphics/info.gif)